Adding animation to your presentations can grab attention and make them more engaging. GIFs are a fantastic way to achieve this, allowing you to incorporate eye-catching visuals. In this post, we will show you how to add a GIF to PowerPoint. This way, you can engage and entertain your audiences like never before! So, if you’re ready to add humor to your presentation, keep reading this!
Let us first answer the common question: can you add GIFs to PowerPoint? Well, if you’re wondering if it’s doable, the answer is YES! You can definitely add GIFs to PowerPoint presentations. They’re a great way to add humor, personality, or visual interest to your slides. In actuality, they function just like any other image file. For good measure, you can incorporate GIFs into your presentations by searching through the web or uploading one from your local file.
PowerPoint’s Supported Formats:
PowerPoint presentations don’t have to be all text and charts. You can add personality and grab attention with animated GIFs. It allows you to add captivating animated GIFs from your local computer to your presentations.
Here’s how to add animated GIF to PowerPoint from local files:
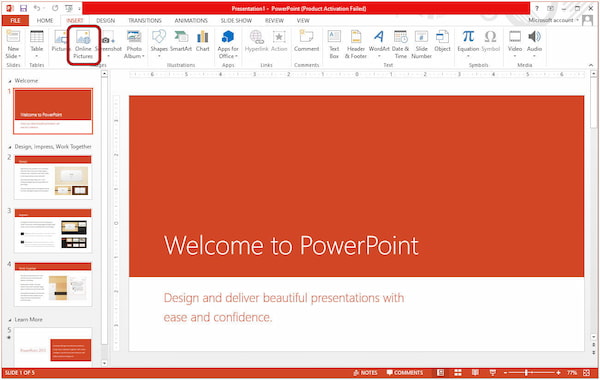
1. Launch Microsoft PowerPoint and open the presentation where you want to include the GIF. Navigate to the Insert tab located at the top of the PowerPoint interface.
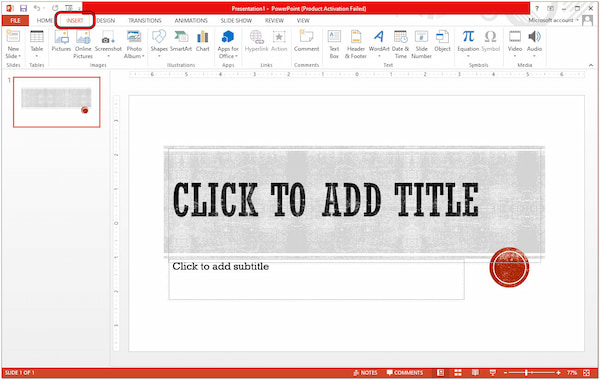
2. In the Insert tab, you will find various media options. Look for an option labeled Pictures and click it. Locate the folder where you saved your GIF and click it to insert it.
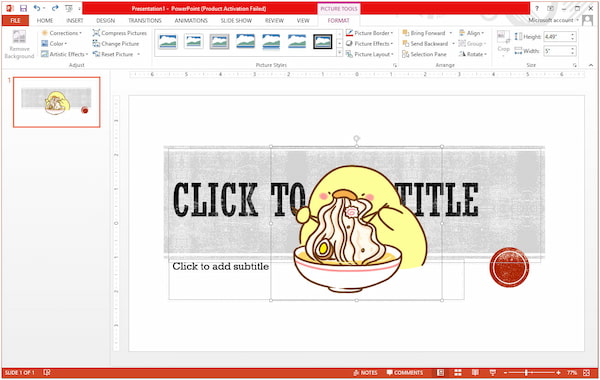
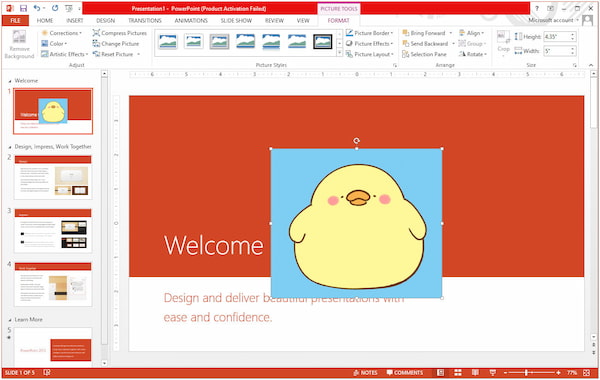
3. The GIF will now be placed on your slide. If needed, drag and drop the animation to the desired location. The corner handles allow you to resize the GIF to fit your slide layout.
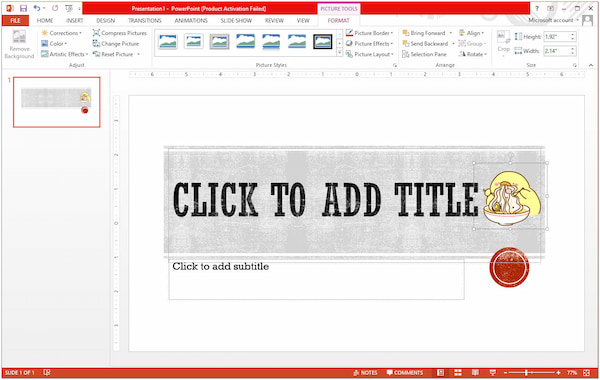
Note: By default, GIF will not play automatically while editing your slide. If you want to see the GIF animation in action, click the Slide Show button.
PowerPoint allows adding GIFs saved from your local files. You can incorporate any GIF you desire, but be mindful of its size. Currently, PowerPoint only accepts GIFs with a maximum of 1.5MB file size. Larger files won’t work with PowerPoint unless you compress GIFs.
PowerPoint offers a handy way to insert animated GIFs directly from the web. It eliminates the process of downloading GIFs, making insertion fast and convenient. It has an Online Pictures feature that lets you incorporate captivating GIFs directly from the web.
Here’s how to insert a GIF into PPT online:
1. Open your presentation and select the slide where you want to insert the GIF. Click the Insert tab located in the ribbon at the top of your screen.
2. Select the option labeled Online Pictures and click it. PowerPoint uses Bing to search for online images. In the search bar, type the keywords describing the desired GIF.
3. The search results will display various images. Look for the animated thumbnails with a small play icon to identify the GIFs. Afterward, click the GIF you want to insert into your slide.
4. Once you click the GIF, it will be automatically inserted onto your slide. Similar to the previous method, it appears static in edit mode. It will only come alive during the slideshow.
Similar to adding GIFs from your local file, PowerPoint doesn’t offer control over the animation loop count. The GIF will continuously repeat until you move to the next slide.
As mentioned, PowerPoint doesn’t offer control over the number of times your GIF animation loops. The good thing is that there’s a workaround you can try. You can edit the GIF before adding it to your presentation. But here’s a thing. It can be tricky and requires additional steps.
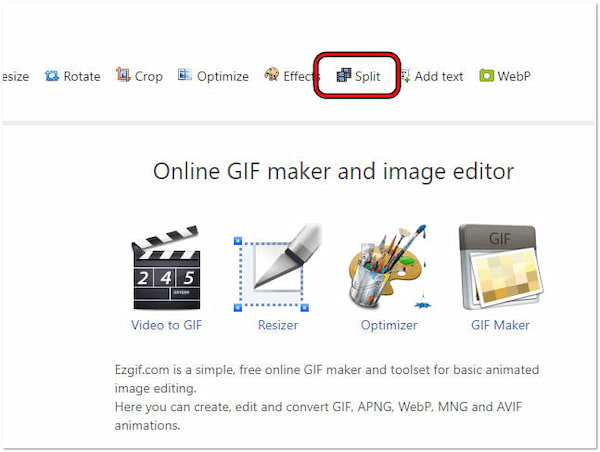
1. Open a web browser and visit the ezgif website. Navigate to the section for editing GIFs. Look for a tool labeled Split and click it to access the editing interface.
2. Under the Upload Image section, click the Choose File button. This will open your computer’s file explorer window. Locate your downloaded GIF file and select it to load it.
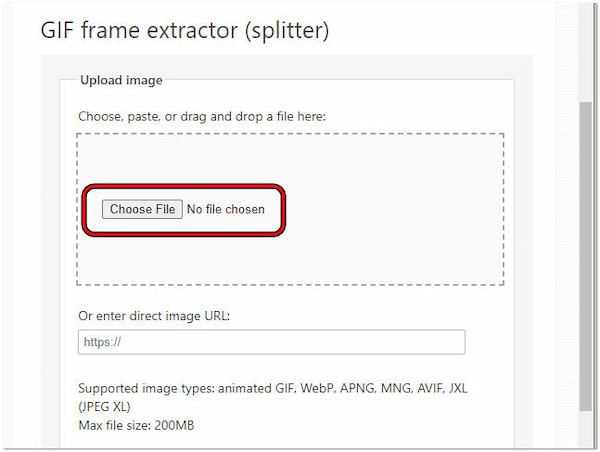
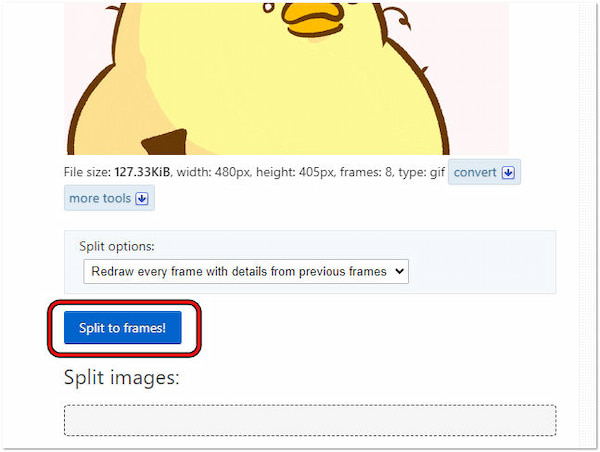
3. Click Upload to proceed with the next window. The GIF will appear on the screen along with details. Below the GIF, click the Split to frames! Button.
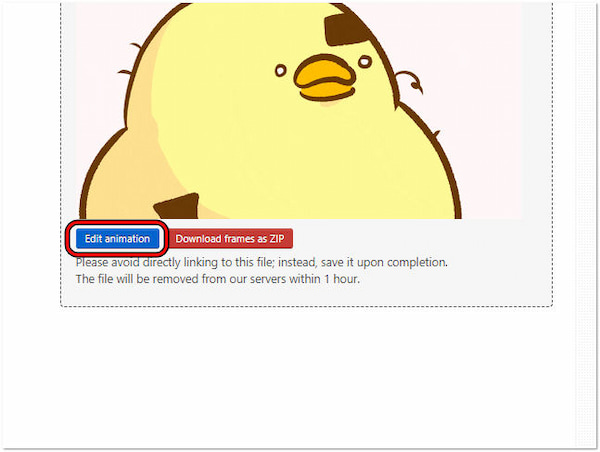
4. After a brief moment, the GIF will be displayed as individual frames on the webpage. Scroll down the page, locate the Edit animation button, and click it.
5. Look for the Loop Count box and enter the desired number of times you want the animation to loop. For example, typing 2 will make the animation play twice.
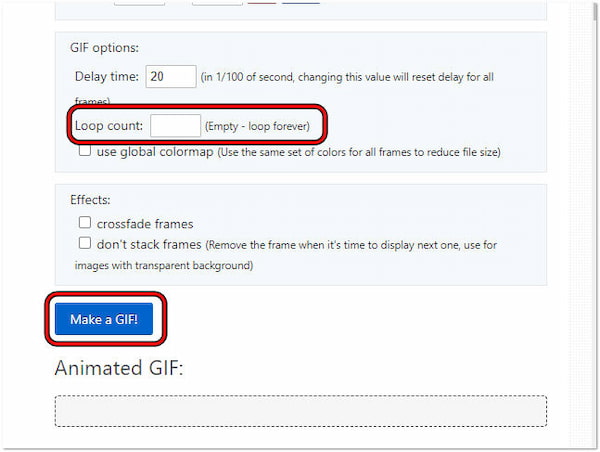
Note: Leaving the box empty will lead the GIF to loop endlessly.
6. Once you’ve set the loop count, click the Make a GIF! Button. The edited GIF will appear below this button. Below the revised GIF, click the one on the far right labeled Save.
Now that you have the edited GIF with the desired loop count, you can add it to your PowerPoint presentation. You can follow the usual steps for inserting pictures. During your presentation, the animation will only loop the specified number of times you set. Aside from configuring the loop count, you can also change GIF speed.
Animated GIFs can elevate your PowerPoint presentations. But where do you get GIFs for PowerPoint? Here, we’ll cover two methods for acquiring perfect presentation GIFs:
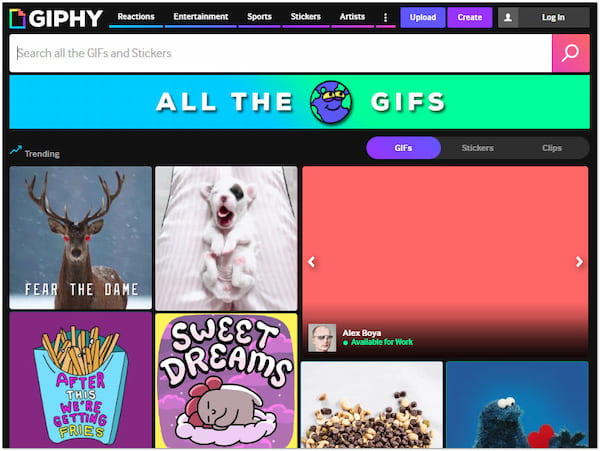
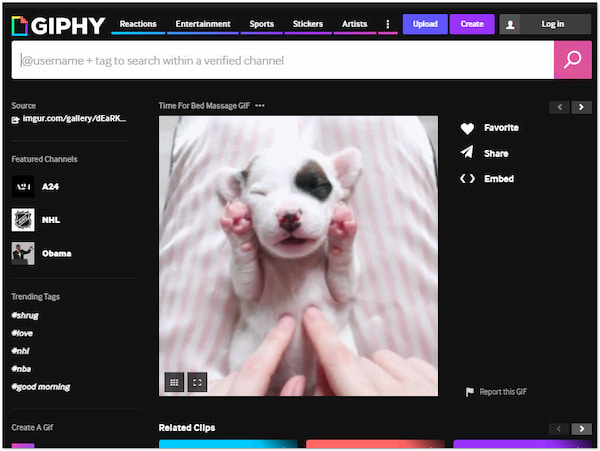
GIPHY stores a massive collection of short, looping video clips called animated GIFs. You can search for GIFs by keyword or browse by categories to find the perfect one for your needs. It’s a one-stop shop for finding, sharing, and downloading all things GIF-related!
1. Open your web browser and head over to GIPHY’s official website.
2. Use the search bar to find a specific GIF by typing keywords.
3. Once you’ve found your desired GIF, click it to open it in a detailed view.
4. Look for the download button associated with the GIF.
Note: If you don’t see a download button, press Ctrl+S to save it on your local drive.
Now you have a downloaded GIF, you can now incorporate it into your presentations. Most GIFs on GIPHY are free to download and use. However, there’s a catch. Some creators have specific guidelines for how their GIFs can be used.
A downloaded GIF might be close to what you want but not quite perfect. Maybe the action is slightly different, the characters are wrong, or the text doesn’t match your needs. That’s why creating your own GIF is ideal. It lets you express your creativity and share something entirely new. If you’re looking to create a personalized GIF that exactly matches your needs, consider using AnyMP4 Video Converter Ultimate. This multimedia software goes beyond just media conversion. It offers a multimedia tool kit with over 20+ tools, including GIF Maker.
For good measure, you can create a GIF from photos or videos. You can upload multiple photos and arrange them in sequence to create a custom animation. If you have specific scenes in a video that perfectly captures a moment, worry not! You can upload the video and cut out the exact clip you want to transform into a GIF. You can even rotate or crop the video to ensure perfect framing for your GIF. On top of that, AnyMP4 Video Converter Ultimate lets you further customize your GIF. Enhance your GIF with effects and filters and even overlay text/images.
1. Start by obtaining the free download of AnyMP4 Video Converter Ultimate. Install the multimedia software and wait for the installation process to complete.
Secure Download
Secure Download
2. Once the installation is complete, run the AnyMP4 Video Converter Ultimate on your computer. Head straight to the Toolbox tab and select the GIF Maker tool.

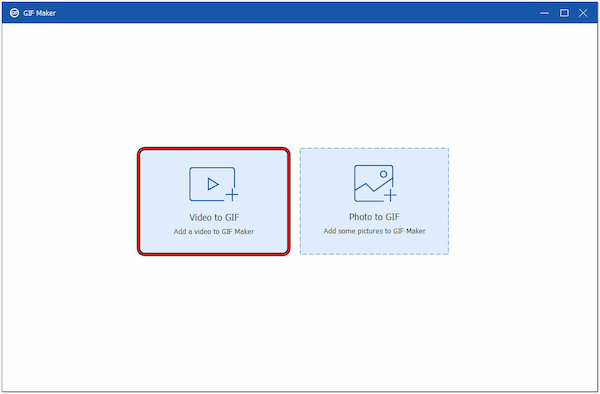
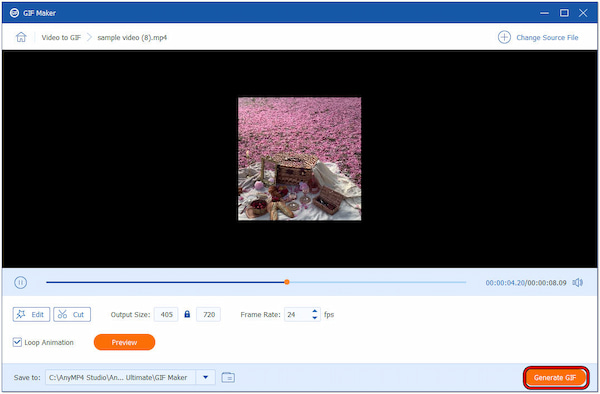
3. Depending on your GIF creation, select Video to GIF or Photo to GIF to load a file. In this demonstration, we will select the Video to GIF option.
4. Once the video file is uploaded, locate the Cut tool and click it. In the editing window, cut the specific segment of the video you want to use.
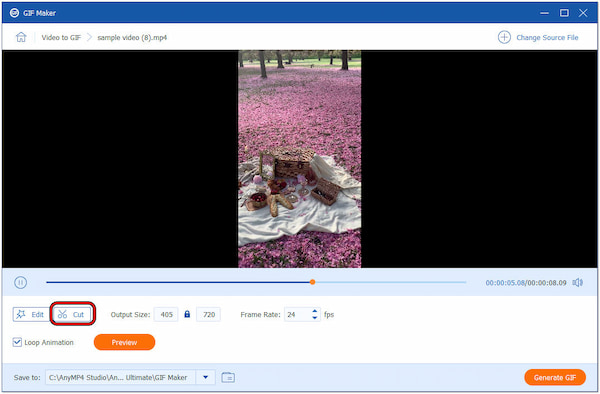
After loading the media file, use the Cut tool to cut a specific segment of a video. Then, click Edit to rotate or crop your video to get the ideal framing.
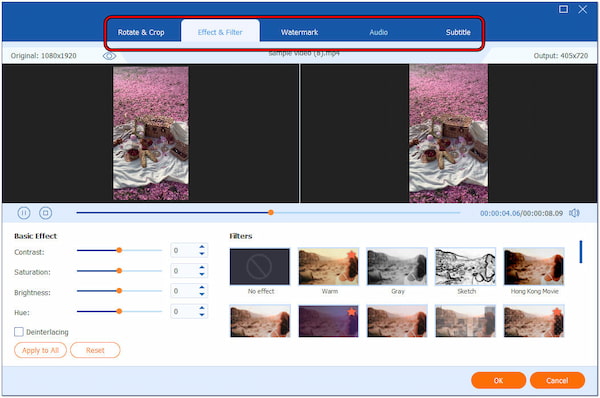
5. After successfully cutting the segment, it is now time for editing. Click Edit to open the editing window. Explore the available tabs like Rotate & Crop, Effects & Filters, Watermark, etc.
6. Once done with GIF editing and enhancement, preview it to check the pre-output. If you’re satisfied with the result, mark the Loop Animation box and click Generate GIF.
After your GIF creation, you can now attach GIFs to PowerPoint. AnyMP4 Video Converter Ultimate is not just for digital media conversion. It also functions as a GIF maker, allowing you to create a custom GIF. As mentioned, you can also add text to GIF to personalize them. You can include captions, quotes, or even inside jokes.
There are several reasons why GIFs might not play in PowerPoint. The good news is there are usually straightforward solutions! Here, we’ll cover the most common reasons why GIFs doesn’t play in PowerPoint. We’ll provide easy fixes to get your animations up and running.
Unsupported File Format: PowerPoint can only play standard GIF animations. If you’re trying to insert a different video format like MOV, it won’t work. Double-check the file format of your GIF. If it’s not a standard GIF, convert the MOV to GIF format using a media converter before inserting it into PowerPoint.
Incorrect File Path: If you’re referencing a GIF on your local computer, a broken link can prevent playback. PowerPoint relies on the file path you provide to locate the GIF. If you move the GIF file after inserting it, the animation won’t play. Double-check the file path in PowerPoint’s Insert Picture menu. Ensure it is correct and the GIF is still present at that specific location.
Corrupted GIF File: Sometimes, GIFs can become corrupted during download or transfer, causing playback issues. Try downloading the GIF again from a reliable source. You can also test the GIF by opening it in a web browser to see if it plays correctly. If it still doesn’t play, try finding a different GIF. If it still doesn’t play, try using video repair software.
Why GIF is not working in PowerPoint?
There are a few reasons why it might not play as expected. The most common reason a GIF won’t play is because it’s not actually a GIF file. If you’re trying to insert a different format, it won’t work. Always check the file format of your GIF; the .gif extension identifies it.
Why is my GIF not moving?
By default, GIFs won’t play their animations while you’re editing your PowerPoint presentation. However, this doesn’t mean your GIF is broken! To see the animation come alive, you need to switch to Slide Show mode.
How do I play a GIF file on PowerPoint?
Navigate to the Slide Show tab on the ribbon. You can choose From Beginning to start from the first slide. Otherwise, choose From Current Slide to begin from the slide containing your GIF. During the slideshow, the GIF will automatically play its animation when you reach that slide.
This post has equipped you with the knowledge of how to add a GIF to PowerPoint. We’ve explored how to find the perfect GIF online or from your computer, along with the steps to insert it into your slides. Remember, while it doesn’t offer direct loop count control, we discussed effective workarounds to manage animation repeats. We also cover two main ways to acquire GIFs for your presentation. Websites like GIPHY offer a library of downloadable GIFs across various categories. If you can’t find the perfect pre-made GIF, consider creating your own! AnyMP4 Video Converter Ultimate’s GIF Maker allows you to turn your photos or short video clips into a custom GIF animation.
 Posted by Angelica Liwanag to GIF
More readings
 4 Best Methods to Cut and Trim an Animated GIF
How to cut an animated GIF and remove unwanted frames? You will find what you want in this single tutorial without requirement of technical skill.
 A Full Guide to Crop or Resize a Video With EZGIF Online
Do not like to install video editing software? This tutorial shows you how to crop and resize a video on EZGIF in your browser.
 100% Working Method to Add an Audio Track to an Animated GIF
Boring about the mute GIFs? Here is a comprehensive guide to explain how to add audio tracks to animated GIF images without technical skills.
 Best 5 GIF Enlargers to Make Your Animated Images Bigger
Explore the top 5 GIF enlarger tools to make animated images look bigger and better. Discover their pros, cons, and features. Make GIFs larger instantly.