Freeze frame effect is one of the most effective ways to make videos more appealing creatively. Using this effect, specific frames in a video clip can be paused for a few seconds, which makes appreciating them easier since the people who will watch the video will be able to look at it for a longer duration. This effect is highly effective for clips featuring swift motions or natural movements. In this article, we will provide a full guide on how to use DaVinci Resolve to freeze-frame videos that are being edited in the software. We will explore two options to freeze-frame DaVinci Resolve videos that you can follow easily. If you are an aspiring editor and DaVinci Resolve looks too technical for you, we also featured an alternative that you can use to add the freeze frame effect more easily.
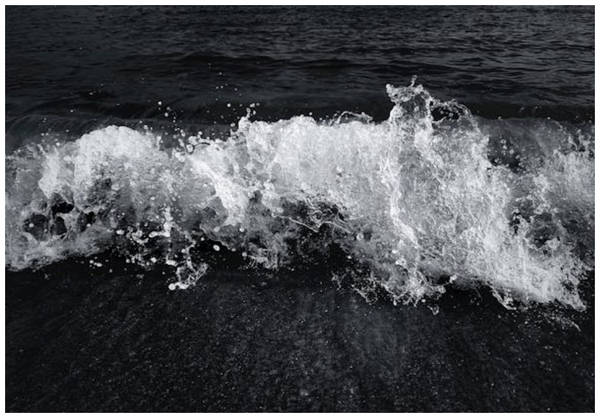
Frame freezing is a video editing technique that involves suspending a specific frame in a video for a long duration to highlight the elements and effects included in the paused frame. This method is a famous technique to highlight the organic and natural movement of subjects such as dancers in motion, waves at the beach, flying birds, water drop ripples, and other similar subjects. With the concept of freeze frame now discussed, we can now move on to the tutorial on how to apply this effect in DaVinci Resolve.
The next section of the article will feature the basic option to apply freeze frames, while the part afterward will feature the alternative version inside DaVinci Resolve’s menu.
Now that we have discussed the freeze frame effect and its best uses, we can move on to the section of this article that you can follow while editing in DaVinci Resolve.
Simply follow this five-step guide to add Freeze Frames to your video editing projects.
1. Import the video file you want to edit into DaVinci Resolve’s editing timeline.

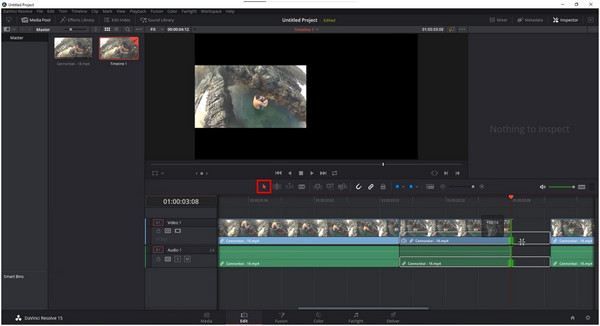
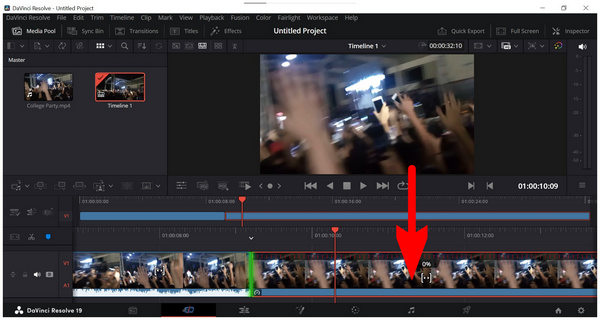
2. Adjust the video duration bar to the part of the video that you want to use as the start of the freeze frame effect. Then, activate the Blade Edit tool.
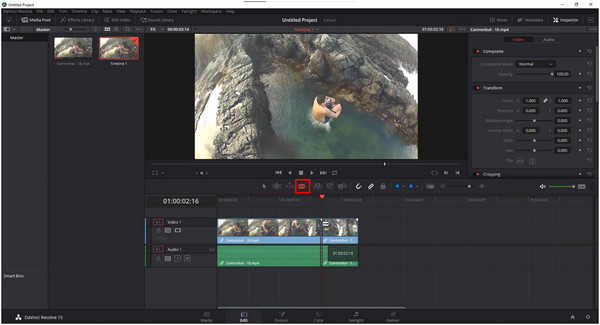
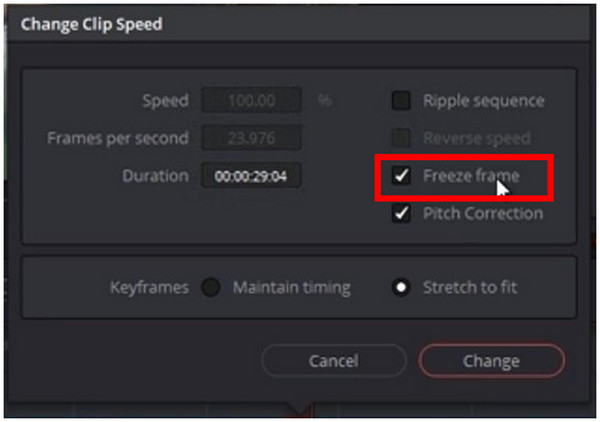
3. Using the Blade Edit tool, right-click on the video and select the Change Clip Speed option.
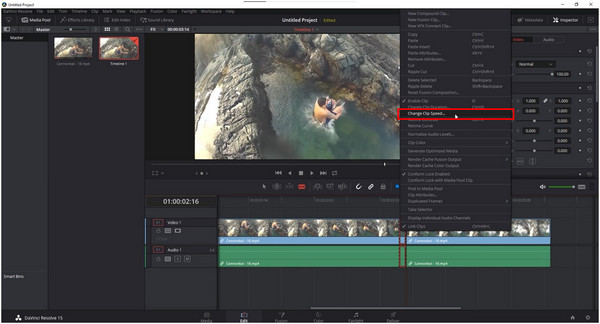
4. Selecting the Change Clip Speed button will make its menu pop up. Check the box beside the Freeze Frame option to choose this setting.
5. Back in the main editing timeline, switch to the Normal Edit Mode tool, and then click and drag the frozen frame that you have set to adjust how long the freeze frame effect will stay in the video.
If this technique is too technical for you, we also provided another option that you can choose to add freeze frames in DaVinci Resolve. This option is a good way to optimize your workflow since using it to include freeze frames is simpler to do.
This alternative freeze frame application technique includes using the Inspector tab on the editing page. Although this option is closely related to video speed change adjustment rather than tradition freeze frame, it still gets the job done in applying the desired effect. Without further ado, please continue reading below to learn how to use this option.
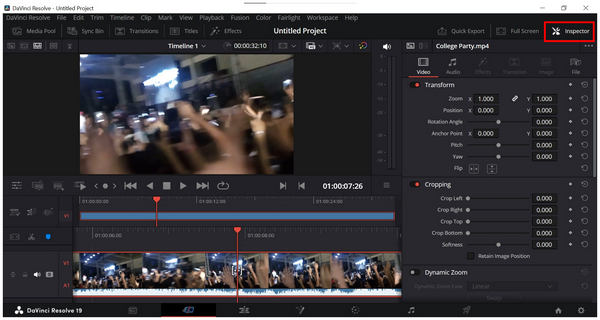
1. Once the video has been added to the editing timeline, click on the Inspector tab to expand the menu. Then, click on Video.
2. In the Video tab, scroll down to find the Speed Change options. Click on the Snowflake button to add the freeze-frame effect to your video.
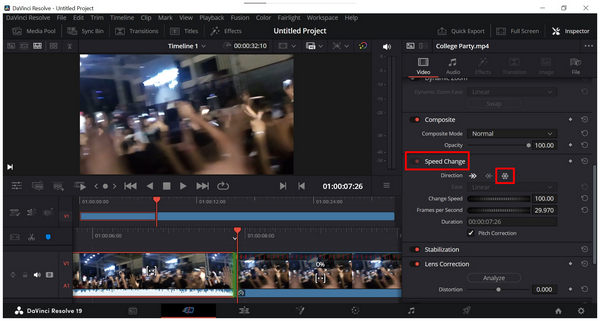
3. Go back to the editing page and discover the part of the video with the freeze-frame effect. The section of the video with blue bars has a freeze-frame.
Due to the advanced nature of DaVinci Resolve and its demand for the editing skills of the user, it is understandable to use another software if you are an amateur editor looking for software that is more accessible in terms of difficulty. If that is the case, the next part of the article was made for you since we will feature an alternative program that you can use to apply freeze-frame effects.
When looking for a program to freeze-frame videos, you can use software other than dedicated video editing tools. One of the more reliable options is to use video converter software with versatile features and functions, such as AnyMP4 Video Converter Ultimate.
Although labeled as a video file converter, this software was developed to be versatile enough and equipped with multiple practical tools to apply minor editing adjustments to a video file. With that in mind, this software can apply the freeze-frame effect. This makes the tool a good option if the user is only interested in applying simple video editing techniques, and the advanced nature of video editing tools such as DaVinci Resolve might be too technical.
Without further ado, let us proceed to the detailed guide on how to use AnyMP4 Video Converter Ultimate to add freeze-frame effects to videos.
Make sure to download the software first to easily follow each editing step smoothly.
Secure Download
Secure Download
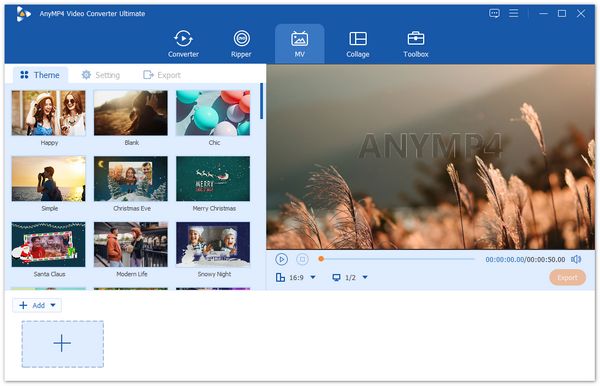
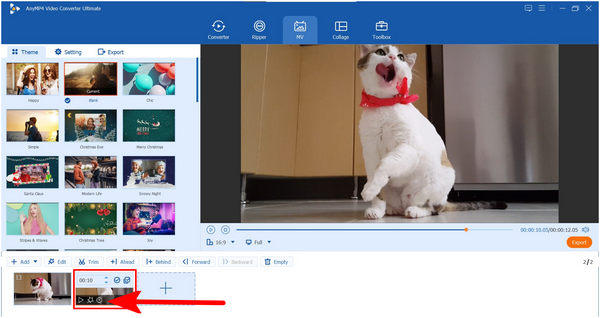
1. Open AnyMP4 Video Converter Ultimate and click on the MV Editor section. Click the Add button to add the clip that you want to edit.
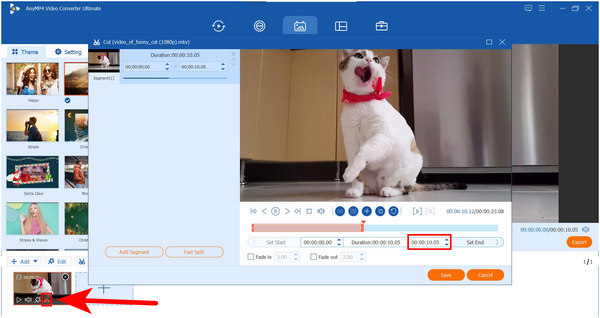
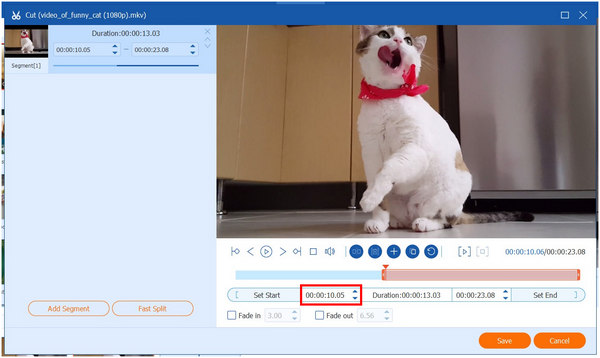
2. Once the media file has been imported into the program, click on the Clip button on the added video. In the Clip editing window, set the clip ending to the frame that you want to freeze.
3. Watch the video file in a media player and then take a screenshot of the frame that you want to use as the freeze frame. Next, go back to the MV Editor, select the Add icon, and then import the screenshot of the freeze frame.
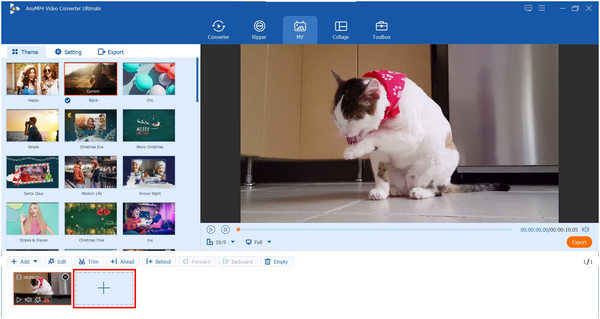
4. Now that the freeze frame screenshot has been added, click the Duration icon and then set the time depending on how long you want the freeze frame to last.
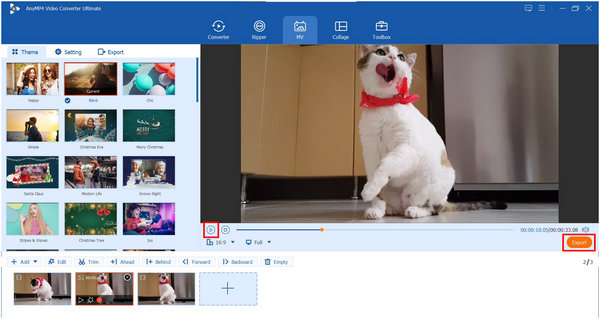
5. Copy the original video you are editing and move it to the right side of the freeze frame screenshot. Select the Clip button and set the clip starting point on the exact frame where the freeze frame was captured.
6. With the clip starting point, freeze frame image, and clip ending point now laid out, click Preview to check if the freeze frame has been applied correctly. Once satisfied with the result, simply click on Export to save the video with the freeze frame effect now applied.
Now that you have learned how to apply freeze-frames in videos easily, we hope that this guide has proved useful for your multimedia editing needs. Make sure to check out other features in AnyMP4 Video Converter Ultimate to discover more versatile options in the program.
Now that you have learned the basics of adding freeze-frame effects in multiple tools and programs, we hope that this article has proved useful for your needs as a video editor. If you are looking for software that is simple and accessible for new users who want to learn how to edit videos on Mac and Windows computers, we highly recommend using AnyMP4 Video Converter Ultimate.
Please share this article online to help other users looking for a freeze-frame tutorial.
 Posted by Angelica Liwanag to Edit Video
More readings
 How to Sync Audio and Video in DaVinci Resolve
If your audio is out of sync with the video, worry not. Find out how DaVinci Resolve can sync audio to video automatically and manually, only right here.
 Change Frame Rate in DaVinci Resolve for Smooth Playback
Get into this post and find out how to change the frame rate in DaVinci Resolve. Learn how to apply it in individual projects and in a timeline with our guide.
 Top 5 Frame-by-Frame Video Editors for Computer or Smartphone
These are the best video frame editors that you can use to effectively and simply edit a single frame or certain frames without interrupting other video frames.
 How to Go Frame by Frame in VLC for Windows and Mac Versions
Do you want to capture a specific VLC screenshot of every frame? Read this article to learn how to use VLC player frame-by-frame mode for Windows and Mac.