Grainy effects on photos, whether naturally captured or added as an overlay, are a solid effect to improve the gritty aesthetic of an image. Image graining is commonly used on photographs captured in party places, graphic design works with rugged themes, and action photos to help convey a more active appeal. However, due to the informal effect that image graining can convey, this effect may not be suitable for all kinds of photography uses, such as photos meant to be used for formal or professional usage. With that in mind, users looking for a solution on how to fix grainy photos often look for solutions online. If so, you are in luck since this article will serve as a full guide to help reduce image graining using three tools of different difficulty. To learn more about this topic, please continue reading the article down below.
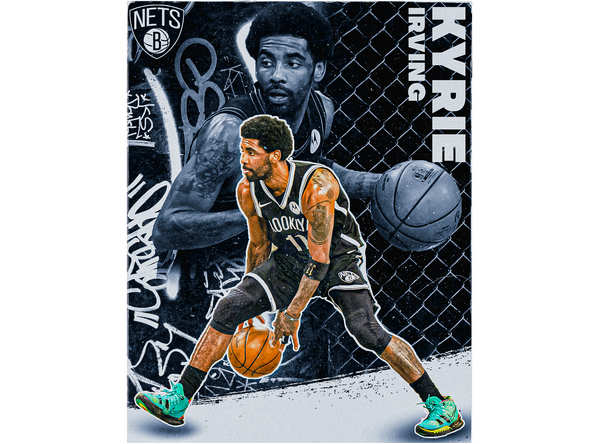
Photo graining is commonly triggered by insufficient lighting in the place where the photo was taken. Since the camera can detect if the light source is too weak or dim, one solution to compensate for this problem is by highlighting the light particles captured in the viewpoint of the camera. If this is the case, the hyper-focused light particles can be captured as graining when the image is taken, and lead to image noise.
Another potential cause of grainy images is that a grain overlay has been applied to the photo for aesthetic value. This is usually the case for graphic design work or posters that require a gritty appeal. In fact, there are even built-in graining filters on modern social media services to help their users include an additional layer of personal touch on their uploaded images.
If you want to clean your images by improving their quality through graining reduction, the next section of this article will be perfect for your needs since we will discuss three tools that are all perfect for solving this problem.
The first solution that will be highlighted in this article will be AnyMP4 Image Upscaler Online, the best online tool to enhance image quality automatically. This option will be highlighted first since it is both the easiest to use as well as the most efficient among the tools that will be featured in this article.
To start, AnyMP4 Image Upscaler Online is supported by a smart AI system that can increase the resolution of images, resulting in a photo that has better quality and sharper details. Along with increased image resolution, image graining reduction can be done as well since it will drastically make an image sharper and more detailed.
In addition to image grain reduction, this tool can also be used for more practical image enhancement needs such as:
To easily understand how to fix grainy photos online using AnyMP4 Image Upscaler Online, a step-by-step guide will be provided down below:
1. Go to the AnyMP4 Image Upscaler Online’s website and click on Upload Photo to add the image that you want to enhance.

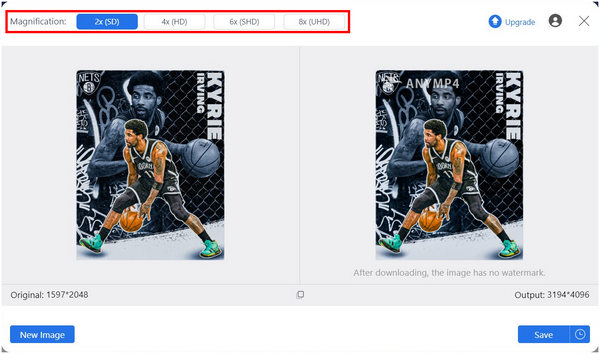
2. Once the image has been added, select the magnification option that you want to use. You can choose among 2× (SD), 4× (HD), 6× (SHD), or 8× (UHD).
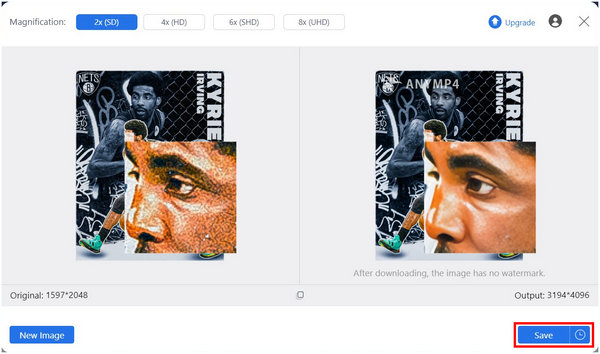
3. To check if the image enhancement has been applied, simply hover your cursor to the part of the photo that you want to check. The upscaled image will have a drastically improved texture. You can now click on Save to download the enhanced image back to your computer.
With the most practical image enhancement tool now featured, you can now fix any grainy images after following three simple steps with AnyMP4 Image Upscaler Online. On top of being the easiest software to use, it can also be used without installation, making it not only a solid option but also a practical one.
Adobe Lightroom is a dedicated photography enhancement tool made by Adobe to provide photographers with exclusive editing software to enhance their photographs. Unlike the more design-aligned Photoshop, Lightroom features editing options that are focused on enhancing the details and colors of an image being processed in the tool.
With that in mind, Lightroom had a dedicated tool to fix grainy photos which is none other than their Noise Reduction settings. To learn how to fix grainy photos in Lightroom, please refer to our short guide below:
1. Add the grainy photo that you want to edit.
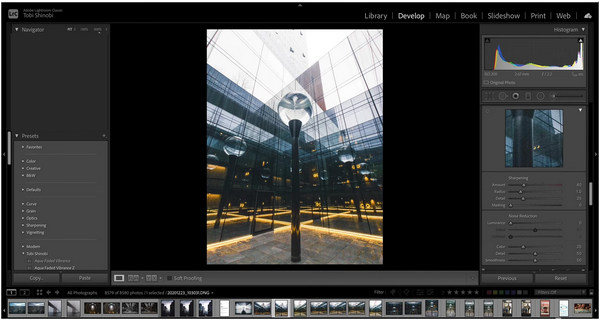
2. Once the photo has been added, zoom in to check the intensity of the image graining. Then, click on the Develop tab and scroll down to find the Noise Reduction section.
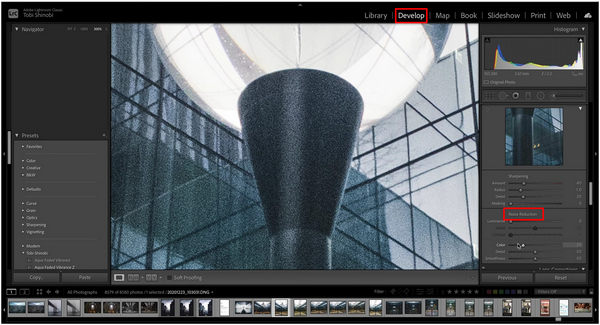
3. Under the Noise Reduction section, adjust the intensity of the Luminance bar to reduce or remove the image grain completely.
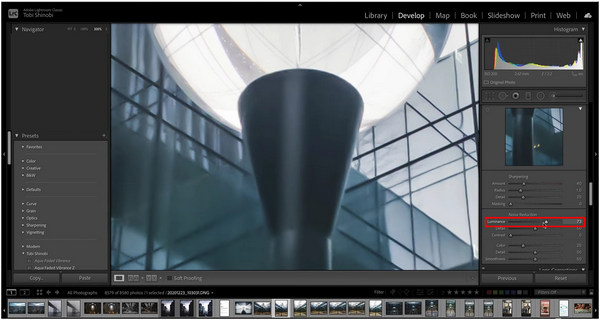
By adjusting the noise reduction setting of Lightroom, the image graining can be removed. This is a surprisingly simple method, especially in Lightroom, which is quite challenging to use for beginners. However, it will include a watermark in its free version. Learn from this post to remove the watermark in Lightroom.
Adobe Photoshop is the more advanced editing tool also produced by the same developers of Lightroom. Unlike Lightroom, this tool is focused on graphic designing and advanced photo editing instead of the more detail-oriented tools available in Lightroom. Because of that, graining reduction using Photoshop is more challenging to do when compared with the previous tools that we featured.
With Photoshop’s grain reduction capabilities now introduced, we can now move on to the step-by-step guide on how to fix a grainy picture in Photoshop:
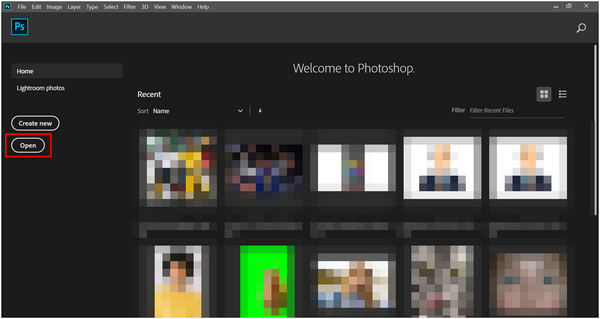
1. Open Photoshop and add the photo that you want to use by clicking on the Open button.
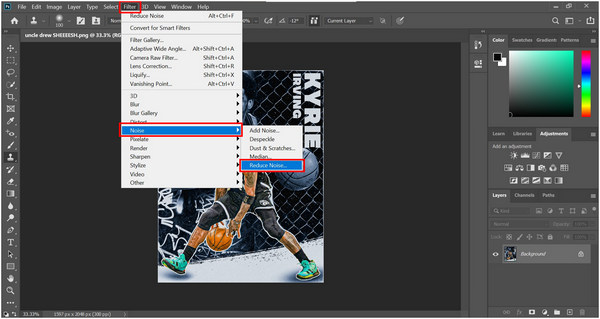
2. After adding the image, click on Filter, hover on Noise, and click the Reduce Noise option.
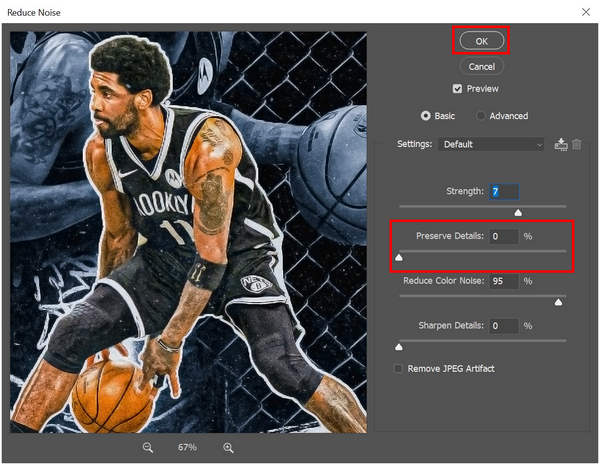
3. Inside the Reduce Noise editing Window, reduce the Preserve Details adjustment to lighten or completely remove the graining effect on the photo. Click on OK once you are satisfied with the adjustments.
By using Photoshop’s Noise Reduction setting, cleaning image texture by reducing their noise or grainy details was now made easier. This is a welcome addition to the skills of new editors who want to improve their editing skills by learning how to enhance the image quality.
If you are using DSLR or the pro mode on your smartphone camera, make sure to avoid using high ISO settings since this option will make your lens sensitive to lighting. With increased sensitivity to lighting, image graining will be more prevalent in high ISO settings.

Since a low-lighting environment may force your camera to overcompensate and highlight the lighting particles, which would cause graining, the easiest solution for this option is by using enough lighting or using your camera’s flash if a stronger lighting option is not available. However, make sure to use the right amount of lighting since too much may cause light glares.
Unfocused images can also produce graining aside from the usual blur that is normally caused. With that in mind, making sure that your camera is focused on the subject that you want to capture will ensure that the chance of image graining will be heavily reduced.
Does high shutter speed cause grain?
No, it does not. Shutter speed only speeds up the amount of time that an image will be captured. It will not cause unnecessary graining.
Is there an app to fix grainy pictures?
Yes, there are. The easiest to use is AnyMP4 Image Upscaler Online. You can also use traditional image editors such as Lightroom and Photoshop. This is a solid solution if you want to learn how to make a photo less grainy.
Can you improve picture quality on the iPhone?
Yes, you can. iPhone’s image gallery has a dedicated editing tool that can be used to improve image quality. There are also multiple camera settings that can enhance the quality of images such as ProRAW and more.
Why are my iPhone photos grainy?
Your images might be taken in a dimly lit area. Another potential cause is too much editing and quality enhancement. It is also smart to check your camera lens and clean it. These are some common reasons why people often search for why do my iPhone photos look grainy.
What is the best app that fixes grainy pictures?
Use AnyMP4 Image Upscaler Online as the app to get rid of grainy pictures. This is the easiest tool to fix image graining. It is also free and simple to use. This is the best tool if you want to learn how to get less grainy photos.
Now that multiple steps to reduce graining from photos have been featured, you can now fix your grainy images with no problem. If Adobe software such as Photoshop and Lightroom are too expensive or excessive for simple grain reduction work, keep in mind that AnyMP4 Image Upscaler Online is free to use and also the easiest to use.
Please share this article online to help other people looking for a solution to fix images with grainy details.
 Posted by Angelica Liwanag to Edit Photo
Related Articles
 Top 5 AI Photo Upscaler Tools to Enhance Image Quality
Enhancing the quality of your images is the best way to improve your photos. Discover how to fix bad image quality by following the steps of the tools.
 Top 3 AI Picture Retouching Tools to Enhance Old Photos
Restoring your old photos is a possible thing to do these days. Enhance those old vintage photos of yours to preserve memories. Discover these easy steps.
 How to Unblur Images With 4 Best Photo Clarity Tools
Image deblurring is the way to make photos clearer. You can use the best tools to unblur images online and offline. Learn their features and easy steps.
 Best 4 Tools to Sharpen Blurry Photos Online and Offline
Sharpening an image is an excellent photo-editing technique to use. Discover steps on how it is done on the 4 image upscalers to sharpen blurry images.


