How to Fix Overexposed Photos The Easiest Way
Photography has come a long way thanks to the advancement in technology used on modern smartphones. Today, even entry-level devices have decent-quality cameras that aspiring photographers can use to practice their skills. However, amateur photography is prone to beginner mistakes such as poor angles and overexposed lighting. Because of that, this article can serve as your guide to solving problems involving how to fix overexposed photos. Today, we will present the easiest online tool to solve overexposed photos along with three editing software for computers that can fix the same issue. Please continue reading this article below to learn more.
Part 1. What is Overexposed Photo
Overexposed photos are caused by overpowering brightness from the lighting captured in an image. This often occurs when a strong light source is captured along with the subject of the photo such as sunset photographs or studio lighting. As a result, the subject in front of the light source will be overwhelmed causing it to look dark and its features becoming less prominent. Overexposure is commonly not the desired result of photography sessions since the subject is called such for a reason.
Fortunately, countless tools can fix this visual issue with four of the most famous among them highlighted in the following sections of the article below. In the second part of this article, the easiest to use among these tools will be featured.
Part 2. How to Fix Overexposed Photos in AnyMP4 Image Upscaler Online
We will start these software recommendations by featuring the most beginner-friendly among them with AnyMP4 Image Upscaler Online, an online tool perfect for improving the overall quality of images by enhancing the texture, edges, and smaller details of a photo.
Since the subject of overexposed images is drowned in strong light sources, a common issue among these photographs is the reduction in the quality of the subject causing their edges to have poor texture. Because of that, image upscaling is perfect for fixing the side effects of overexposed photos such as downgraded textures. This tool is even more ideal for photographs that are intentionally taken to be overexposed causing silhouettes to become the primary subject of an image.
Aside from the tool’s tailor-fitted features to fix overexposed photos, it is also perfect for other image enhancement purposes such as:
- • Automatic image upscaling powered by AI.
- • Photo enlargement with no quality loss.
- • Improving the texture of graphic designing assets.
- • Old photo restoration powered by graining fix and noise reduction.
To learn how to fix overexposed pictures using AnyMP4 Image Upscaler Online, please read our guide below:
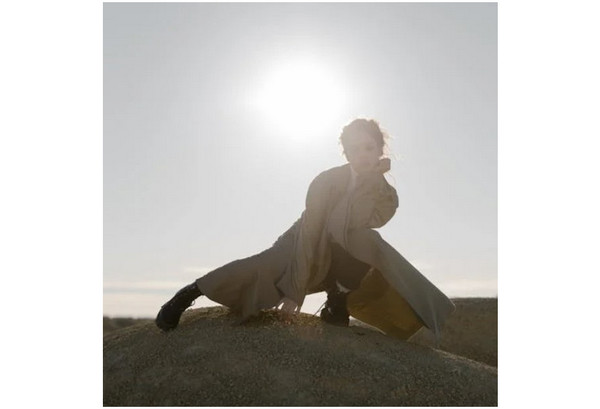
1. Head over to AnyMP4 Image Upscaler Online’s website. Add the overexposed image that you want to fix by clicking the Upload Button.

2. With the image file now added, choose the magnification mode that you want to use. It will define the intensity of the automatic AI upscaling. You can choose among 2× (SD), 4× (HD), 6× (SHD), or 8× (UHD).
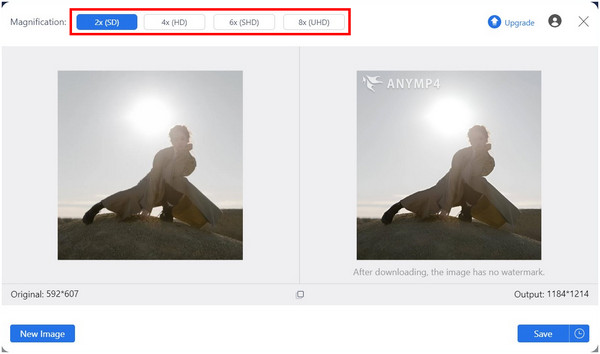
3. After enhancing the texture and quality of your overexposed image, click on Save to import the improved image on your computer.

This tool is by far the easiest and most intuitive tool in this article. Because of that, this makes it the best option for beginners and photographers who want to save time when enhancing their captured photos. AnyMP4 Image Upscaler Online should be one of the top of mind when thinking about the best tools to fix or improve overexposed images.
Part 3. How to Fix Overexposed Photos in GIMP
The first traditional editing software that we will highlight in this article is GIMP, an open-source photo editing program designed to become a free alternative to the widely used Adobe Photoshop. Since it is designed based on the mentioned software, GIMP is also equipped with essential color and lighting adjustment tools that can be used to fix overexposed photos. Unfortunately, GIMP’s offerings are more on the complex and advanced side making it not advisable for beginners.
To learn how to fix overexposed photo GIMP can do, please read our short guide below:
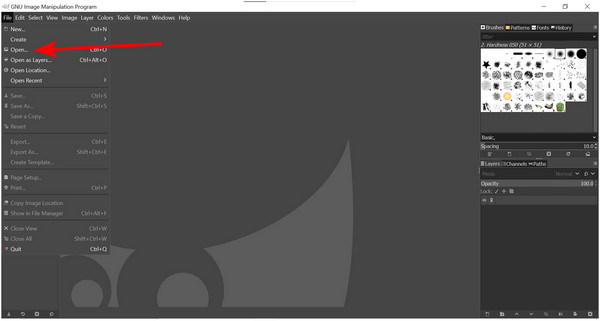
1. Add the overexposed image that you want to fix by clicking on File and then selecting Open.
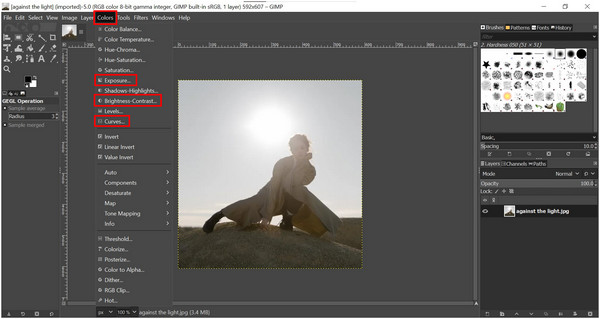
2. With the image now added, select the Colors tab and select the tools that are made for lighting adjustments. Exposure, Brightness-Contrast, and Curves are some of the most effective.
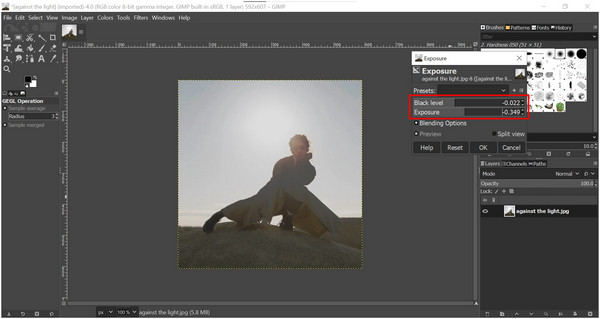
3. On the Exposure adjustment window, slide the Black Level and Exposure bar according to your liking. Click OK to confirm the adjustments.
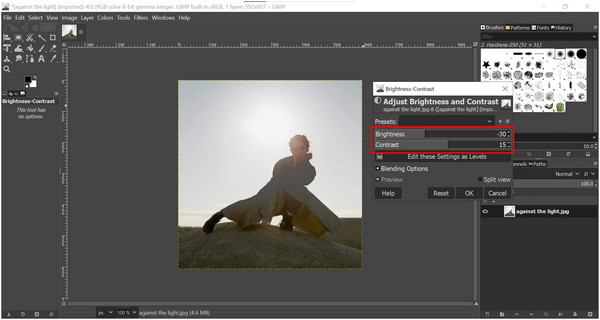
4. Next, balance the image's Brightness and Contrast in their designated setting.
5. Finally, adjust the Color Curves according to your liking.

Then you can export the overexposed image. Before that, you can resize the image in GIMP for uploading the social media easily.
With the help of these Color adjustment options, overexposed photos can be adjusted according to the preference of the editor. The tools are versatile enough for any form of adjustment but it also drastically affects the difficulty of using the tool. Nonetheless, GIMP is a serviceable option for fixing overexposed images.
Part 4. How to Fix Overexposed Photos in Adobe Lightroom
We will enter the editing offerings of Adobe Creative Suite in this section by featuring Adobe Lightroom, a specialized photography editor made for adjusting the contrast, color, and brightness of images in one go. Unlike its Adobe counterpart in Photoshop, Lightroom is more designed to fix photographs making it the best tool for fixing overexposed photos among the Adobe software.
To discover the settings that can fix overexposed photo Lightroom can do, we will provide a full tutorial using this tool to learn how to adjust overexposed photos using it:
1. First, add the photo that you want to fix on the software.

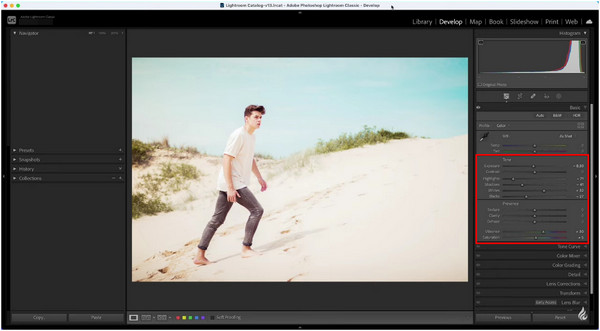
2. With the image now added, click the Develop tab and then expand the Basic tools.

3. Tweak the sliders under the Basic settings until the overexposed image has been fixed.
Since Lightroom was developed for editing photographs, its tools are more inclined to color and lighting adjustments. This makes it a solid option for professional photographers who want to improve the lighting of their captured images. Unfortunately, it is not a welcoming option for complete beginners. If you like Lightroom, you cannot miss the Lightroom alternatives here.
Part 5. How to Fix Overexposed Photos in Adobe Photoshop
We will stick with Adobe software on the fourth option in this article since we will now highlight their primary editing tool in Adobe Photoshop. Unlike Lightroom which focuses on editing the lighting of photographs, Photoshop is built more like an all-around graphic designing tool and this includes lighting adjustments and general visual elements of an image.
To learn more about how to correct overexposed photos using Photoshop, please read our quick guide below:
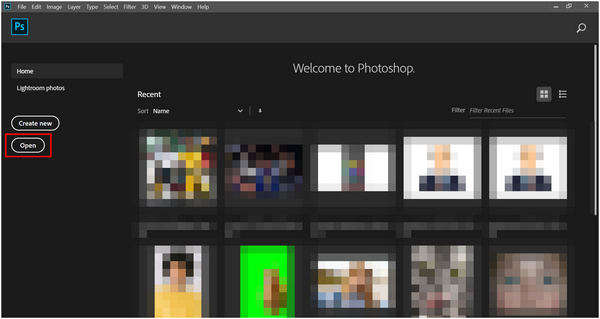
1. Open Photoshop and add the image that you want to edit by clicking the Open button.
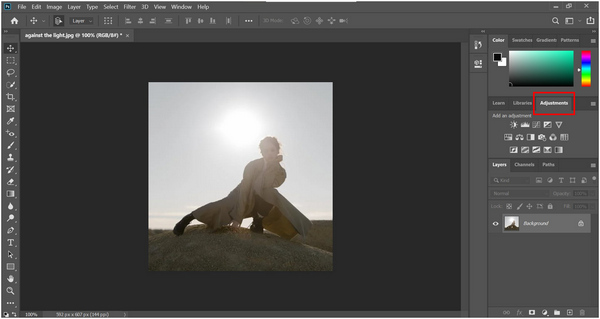
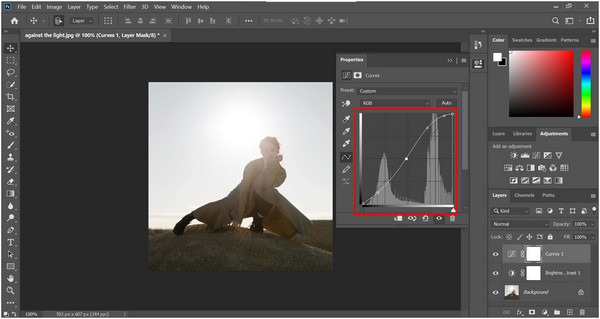
2. With the image now added, click the Adjustment settings. The Brightness/Contrast, Curves, and Exposure settings are the most important options under this tab.
3. Adjust the corresponding bar for Brightness and Contrast according to your liking.
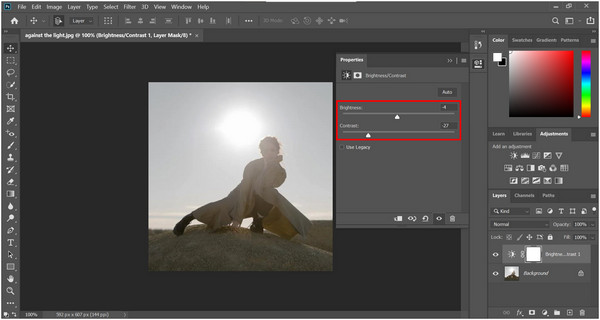
4. Next, edit the Curves setting to balance the lighting of the image.
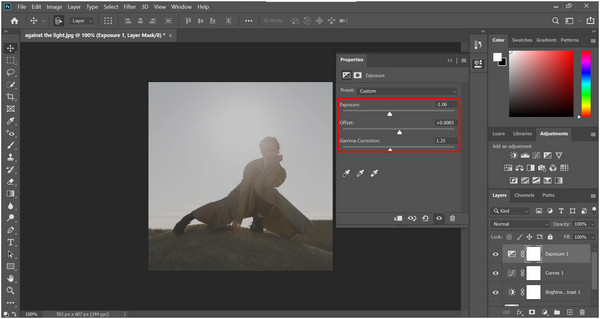
5. Finally, modify the Exposure, Offset, and Gamma Correction inside the Exposure settings to adjust the quality of the overexposed photo.
Also, you can use Photoshop to increase the image resolution before exporting it.
Although Adobe Photoshop is known for being challenging to learn and use, it is still the go-to editing tool of experienced editors which proves the overall quality of the software. On top of that, its capabilities are only limited by the skill of the designer or editor making it the optimal option for experienced users.
Part 6. Skills to Avoid Overexposed Photos
Avoid Overwhelming Light Sources
Since poor lighting is one of the primary causes of image overexposure, avoiding powerful light sources such as sunlight is one of the easiest solutions for this issue. However, if sunlight is the only source of light, make sure that your image is not being overwhelmed by the mentioned light source. You can do this by moving your camera physically or by changing the camera settings.
Avoid Aiming Your Camera Directly at the Light Source
Similar to the example image in our guide above, images taken directly against the light will automatically cause it to become overexposed. If you want to avoid this look, avoid directly putting your subject between the camera and the light source.
Find an Angle Where Proper Lighting Will Be Applied
Lighting is extremely important for all forms of photographs or designs because learning how to use proper lighting is a skill that must be established and developed over time. With the use of an optimal lighting environment, the overall quality of images will be enhanced tenfold.
Part 7. FAQs About How to Fix Overexposed Photos
What is the app that fixes overexposed photos?
You can fix overexposed images using photo editors. Thankfully there are countless options available such as GIMP and Photoshop. For beginners, using online tools such as AnyMP4 Image Upscaler Online is more advisable. This tool can also be the answer for people searching for a way on how to fix an overexposed Polaroid picture as long as the image were to be converted digitally.
Can you save overexposed photos?
Yes, you can. You can do this using the camera by incorporating overwhelming light sources. Another option is to adjust the brightness and exposure of your image.
Is it hard to capture overexposed photos?
No, it is not. Overexposed photos are one of the common problems of beginner photographers. You can easily capture overexposed images even accidentally. You can even fix overexposed photo online.
How to fix overexposed photos on iPhone?
You can use the edit function of the iPhone's photo gallery. You can also use third-party apps such as Picsart. To avoid installing new apps, online tools such as AnyMP4 Image Upscaler Online are the way to go.
Are overexposed photos pleasing to look at?
It depends on where the image will be used. If the subject’s features are important, overexposure may cause the image to look bad or low quality. But if the silhouette is the chosen subject, overexposure should be the way to go.
Conclusion
If you are worried that the image that you will capture will look overexposed, fear not since the easiest way to fix this issue is now discussed in this article. Additionally, you can also refer to our detailed and step-by-step look at how to use traditional editing software to fix overpowering lighting.
Please share this article online to help other editors and photographers solve their overexposed image problems.