Fading audio is a fundamental technique in video editing. It lets you create natural transitions between clips or smoothly introduce and conclude audio elements. Premiere offers several methods to achieve this effect, catering to both beginners and experienced editors. In this post, we’ll explore the different approaches to fade audio in Premiere. We’ll show you the detailed steps to achieve the fade effect you need for your audio. So, if you’re excited to know how it works, continue reading this.

Fading audio with volume keyframes gives you control over how the volume changes throughout your clip. This is a common technique for creating smooth transitions between clips. Also, it is used to fade out music at the end of a video. By setting keyframes at different points with varying volume levels, you create a gradual fade effect.
Here’s how to fade audio in Premiere through the volume Keyframe:
1. Launch Premiere Pro and click File on the top menu bar. Select New and choose Project to create a new project.
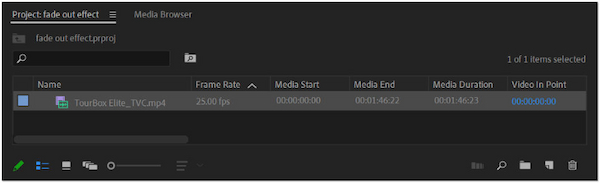
2. Go back to the File menu and click Import to browse and upload your file. Once imported, drag and drop the clip from the Project panel onto the Timeline panel.
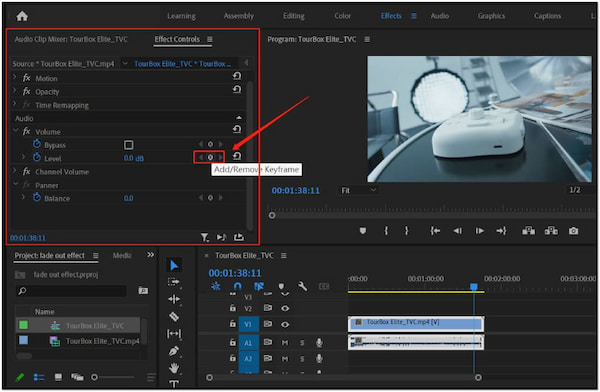
3. Locate the Effect Controls panel on the right side of the Premiere Pro interface. Expand the Volume dropdown menu within this panel.
4. Click the audio clip in the Timeline panel to select it. Use the playhead to navigate to the point where you want the fade-out to begin.
5. In the Volume section, find the Level (dB) setting. Click the Stopwatch icon next to Level to create a keyframe. This marks the starting volume for the fade.
6. Drag the playhead to the desired endpoint of the fade-out. This could be the end of the video clip or any point where you want the audio to fade to silence.
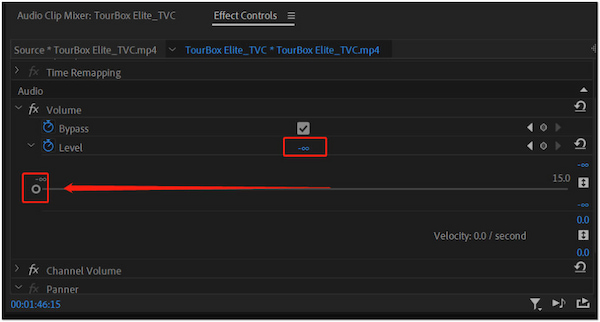
Note: Reduce the Level (dB) value to a lower volume, indicating the final level for the fade-out. Premiere Pro will automatically create a second keyframe at this point. Aside from fading audio, you might also want to check how to get rid of background noise in Premiere.
The Exponential Fade is a specific audio transition effect. It creates a more gradual fade compared to the standard Constant Power fade. It starts with a slow volume decrease and accelerates as it gets closer to the endpoint. This resulted in a smoother and less noticeable transition to silence.
Here’s how to fade out sound in Premiere with Exponential Fade:
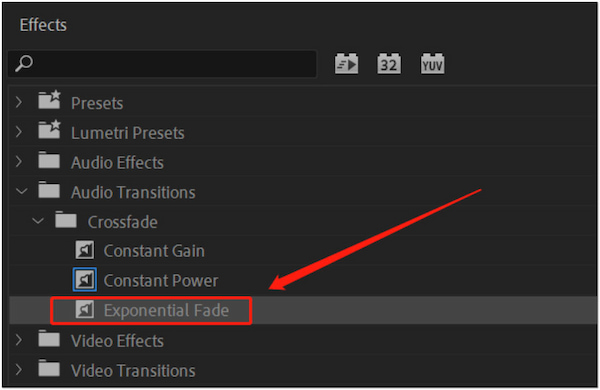
1. Locate the Effects panel on the right side of the Premiere Pro interface. If it's hidden, go to Window on the top menu bar and select Effects to make it visible.
2. In the Effects panel’s search bar, type Exponential Fade. Alternatively, navigate through the folders and select Audio Transitions, Crossfade, and then Exponential Fade.
3. Drag and drop the Exponential Fade transition from the Effects panel onto your audio clip. Remember, it can only be placed at the beginning or end of an audio clip, not in the middle.
4. If you want to fade only a specific section, use the Razor Tool. This lets you split the clip at the desired fade points. Apply the Exponential Fade to the appropriate clip segment.
5. Placing the Exponential Fade at the beginning will create a fade-in effect. Meanwhile, placing it at the end creates a fade-out. In this case, we're focusing on a fade-out at the end.
6. Zoom in on the audio track in the Timeline panel to see the added Exponential Fade transition. To adjust the fade duration, click and drag the edges of the transition box.
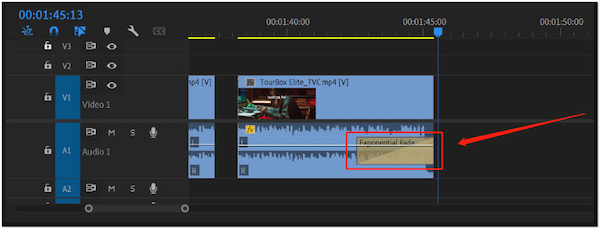
The Exponential Fade transition is a quick way to add a smooth audio fade-out/in effect. It makes the sound gradually decrease in volume. This effect is particularly useful when fading out music or background sounds at the end of a video clip.
A Nested Sequence in Premiere Pro is essentially a sequence within another sequence. It's like creating a sub-project within your main project. It allows you to merge video clips, effects, or transitions into a single unit.
Here’s how to make audio fade in Premiere Pro using the Nested Sequence method:
1. Select the video clip you want to fade in the Timeline panel. Go to Edit and choose Create Nested Sequence. This creates a new sequence containing only the selected clip.
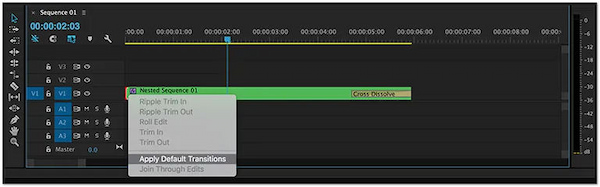
2. Open the newly created nested sequence by double-clicking it. Apply the desired video fade transition to the beginning of the video clip. You can also add an audio fade here if you prefer a different fade style for the audio.
3. Go back to the main sequence where you have the nested sequence placed. Apply the desired audio fade transition to the audio track of the nested sequence in the Timeline. This will fade out the audio along with the video within the nested sequence.
This method offers more flexibility for complex fades. It’s also ideal when you want to apply different fade styles to audio and video. You can experiment with different fade transitions for both audio and video. This way, you can find the style that best suits your project.
Fading audio in Premiere can be a little tricky, mainly for beginners. Although it offers several methods, it requires some understanding of the software and the specific techniques involved. If you're looking for a simpler solution to fade audio, especially for occasional use, AnyMP4 Video Converter Ultimate can be a helpful tool. It goes beyond video conversion and allows you to edit audio files directly. It offers a user-oriented interface for fading audio in and out, with customizable fade duration. This can be a cost-effective solution if your primary goal is straightforward audio editing tasks like fading.
Here’s how to fade audio in Premiere Pro alternative:
1. Start by obtaining the free download of AnyMP4 Video Converter Ultimate. Install the multimedia software and wait for the installation process to finish.
Secure Download
Secure Download
2. Once the installation process is finished, run the AnyMP4 Video Converter Ultimate on your computer. Navigate to the Converter tab and click +Add Files to load the audio file.

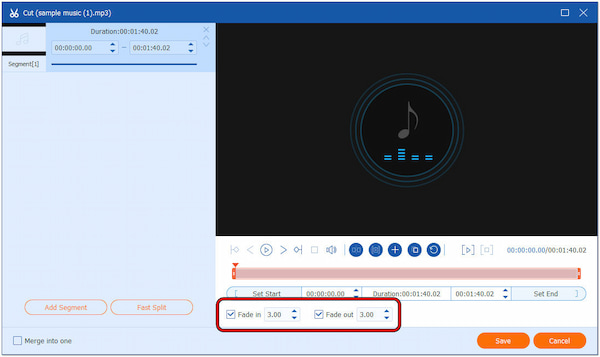
3. Once loaded, look for the Scissors icon and click it. In the editing window, check the Fade in and Fade out boxes to enable it.
4. By default, the fade duration is set to 3.00. If desired, you can configure it to your desired duration. Afterward, click Save to save the changes you made.
5. Optionally, click the Output Format section and head straight to the Audio category. Look for a new format and choose a quality. If changing the format is not necessary, skip this step.
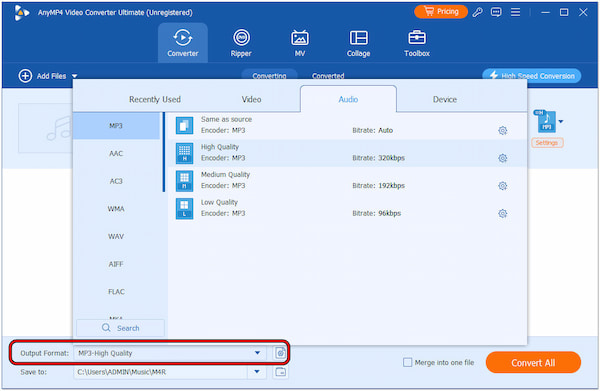
6. In the Converter interface, click the Save To section and choose your file destination. Finally, click the orange Convert All button to save your faded audio.

AnyMP4 Video Converter Ultimate is not just about conversion; it’s also for editing. Sounds great? Well, it’s just one of the many features available. Besides fading audio, the software also comes with a multimedia kit. Here, you can find over 20+ editing tools. This includes Audio Compressor, Audio Sync, Volume Booster, Noise Remover, and more.
What are keyboard shortcuts for Fade In/Out in Premiere?
Unfortunately, it doesn't have a dedicated keyboard shortcut for fading audio in or out. However, there are efficient shortcuts for applying transitions that achieve the fade effect. Move the cursor to the clip's beginning, then press Ctrl+D/Cmd+D to achieve fade-in. When you move the cursor to the clip's end and press the Ctrl+D/Cmd+D, you’ll achieve the fade-out effect.
Why is Premiere Pro's Exponential Fade not working?
There are several reasons why the Exponential Fade transition might not be working as expected. Exponential Fade can only be placed at the very beginning or end of an audio clip, not in the middle. Ensure you're dragging it to the desired start or endpoint of the audio. If you already have another transition applied to the same section of the audio clip, it might override it. Try removing any conflicting transitions before applying the Exponential Fade.
What is a fade-in audio?
A fade-in audio effect gradually increases the volume of an audio clip from silence or a very low level to its full volume over a specific duration. This creates a smoother and more natural transition at the beginning of an audio clip, especially when introducing music or narration.
Knowing how to fade audio in Premiere unlocks a powerful tool for creating professional-looking videos. By understanding the different techniques and choosing the right approach for your project, you can achieve seamless transitions and elevate the overall quality of your edits. However, navigating these functionalities can be a bit tricky, especially for casual users. Understanding keyframes and transitions and manipulating the timeline might require some practice. If you're a casual editor who simply wants to fade audio in or out for a project, AnyMP4 Video Converter Ultimate has got you covered. It allows you to edit audio files directly, including adding fade-in and fade-out effects.
 Posted by Angelica Liwanag to Edit Audio
Related Articles
 Audio Fade Out - How to Use Audio Fade In/Fade Out Effects
How to fade audio online? How do you fade out sound? How does an audio fader work? What is fade out in radio? Learn 3 ways to make audio fade out and fade in.
 How to Fade in and out Audio in iMovie on MacBook Pro/Air/iMac
With your project opened, you can follow our comprehensive guide to fade audio in iMovie on Mac without damaging the video and audio quality.
 Audio Volume Control - How to Change/Increase Audio Volume Easily
Where is the audio volume control? How to control sound volume? How do I increase the volume of an audio file? Here to get 3 best audio volume control tools.
 How to Get Rid of Background Noise Using Premiere (Advance Tips)
This article is all you need to reduce background noise in Premiere Pro. We will guide you on doing the advanced method together with an alternative tool.