As a popular broadcasting application, OBS Studio is widely used by vloggers, small business, game players and more. If you just start a popular channel or wish to share gameplay on Twitch, you are at the right place.

This article intends to share everything you should know about the open-source solution, from main features, to advantages and disadvantages, from detailed guide to the best alternative. Even though you do not have any technical skill, you can master OBS screen recording quickly following our guide.
Since OBS Studio is an open-source project, everyone can use it for free. It packs a lot of features and settings and provides amazing flexibility if you are willing to put in the time to learn it.
Anyway, OBS Studio is a good option for beginners to record screen on desktop.
Pros
Cons
According to research, OBS is secure if you download it from the official website. However, you have to turn off your antivirus software temporarily. Sometimes, antivirus software may believe open-source solutions as malware.

Step 1: Open OBS Screen Recorder from your desktop. It works on Windows, Mac, and Linux.
Step 2: Go to the Scenes panel at the bottom, click the Plus icon to add a scene, and name it.
Step 3: Then hit the Plus icon in the Sources panel and decide the source. Audio Input Capture, for example, will record your voice via microphone. Audio Output Capture is able to record the audio coming out from your system. Display Capture will record entire screen, and Game Capture will record your gameplay. Once you have added all sources, go to the Mixer tab and adjust the volume.

Step 4: Click the Settings button in the Controls section to open the Settings dialog. Go to the Output tab, locate the Recording section, and set the options based on your preference. Set other options and click OK to confirm it.

Step 5: Hit the Start Recording button at the bottom right corner, and start doing what you want to record on your desktop.
Note: By default, OBS will save your screen recordings in FLV, but you can change FLV to MP4. The best recording settings is depending on your demand.
It cannot be denied that OBS is a good option to record screen, gameplay and more. However, it is a bit difficult to learn for beginners. From this point, we recommend AnyMP4 Screen Recorder. It includes almost all features of OBS and provides more useful tools.
Main features of the best alternative to OBS Screen Recorder
Briefly speaking, it is the best alternative to OSB to record your screen without lagging.
Secure Download
Secure Download
Step 1: Install Screen Recorder
Launch the best alternative to OBS after you installed it on your computer. Select Video Recorder from the home interface. To customize output formats and other options, click the Gear icon to open the Preferences dialog.

Step 2: Record screen
There are four options on the window. Toggle on Display and set the recording area. Turn on System Sound and adjust the volume. If you wish to add your face and voice to the screen recording, enable Webcam and Microphone; otherwise, turn them off. Click on the REC button when you are ready on-screen recording.

Step 3: Preview and save screen recording
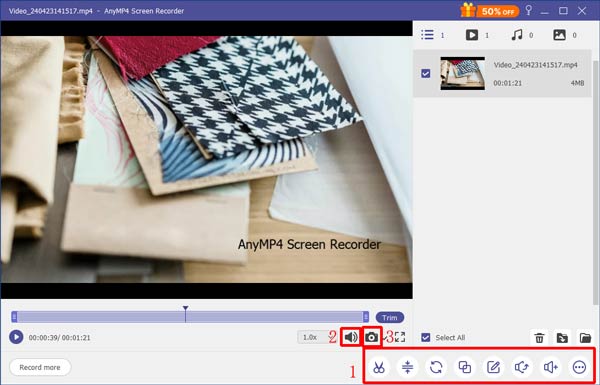
When screen recording finishes, hit the Stop button. Then preview it, remove unwanted frames with Clip tool. Hit the Save button if you are satisfied with it.

| Features | OBS | AnyMP4 Screen Recorder |
|---|---|---|
| Recording sources | System sound, webcam, microphone, desktop | System audio, webcam, microphone, desktop |
| Output format | FLV, MP4 | MOV, M4V, GIF, WMV and MP4 |
| Video editing | No | Yes |
| Platforms | Windows, Mac, Linux | Windows, Mac |
Is OBS Studio safe to use?
OBS Studio is safe to use if you download it from the official website. However, antivirus software may treat it as malware. Therefore, you have to turn off your antivirus when installing OBS.
Does OBS Studio cost money?
OBS Studio is open-source solution. It is completely free to use and it does not cost money at all. However, you may encounter the paying requirement if you access the fake websites. More free screen recorders like OBS are here.
Why OBS recording choppy?
If you are using the advanced output settings, please try to set the audio bitrate back to 160. Plus, make sure that the sample rate in OBS is the same as the one for your audio devices in Windows audio settings.
If you just create a new channel online, you will need a broadcasting application. OBS may be one of your candidates. It can meet your basic need of screen and gameplay recording. The only problem is the complicated configuration process. That is why we shared AnyMP4 Screen Recorder. It is easier than OBS Screen Recorder, but more powerful. If you have more questions related to screen recording, please leave a message below and we will reply it as soon as possible.