Capcut is one of the most beginner-friendly mobile and PC video editing options. Designed to make video editing simple and template-based, the editing software has emerged over time to become a reliable tool for both PC and mobile. However, the tool's more advanced functions and editing methods may still be challenging for beginners. As a result, inquiries regarding how to Zoom in on CapCut became a common topic that its users often ask online. With that in mind, this article aims to provide three different solutions that can be used to zoom in when editing videos in Capcut. We will explore the standard zoom effect, scale adjustment, and keyframe zooming. Moreover, an alternative video editing option that can dethrone Capcut as the most beginner-friendly video editor will also be featured as an alternative.

We will start this guide by providing a detailed effect using the standard zoom-in effect on Capcut. According to Capcut reviews, which are readily available online, editing effects in the software could be the main reason for its ease of use. This is because editing effects that are available in it can be added to the editing timeline after a few clicks. These editing elements may also be adjusted using a few slides within the media files used in the video production.
We have provided a detailed step-by-step guide below to help you understand how to zoom in on a specific spot in Capcut using zooming effects. The Capcut version used in the tutorials in this article will be their online tool.
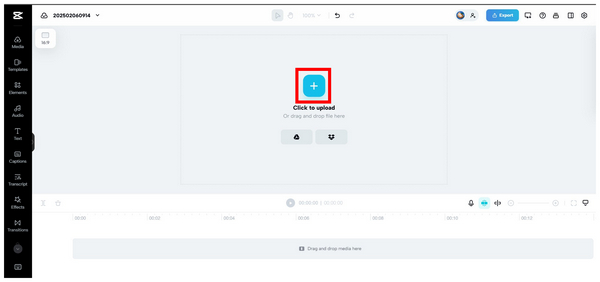
1. Open the Capcut editor on your browser. Then, click on the Upload Button or click and drag the file from your computer. This option will allow you to add the media files you want to use in the video, whether they are clips, images, or audio.

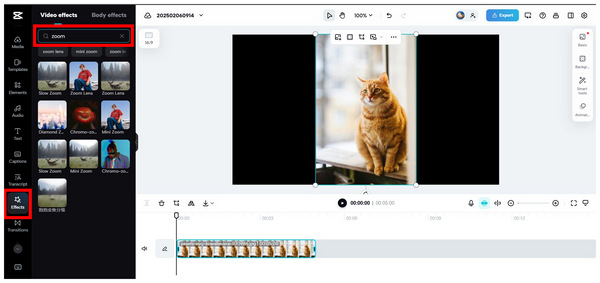
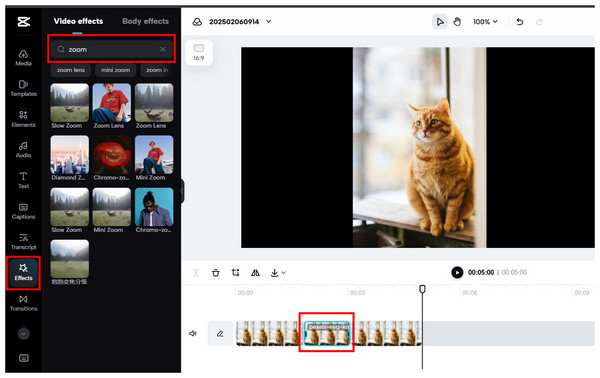
2. Once the media files you want to use for the video production have been uploaded, click Effects and search for zooming video effects. Choose the zoom option that you want to use that will work appropriately for your video.
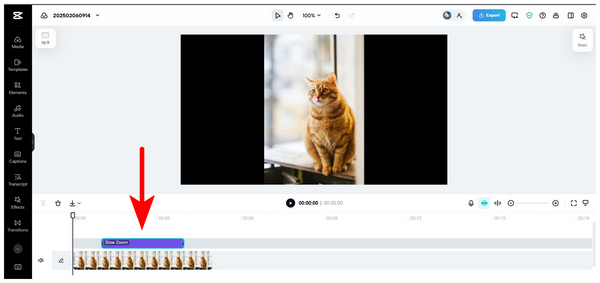
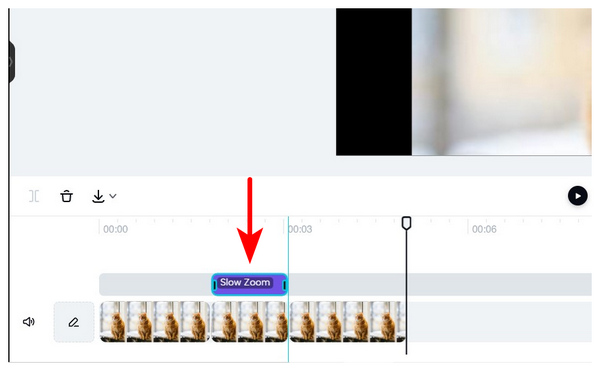
3. Now that the Zoom effect has been added to your editing timeline, you can adjust it to set where the effect will start to appear on your video. Simply click and drag the effect in the timeline.
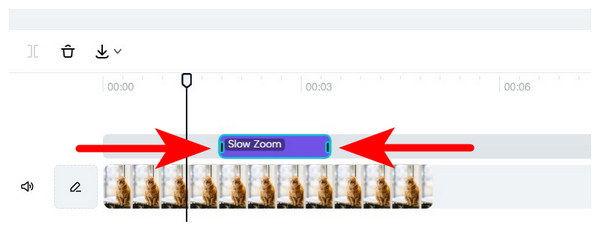
4. After placing the Zoom effect where it will start to appear in the video, you can now adjust its duration by clicking and dragging the sides of the video effect.
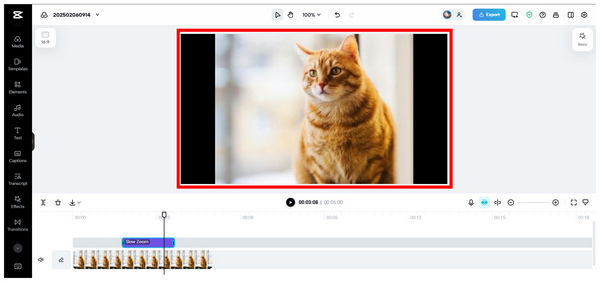
5. Now that your video effect has been placed in the clip and its duration is adjusted, you can preview the result of the zoom effect. Simply change the editing timeline if you wish to apply more adjustments.
Since the Effects tab of Capcut is the most straightforward way to add different types of zooming effects, this is the most popular option for most Capcut users.
Moving forward to the alternative option within Capcut, we will feature the Scale option, which can be adjusted from the Transform settings of Capcut’s basic video adjustment tools. As its name suggests, scale adjustment is also a viable option for applying zooming to your video. With that in mind, this mode could solve problems involving how to zoom in on Capcut video.
For a complete guide on how to zoom in on a video in Capcut editor using the scale transform tool, please proceed to our five-step guide on using the scale zooming option below.
1. Go to Capcut online and open their video editing window. Afterward, upload the media file that you want to use as an asset for your video production needs by clicking on the Upload button.
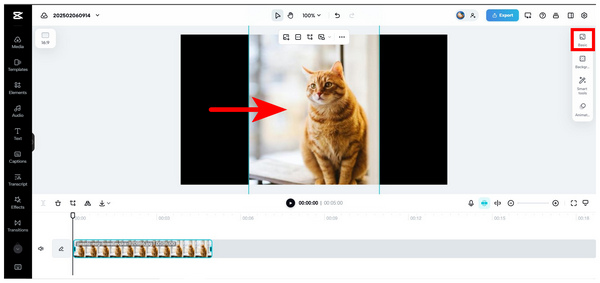
2. Once the media file has been uploaded, click on it to reveal the media file adjustment options available in Capcut. Select the Basic option.
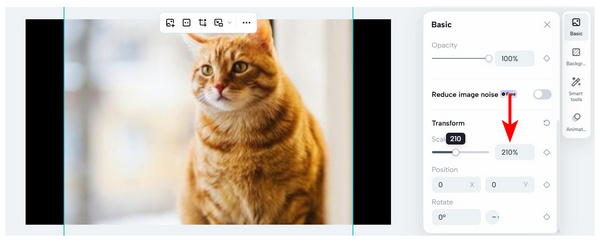
3. Inside the Basic editing menu, find the Transform options. Then, adjust the Scale bar with a percentage value using your cursor. You can also change the numerical value on the right side of the adjustment bar.

4. As you adjust the bar to the left or right, the selected media file will be zoomed in and out in real-time. Since you have complete control over this option, you can choose the zooming intensity you want to apply.
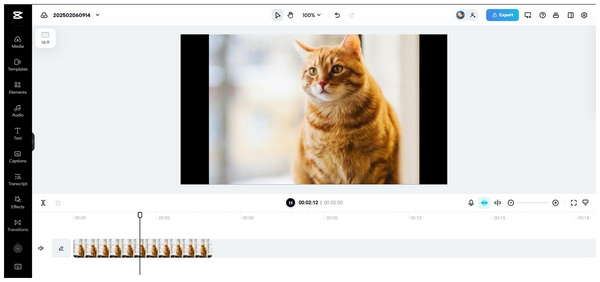
5. Once satisfied with the zooming value, close the media file adjustment options and play the video you edit in the preview window.
Although not as accurate as the zooming effect option, scale adjustment is better if you want to zoom the entire media file you edit thoroughly.
For more detailed zooming adjustments, an option to only zoom in on a specific keyframe in Capcut is also possible. As its name suggests, keyframe zooming functions by only applying the zoom effect in a set frame on the video. Due to the complexity of this zooming option, it might be the most challenging to use compared to the scale and effect of zooming.
If you wish to learn how to zoom in on Capcut on PC, please proceed to our detailed tutorial on how to zoom in on specific keyframes below.
1. Open Capcut on your PC using their online tool. Then, upload the media files you wish to use in the video production by clicking on the Upload option.

2. With your media files added to the editing timeline, right-click on it and select Split. This option will separate the portion of the video you set as a separate split. The media file now has two different elements.
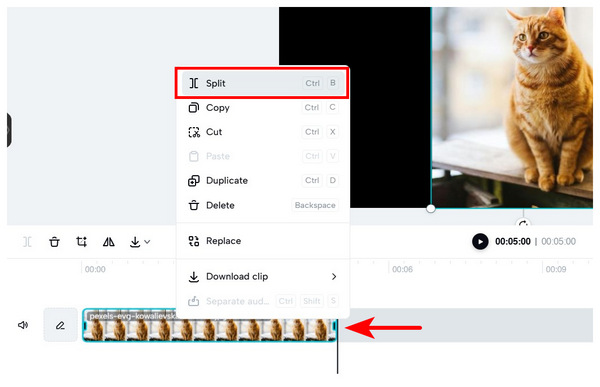
3. After splitting one portion of the video, move to the other side of the divided video. Then, repeat the Split option that you did in the second step. Split the video once more.

4. Click the video that has been split from both sides of the media file. Then, select the Effects tab and search for Zooming effects similar to the first method in this article.
5. To apply the Zooming effect in the keyframe that you have divided, place the Zoom effect above the keyframe that you have split from the original media file. Once you preview the video, only the portion that you have selected will be the one with a zooming effect.
Since keyframe zooming is the most complicated method of how to do zoom in effect on Capcut, we will now proceed to the fourth option of this article, where a simple-to-use Capcut alternative will be featured. Unlike the zooming options available in Capcut, the steps featured in the alternative below will be much more straightforward.
Compatibility: Windows 11/10/8.1/8/7, Mac OS X 10.12 or above.
Now that we have highlighted the zooming effects available in Capcut, we can proceed to the even more beginner-friendly option that you can use to apply zooming effects in your video with none other than AnyMP4 Video Convert Ultimate.
This versatile video converter tool supports video zooming with the help of its MV Editor feature for high-quality videos up to 8K/5K/4K. Zooming effects might be applied in the software using the multiple zooming options: the video cropper tool, aspect ratio editor, and the zoom mode function.
If you want to apply video zooming and remove specific sections of the video, the cropper tool should be your best option since this zooming mode can fix both issues. On the other hand, if video resizing is your primary goal with only zooming as a secondary objective, use the Aspect Ratio option, which can be used to set your video to 16:9, 5:4, 1:1, 9:16, or other popular aspect ratio of your choice. Finally, users looking for standard zooming should use the Zoom Mode option, which offers three zooming modes: Letter Box, Pan & Scan, and Full.
Equipped with three video zooming options, AnyMP4 Video Converter Ultimate’s MV Editor makes for better-zooming software than CapCut. This is because the software offers a combination of versatility and convenience that is unmatched by the basic editing options in CapCut.
Moreover, videos that will be edited using this tool may have their elements adjusted within the app itself, including the file name, set download folder, and quality-based exporting parameters such as output format, resolution, encoding, and quality.
Now that we are done introducing the best Capcut alternative in the market let us proceed to the step-by-step guide on how to zoom in on the Capcut alternative: AnyMP4 Video Converter Ultimate.
First, download the software to follow the tutorial more easily.
Secure Download
Secure Download
1. Open AnyMP4 Video Converter Ultimate and go to the MV Editor tab labeled MV in the tool’s interface. Then, click on the Add File button below the editor menu.
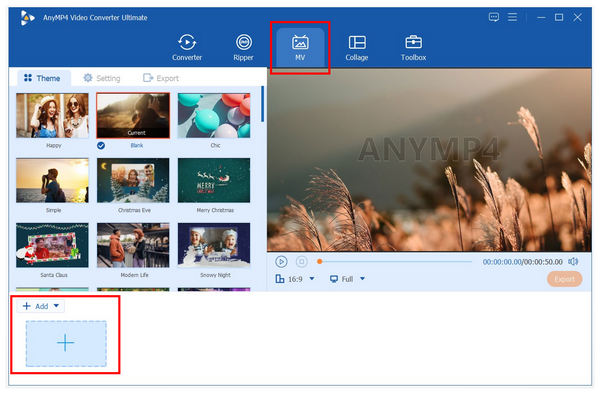
2. Once the file you want to edit has been added, click the Edit button above the editing timeline. This menu will open multiple video editing options that you can use to apply different modification adjustments to your video, including the zooming effect.
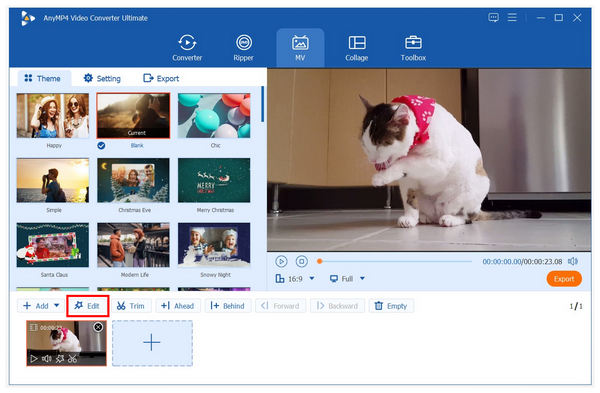
3. Inside the Edit menu, you can now adjust the cropping tool to add a zooming effect to the video that you are editing. Simply change the yellow square on the video on the left side of the interface. The video on the right is the preview window. Alternatively, you can adjust the Zoom Mode that will be applied to your modifications. Simply click on OK once you are satisfied with the zoom effect on the preview side.

By following these simple steps, applying the zoom effect to the video you edit will become much simpler and easier to use than Capcut. With that in mind, download AnyMP4 Video Converter Ultimate as your most versatile video editing software.
Now that we have provided you with different ways how to zoom in on Capcut slowly, we hope this article has helped you in future video editing endeavors. If the proposed Capcut alternative has captivated your interest, download AnyMP4 Video Converter Ultimate for free on the link below.
Secure Download
Secure Download
 Updated by Angelica Liwanag to Edit Video
More readings
 How to Reverse A Video on CapCut [Complete Tutorials]
Learn how to reverse a video on CapCut in this post. You will get to know how to reverse a video online and on the app, along with the best alternative to use.
 CapCut Video Upscaler: Enhance Footage in High Quality
If you want to upscale your video and don’t know which tool to use, worry not. Check our post and learn more about CapCut video upscaler and its capabilities.
 CapCut Vs. InShot: Which is Better in Video Editing
Struggling to choose between CapCut vs InShot for editing? Check our post and learn their features, pros, cons, and who each app is best for.
 How to Crop on CapCut PC and Mobile: A Complete Guide
This article will serve as your guide to help you learn how to change the ratio in CapCut video editor on different platforms where the software is available.