Blurring in digital images is a common quality error that is usually present in most modern photos. Since it is a common issue, the solution to fix this problem is, fortunately simple to do as well. In this article, we will provide a complete guide on how to make unclear photos clear and better looking by providing tutorials on four editing software that can be used to solve this issue. We will provide a detailed step-by-step guide on how to use each software, which could be useful for all your image editing needs. These tools range from online tools and traditional editing software.
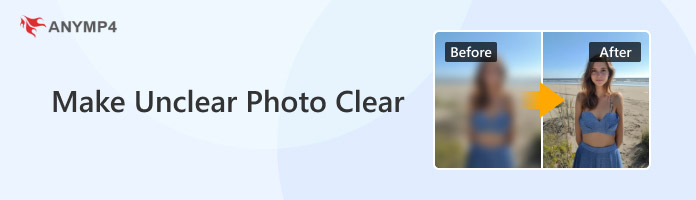
Image blurring refers to unclear sections of an image that make details under the blurring become low in quality due to errors during picture taking, the editing process, the movement of the subject, or because of the condition of the camera itself.
Some of the common types of this error are motion blur triggered by subject movement, out-of-focus blur, which can be caused by the condition of the camera, or camera shaking blur, which is commonly a stability issue. On top of this, environmental factors such as lighting can also cause unnecessary blurring.
Now that we have mentioned the common causes of image blur, we can proceed to the tutorial focused on how to clear a picture that is blurry using online image enhancement tools. Afterward, we will also present the solution that can be used from traditional image editing software.
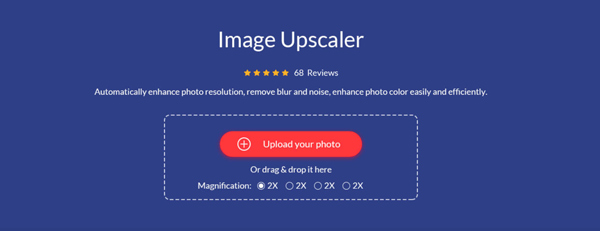
We will start this guide by providing the online tool that is developed for accessibility and ease of use with none other than AnyMP4 Image Upscaler Online. This program is perhaps one of the easiest image enhancement tools to use when it comes to the competitive AI-supported market. Moreover, it is also free to use and very efficient when it comes to the image upscaling performance that it provides.
AnyMP4 Image Upscaler Online is capable of enhancing blurry images by improving the resolution of digital photos that are upscaled through it. By improving the resolution of these images, the sharpness of the photos will be truly improved, causing any form of blurring to be eliminated. Moreover, other elements of an image, such as texture, edges, colors, and lines, will be enhanced as well.
PROS
CONS
To learn how to use this online tool, we have provided a detailed step-by-step guide on how to use it below.
1.Go to AnyMP4 Image Upscaler Online’s website. Then, select the Upload Photo button or click and drag the image that you want to enhance from your file manager. Wait for the image to be uploaded.
2.Once the image has been added, simply select the magnification option that you want to apply. You can choose between 2X (SD), 4X (HD), 6X (SHD), and 8X (UHD). Among them, even the 2X option is enough to fix all types of blurring.
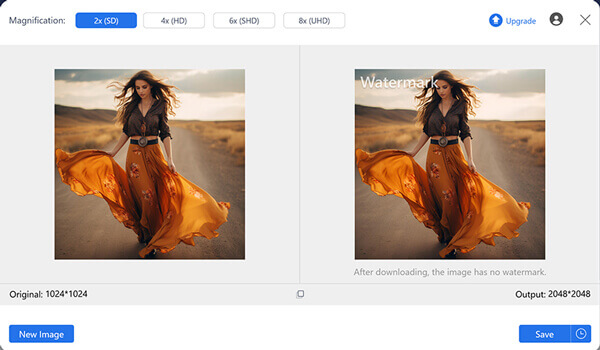
3.Now that you have selected the magnification or upscaling option that you want to use, simply click on Save to download the enhanced image back onto your computer.
By following this three-step guide that we have provided above, fixing image blur has never become easier. This option is the most advisable for users who want to fix images or improve photos that are already good in quality.
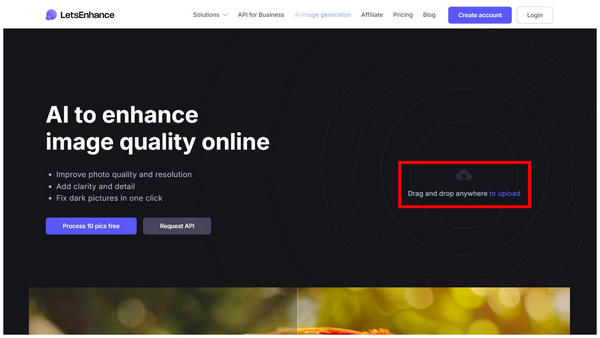
The second option that we will feature when it comes to online tools is Let’s Enhance AI Photo Enhancer. This option is also fully capable of improving the quality of images that are processed on it. However, the tool has an unfortunate downside of requiring its new users to create an account or sign up using their Google account to use their services.
Moreover, the image enhancement process of the tool involves adjusting tricky options and advanced AI tools that are catered to be used by experienced editors. Despite that, their default settings are still serviceable enough to make photos better quality overall.
PROS
CONS
To learn how to use Let’s Enhance, please read the four-step guide on how to use it below:
1.Go to the Let’s Enhance website and drag the image that you want to enhance or click on the Upload button.
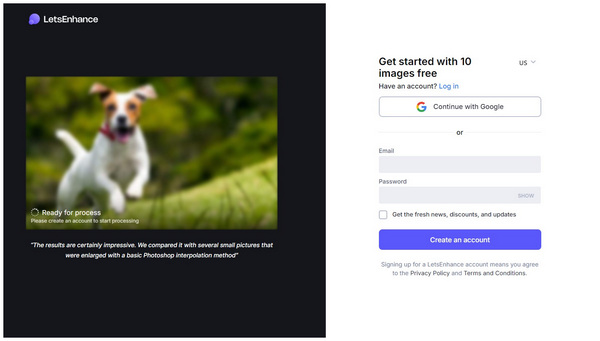
2.To complete the upload process, log in to the website first by creating an account or clicking on the Continue with Google option.
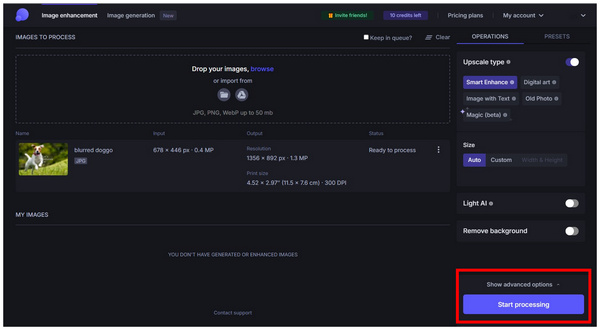
3.After logging in to an account or your Google account, you can adjust the adjustment options that are available on the website. Otherwise, simply click on Start Processing and wait for the image to be enhanced.
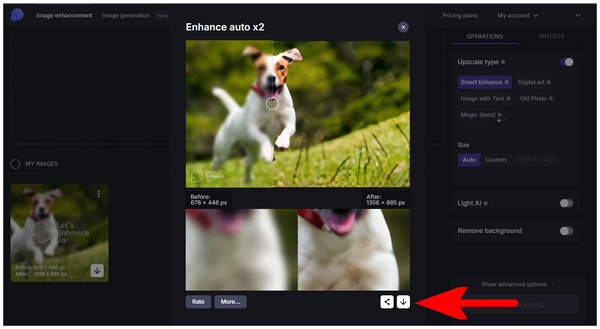
4.After the enhancement process, you can preview the blurry image that you want to enhance. To save it on your computer, click on the Download button.
When using Let’s Enhance for the first time, you can process photos for free by spending the ten credits that are available for the online tool’s new accounts. Unfortunately, these free credits are the limitation of using their services for free. Users who want to learn how to make a picture not blur more than ten times are obligated to buy their premium version.
Adobe Photoshop is probably the first software that will come to mind when it comes to traditional image editing software. This is because the software is the pioneer of photo editing and it is capable of applying all forms of image enhancement to files that are edited in it.
Since the software is a pioneer in photo editing, basic image enhancement, such as fixing image blur and increasing image resolution, can be done within the software using multiple options. With that in mind, our provided guide below will involve one of the more advanced options for fixing image blur. This is selected because this option is highly customizable and also simple to apply.
PROS
CONS
1.Open the image that you want to enhance and create a Duplicate Layer.
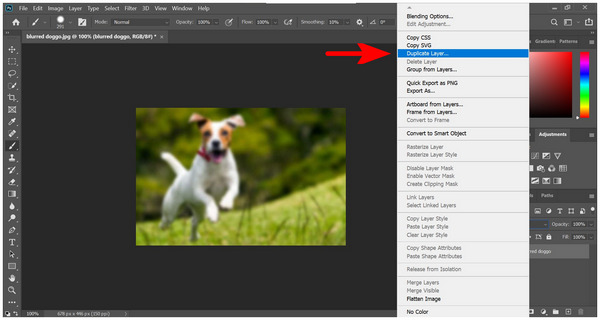
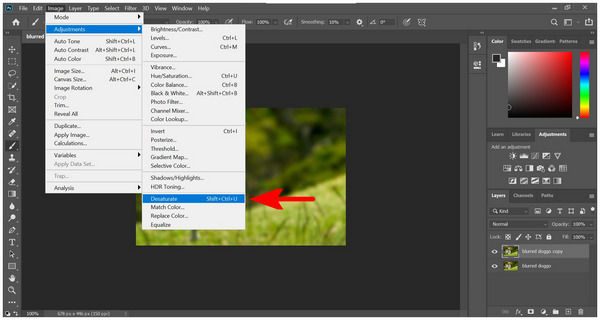
2.In the Duplicate Layer, click on Image, Adjustments, and select Desaturate.
3.Next, click on Filter, Other, and click on High Pass.
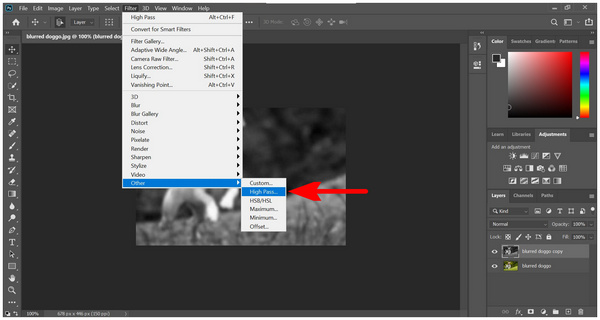
4.In the High Pass settings, set the Radius value to 3.0 Pixels.
5.Set the duplicated layer’s blending option to Linear Light.

6.With the help of the Linear Light blending option, the duplicated layer will enhance the sharpness of the original image layer below it.
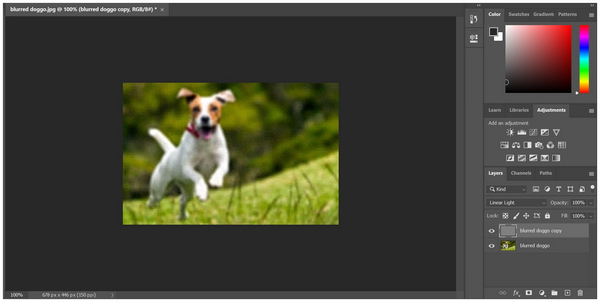
Although tricky to apply, this option is highly customizable since it involves using the layer system available in Photoshop. This means that adding a layer mask is possible, which makes customizing the application of sharpness easier.
GIMP could be considered as the free-to-use counterpart of Photoshop. This is because this open-source program was developed to provide similar tools that are also available in Adobe’s photo editor software. Because of that, most of the editing options that are available in the tool feature above are also available in GIMP.
The biggest advantage of GIMP versus Photoshop is that it is free to use and slightly simpler to learn. Unfortunately, its weakness lies in the design of its toolbar, which might be confusing to learn for experienced Photoshop users and even more for complete beginners.
PROS
CONS
1.Open the blurred image in GIMP. Then, click on Filters, Enhance, and select Sharpen (Unsharp Mask).

2.In the Sharpen (Unsharp Mask) menu, adjust the Radius and Amount of sharpness accordingly. The Radius value should be increased. In contrast, the Amount should be reduced.
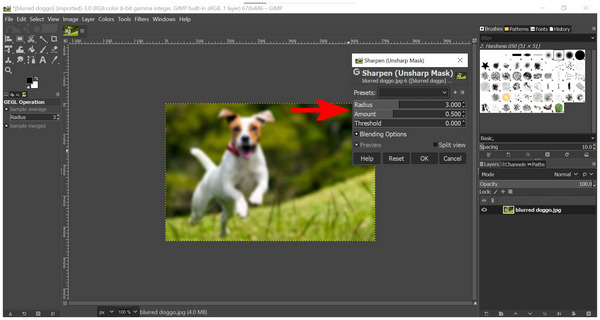
3.Once you are satisfied with the effect of the Radius and Amount adjustments, click on OK in the Sharpen menu.

By following this simple three-step guide, adjusting images in GIMP can now be done simple and easy. On top of that, it is also highly customizable, which promotes skill expression for more advanced editors.
To avoid fixing unclear photos, making sure that raw photos already have good quality is a good first step. With that in mind, making sure that your camera settings are properly adjusted is a good first step. To avoid motion blur, using camera stabilizers is a solid option to ensure that blurring from unnecessary motion is avoided. Finally, good lighting will always be good not only for avoiding blur but also for overall image quality enhancement.
Now that we have provided you with a detailed tutorial on how to use four different software to fix unclear images. We hope that this article has proved useful for all your image enhancement needs.
To help other users looking for similar solutions, make sure to share this article online.
 Posted by Angelica Liwanag to Edit Photo
More readings
 How to Take High-Resolution Photos with iPhone
Read this post to discover multiple ways to learn how to take a high-resolution photo on an iPhone. We will explore all the settings that need to be adjusted.
 How to Edit Overexposed Photos To Improve Image Lighting
Looking for a way to fix overexposed photos? Read this article to learn the easiest online tool to solve this problem along with three more alternatives.
 Solutions and Tips to Fix Unfocused Photos
Read this article to discover the easiest way to fix blurring in unfocused pictures using the best online tool and traditional editing software like Photoshop.
 How to Fix Grainy Images Using Three Different Solutions
Looking for software that can be used to reduce image noise on grainy images? Read this article for a guide to reduce image graining using three editing tools.