FaceTime is a great way to keep in touch with your friends and families. It is completely free of charge and no extra installation. Sometimes, you need to record FaceTime to save important conversations.
The procedures are pretty different depending on what device you are using. In this post, you can learn the best ways to record FaceTime on iPhone and Mac to produce high quality recordings.

FaceTime is not only available to iOS devices, but also can be used on Mac. Let's start with recording FaceTime on Mac since it is easier. QuickTime Player is another native utility on Mac. It has a screen recording feature that you can use to capture FaceTime chats directly.
Step 1: Open your QuickTime Player from your dock or the Applications folder. Click File > New Screen Recording to open the FaceTime recording window.
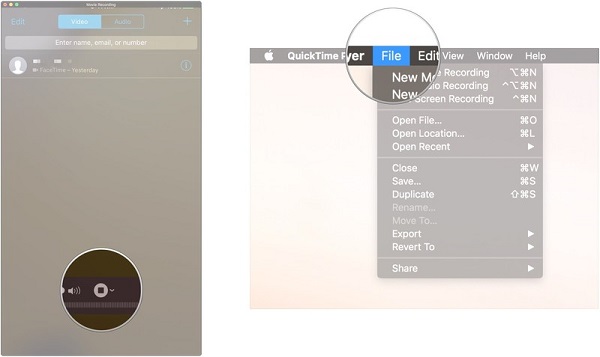
Tip: To only record FaceTime conversation's sound, select New Audio Recording instead.
Step 2: Click the Arrow icon next to the Record button to open the context menu. Make sure to choose Internal Microphone under the Microphone section. Plus, set the Quality and decide whether to Show Mouse Clicks in Recording .
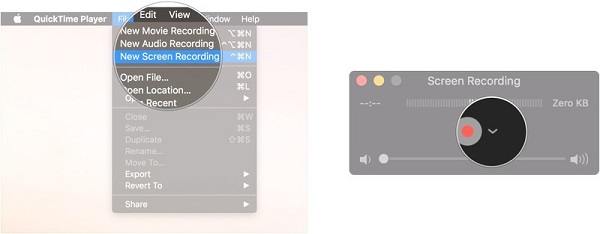
Step 3: Next, start the FaceTime app and make the call you want to record. Click the Record button in QuickTime. Then click and drag over the FaceTime window to only record the call.
Step 4: Once your conversation is complete, click the Stop Recording button in the menu bar. Then hit File > Save to open the export dialog. Write down a name and choose a specific directory. Click the Save button to export the FaceTime recording.
It is well-known that the screen recording feature has been introduced to iOS 11 and above; however, it is not designed to capture FaceTime calls due to legal reasons. If you expect to record FaceTime on iPhone, you have to use a third-party screen recorder app, such as Record it, Go Record, etc. We use Record it as the example to show you the procedure.
Step 1: Make sure to install the FaceTime recorder app on your iPhone, and make a FaceTime call.
Step 2: Open your Control Center, tap Screen Recording and select Record it! Capture to start recording the video call.
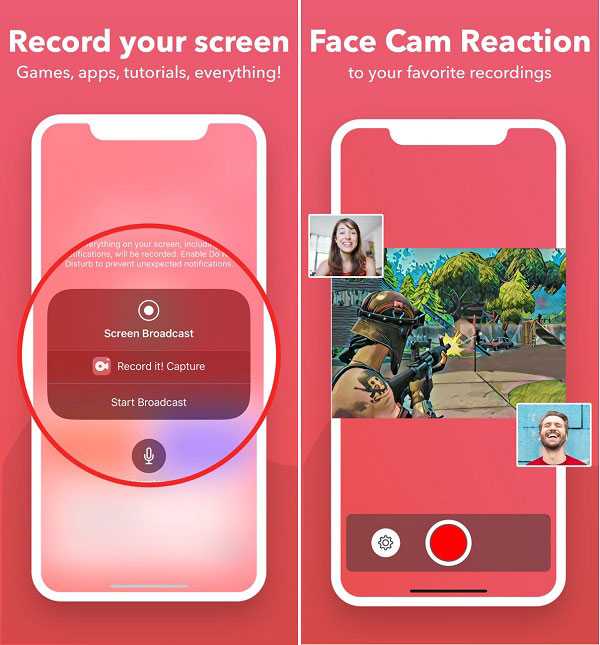
Step 3: When the FaceTime call is done, tap the Stop Recording icon to save the recording to your memory.
Step 4: Next, go to the My Recording folder, select the latest recording, and you can edit it further or share it to YouTube directly.
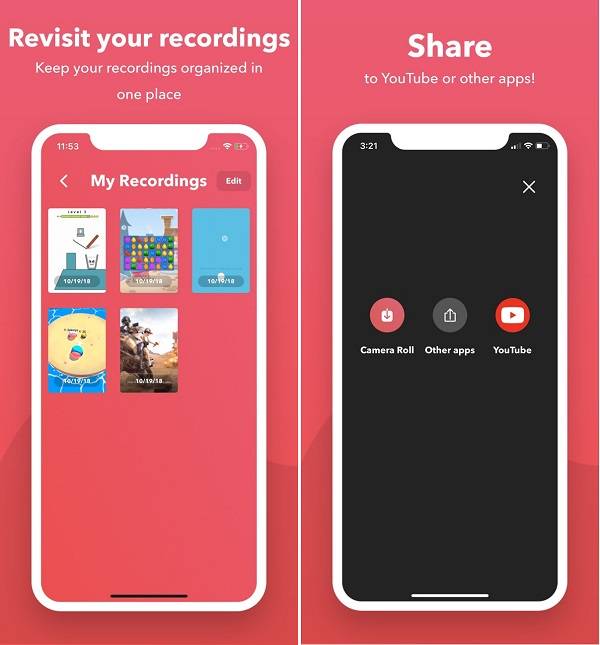
You are able to use iPhone screen recorders to record your FaceTime calls on iPhone directly.
In addition to FaceTime recorder apps, you can also capture iPhone FaceTime calls on Mac computer.
AnyMP4 Screen Recorder for Mac is a powerful screen recorder to save iPhone FaceTime conversations.
In short, it is the easiest way to record iPhone FaceTime calls on Mac.
Secure Download
Secure Download
Step 1: Install Screen Recorder for Mac
Get the best FaceTime recorder installed on your Mac computer from the above link. There is another version for PCs.
Then launch it from the Applications folder and choose Screen Recorder in the home interface.

Step 2: Set up the FaceTime recorder
Next, mirror your iPhone screen to Mac with AirPlay and a screen mirroring app, such as Reflector.
There are four options on FaceTime recorder:
Display is used to capture Mac screen.
Webcam will record everything in front your webcam.
System Sound is able to add the sound from your system to the recording.
Microphone will capture your voice and add it on FaceTime recordings.
Enable the options based on your need and set the recording area according to the iPhone screen.
Then click the Settings icon at the upper right corner to open the Preferences dialog. Here you can set the options involved with Recording, Mouse, Hotkeys, Outputs, and more

Step 3: Record FaceTime on iPhone
Make a video call in the FaceTime app on your iPhone, and click the REC button on the FaceTime recorder to start capturing it. When your call is done, click the Stop icon. On the preview window, you are able to view the iPhone FaceTime recording, and then hit the Save button to export it.

QuickTime is the native media player with a screen recording feature. So, it is another way to record FaceTime on iPhone with Mac.
Step 1: Connect your iPhone to your Mac via the Lightning cable.
Step 2: Open your QuickTime Player and click File > New Movie Recording to open the FaceTime recording screen.
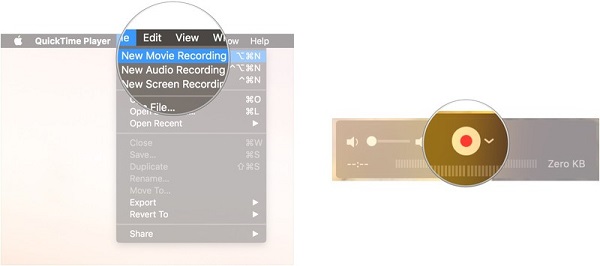
Step 3: Click and expand the Arrow icon and select your iPhone under the Camera section. Then choose the proper audio source and quality. Make sure the volume bar is turned up.
Step 4: Open the FaceTime app on your iPhone and make a call. Click the Record button in QuickTime on Mac immediately.
Step 5: Once you have finished your call, click the Stop button in QuickTime. Hit File > Save and give the recording a name on the popup window. Finally, click Save to save iPhone FaceTime recording to your Mac.

Note: QuickTime is only able to save FaceTime recordings in MOV.
Now, you should understand how to record FaceTime on iPhone with or without a Mac computer. With a third-party app, you can capture voice and images of your FaceTime call on iPhone. On the other hand, AnyMP4 Screen Recorder for Mac is able to capture iPhone FaceTime call on Mac simply. If you have other questions or suggestions, please leave a message below this article and we will reply you as soon as possible.