The first thing users will see when they insert a disc is a DVD menu. It establishes the video's tone and is a primary aspect of the viewing experience. A DVD menu provides a quick and straightforward way to access the content users wish to watch while navigating the disc. Users may discover a way around their DVDs by using professional DVD menu-making software to produce the menu for their project. It also establishes users' expertise and respectability.
In this article, we want to recommend the 5 best DVD menu makers to help you create a top-notch DVD menu for movies or video production. So without further ado. Let's get this started!

What precisely is a DVD menu? A DVD's user interface is represented by its menu. Additional buttons, images, backgrounds, layer sets, text items, and shapes are included. Further, this section will discuss what their purpose is.
Moreover, users can find different conventions, like audio, on a DVD menu. The movie's theme music is often an audio track that plays during a DVD menu. Aside from the music, the video is essential to the menu since it provides users with a DVD preview. Users can occasionally find Easter Eggs in a DVD menu.
DVD Menu Structure
A DVD menu, which the users see as a backdrop image with buttons, is just one video frame without audio. The choice switches between the buttons displayed when the user clicks the keys on the remote control; its look changes as the button is chosen or activated. By pressing the Enter key, users may activate a particular button and either follow its connection to its destination or carry out a command showing the subtitle text.
Buttons
On a DVD menu, a button is an option that users may choose. Typically, users navigate a menu to find the button they want to pick before pressing a select button. The DVD may start playing a video, change to another menu, or show a still picture once the button is pressed.
Images
Images are tiny graphics, such as arrows or separators, which can be placed over backgrounds or other assets. They usually have areas of transparency that allow other images or backgrounds to show through. Images are typically flat image files and use one of several standard graphics file formats.
Backgrounds
A menu's backdrop is made up of more prominent visuals called backgrounds. Typically, these are PSD files with just a backdrop layer and the goal resolution of the television standard the project aims for.
Layer sets
Photoshop users are likely familiar with layer sets and PSD files that include multiple levels but no backdrop layer. Layer sets are frequently used to arrange text, shapes, and images in an organized fashion. Users should note that if a Photoshop file has a single layer set and each layer has a unique name, the layer set will be handled as a button rather than a layer set.
Text items
Text items are PSD files with a single layer containing stylized text and no backdrop.
Shapes
PSD files called Shapes are made up entirely of vector shapes. In contrast to images, they are scalable without compromising quality.
You may be confused about why we need a DVD menu maker, there are many situations that need a DVD menu creator:
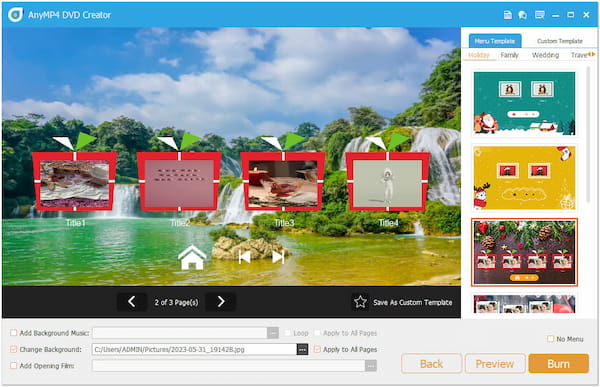
Firstly, let's see the most recommended DVD menu maker, AnyMP4 DVD Creator, which provides rich settings for you to edit the DVD menu. It offers multiple menu template topics, like Holiday, Family, Wedding, Travel, and others. What's more, if you are not satisfied with the provided menu templates, you can also customize the templates through the Add Background Music, Change Background, and Add Opening Film options. After customization, you can click the star icon to save it and use it later. This best software for DVD menu creation is compatible with Windows and Mac computers.
Secure Download
Secure Download
PROS
CONS
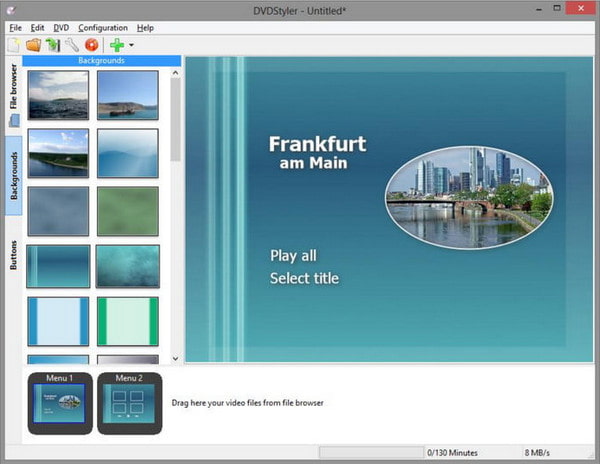
When it comes to creating a DVD menu, DVDStyler is one of your priorities. As one of the top DVD menu makers, it provides rich functions for you to optimize the DVD's visual effects. Regarding the menu templates, it offers Basic, Birthday, Nature, Seasons, and many other topics for you to choose from. Moreover, you can choose the title selection and chapter selection to edit them respectively. If you want to adjust menu text, Menu Editor helps you to change the font, color, and size of the title.
PROS
CONS
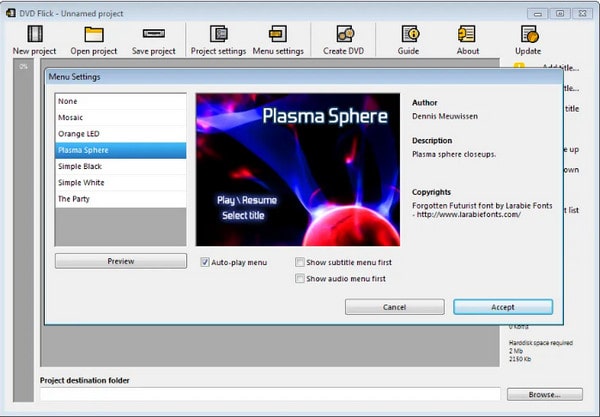
DVD Flick is a free Windows DVD menu creator. It provides you with various DVD menu templates, and you can use them directly. If you want to create new menu templates, you are allowed to change the background image, text size, and other parameters.
PROS
CONS
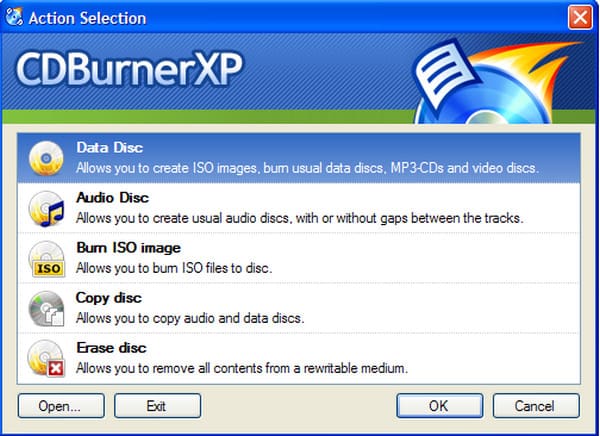
CDBurnerXP is also a commendable DVD menu creator. It offers DVD menu options to create DVD menu templates by adjusting the background images and adding buttons. It can burn multiple types of DVDs, including DVD-RW, DVD+R, DVD+RW, etc.
PROS
CONS
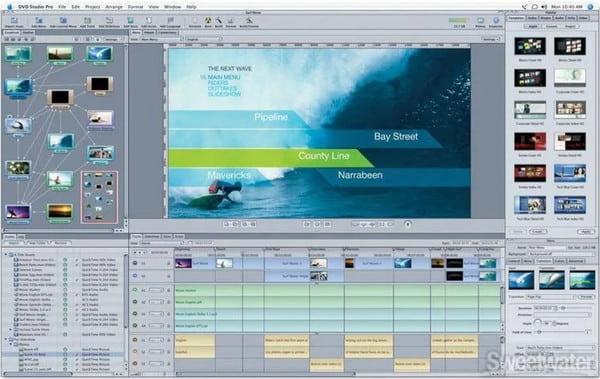
DVD Studio Pro is one of the top DVD menu creators Mac, which was released in 2001 by Apple. It provides a variety of royalty-free theme templates designed by Apple that users can customize. If you want to add buttons to control the DVD playback, you can at most add 36 buttons. More importantly, you can use Photoshop files with layers to make static menus and buttons and make dynamic menus with video streaming.
PROS
CONS
Now, follow us to learn how to use the most popular DVD title menu maker, AnyMP4 DVD Creator, to edit and adjust the DVD menu effect.
1. Click the Free Download below to install AnyMP4 DVD Creator on your computer. Follow the installation process on your screen to complete the setup process of the best DVD menu maker.
Secure Download
Secure Download
After installation, ensure that a disc is inserted into your drive. Then, run the DVD menu maker. Upon opening the program, select the DVD disc option as your disc type. Next, click the Add Media File button to import the files.
Note: You are allowed to add multiple video formats, like MP4, WMV, MKV, MOV, etc., and check them to burn to one DVD disc.

2. Once all the files have been uploaded, tick the Check All box to select all the files. Then, click the Next button. Alternatively, before proceeding, you can modify each file by selecting the Power tools tab. Here you can edit the videos, audio, subtitle, etc.
Note: It allows you to add the external subtitles in the format of SRT, ASS, and SSA for the video you are watching.

3. After clicking the Next button will open the menu template window where you can create and customize menus. To customize, click Add background Music, Change Background, and Add Opening Film. To customize text, double-click the text itself. Afterward, click the Preview button to sneak into your DVD menu.
Note: Besides the above settings, it also offers many topics of menu templates and you can choose and preview the visual effects. Moreover, you can customize the menu template and save it.

4. Once the DVD menu is all set up, click Burn. In this section, choose a destination of your output, and select the Folder path to specify the local file from which you want to save the output. If you wish to have an ISO file, tick Save as ISO. To burn it on a DVD, tick the Burn to disc box, then select your preferred Burn engine (VSO, CdrTool, or IMAPI). Following that, click the Start button. The program will then start converting files and generate the title menus.
Note: It provides a free trial version, and you can try it before the subscription.

1. Is there an online DVD menu maker?
There are no online tools for creating menus and DVD creation. This type of comprehensive work is one of the reasons. Moreover, making DVDs can sometimes take too long, and the video files take up a lot of space, which offline software might need help to handle.
2. Can Windows Movie Maker create a DVD menu?
Microsoft Windows comes with a native software called Windows Movie Maker. This tool's primary use is for video editing; making DVD menus is not one of its primary functions. If you wish to make one, you can do it with Windows DVD Maker.
3. Does the Mac have a DVD menu maker?
Unfortunately, macOS doesn't come with a built-in tool for DVD creation. Yet, it does not exclude you from creating a DVD menu. If you want a custom DVD menu maker, AnyMP4 DVD Creator is the tool. Besides, this program is compatible with Mac and has remarkable capabilities to flavor your work as you edit it.
Indeed, after reading this post, you will only leave with an understanding of how to make a DVD menu. A video, as they say, is like a storyboard, but it will be more impressive if your DVD menu makes a big impression as soon as your viewers put it in their player. Although Adobe DVD menu maker is a great tool, many need help utilizing it. However, if you use AnyMP4 DVD Creator to burn DVDs and create DVD menus, you won't need to install any additional software.