Xvid is a video codec library following the MPEG-4 standard, specifically MPEG-4 Part 2 Advanced Simple Profile (ASP). It uses ASP features such as b-frames, global and quarter pixel motion compensation, lumi masking, trellis quantization, and H.263, MPEG and custom quantization matrices. In contrast with the DivX codec, which is proprietary software developed by DivX, Inc., Xvid is free software distributed under the terms of the GNU General Public License. This also means that unlike the DivX codec, which is only available for a limited number of platforms, Xvid can be used on all platforms and operating systems for which the source code can be compiled.

To convert Xvid to MP4 and then you can enjoy the video on any portable video device whenever and wherever you go. With AnyMP4 Xvid to MP4 Converter for Mac, we can easily convert Xvid to MP4 for compatible with most portable media devices to get rid of the limitation of playing Xvid video on iPhone, iPad, iPod, Xoom, Kindle Fire, and more. And you can use it to add some effect to the video, like adjust the video effect, trim video length, crop video frame, and add text/image watermark. Here is the step-by-step guide to help you how to convert Xvid to MP4 on Mac. First of all, you should download this Xvid to MP4 Converter for Mac software and then install it on your Mac.
Secure Download
Secure Download
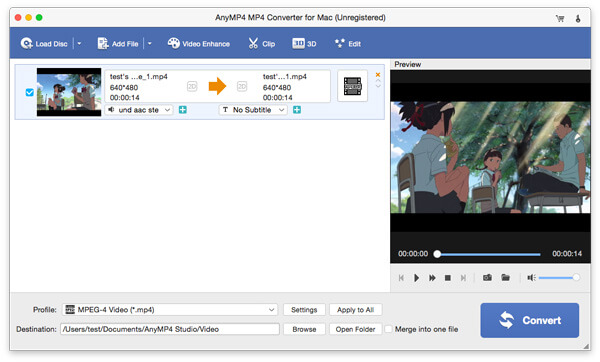
After installing AnyMP4 Xvid to MP4 Converter for Mac software, you can launch the program on your Mac to open the main interface. And then click "Add Video" button to add Xvid video to the program, and you can click "Add Video" drop-down button to select the "Add Folder" option and add an array of videos to the program at the same time.

Click "Profile" drop-down button to open the "Profile" list and you can press "MP4" to the quick-search box to find the MP4 format. You can choose the one as the output format according to yourself.

To optimize the video effect, you can click "Edit" button to open the "Edit" window, and then start to adjust the video brightness, contrast, saturation, hue and volume. Then click "Trim" button to enter the "trim" column to cut off the unwanted part of the video, and also crop the video frame in the "Crop" column, and even add text/image watermark in the "Watermark" column.

At last, all you have to do is to click "Convert" button, and it supports batch conversion, all the checked videos would be converted to MP4 videos and finish the process only in a short while.