Nowadays, streaming videos have become the most popular video-watching method. However, there are still many DVD lovers who think that the DVD player is the best way to watch high-quality movies. To have a better DVD-watching experience, you can connect your DVD player to the TV. If you don't know how to do it, read this article and we will introduce how to connect your DVD player to the TV with HDMI to help you watch DVDs more enjoyably on TV.

Connecting the DVD Player to the TV with an HDMI cable is one of the most efficient ways to enjoy DVDs on a big TV screen. Prepare your DVD player and TV with an HDMI port. Before connecting your TV and DVD player, unplug them. In addition to protecting the equipment, this will lessen the chance that you will receive an electric shock.
Then, follow us to learn the detailed steps.
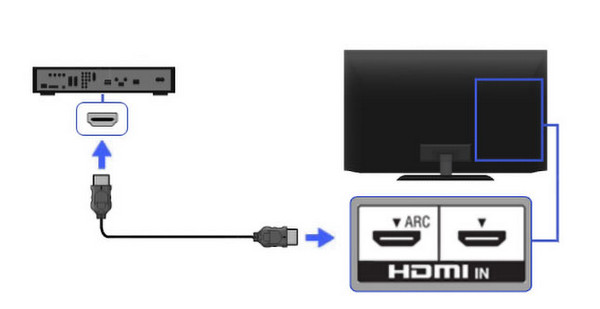
1. Plug one end of the HDMI cable into the TV's HDMI port, and the other end into the HDMI OUT jack of the DVD player.
Tip: An HDMI port is present on the majority of contemporary TVs. Usually, these ports are marked 'HDMI'. If there are many ports, a number will be assigned to each one.
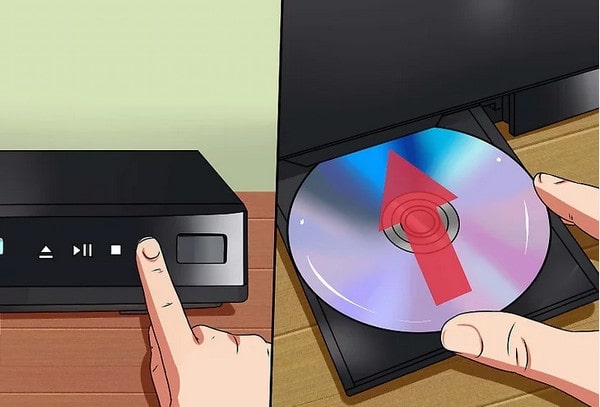
2. Connect the TV and DVD player to power and make sure the power cord is not too loose or tight to influence receiving signals. Insert a DVD disc into your DVD player.
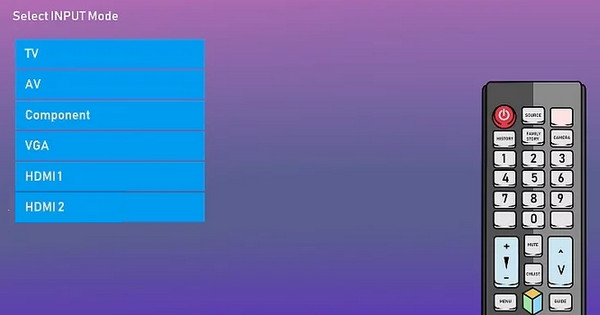
3. Open the TV and press the source button on your TV or remote control to switch the TV to the appropriate input. You should choose the input option that accords with your HDMI cable, such as HDMI 1.
Note: When we try this process, we don't know what to pick, and we try different options till we see the DVD video on the TV.
It is very easy, right? With a HDMI cable, you can easily watch DVDs on TV. If your TV and DVD player both support the HDMI cable, have a try!
If unfortunately, your DVD player is old and doesn't have an HDMI port, you can also use A/V cables to connect the DVD player to the TV. Without further ado, let’s take a look at the specific steps.
1. Plug the one end of the A/V cables into the DVD player's Video OUT port. It needs to be noted that there are three colors of cables, the red and white plugs are for audio, and the yellow plug is for video.
Tip: A border or line dividing the group from the other inputs is frequently used to identify the input sockets.
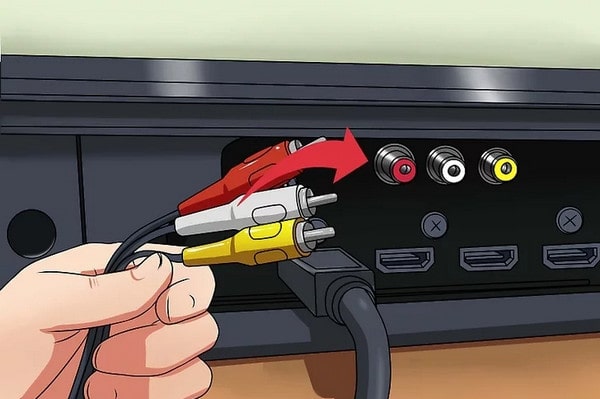
2. Attach the opposite end of the A/V cable to your TV's A/V IN ports, which are also called the yellow/white/red or Video/L/R connectors. Similarly, all of these cords must be plugged into the same-colored jacks.
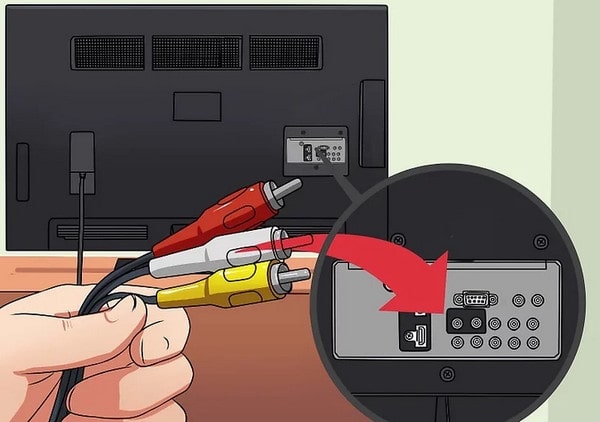
3. Insert one DVD disc into your DVD player. Turn on your TV and DVD player after plugging in the power cords.
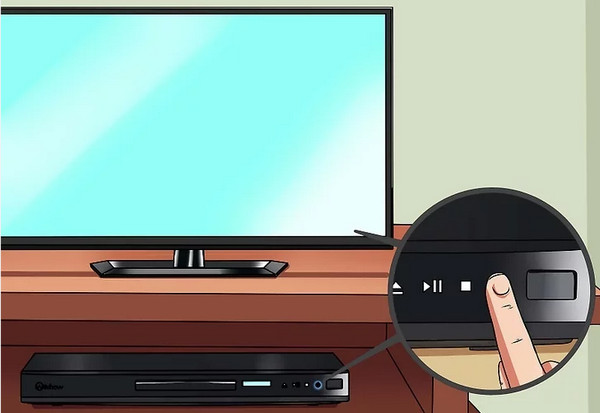
4. Press the source button and choose the A/V input option and you can see DVDs on your TV.
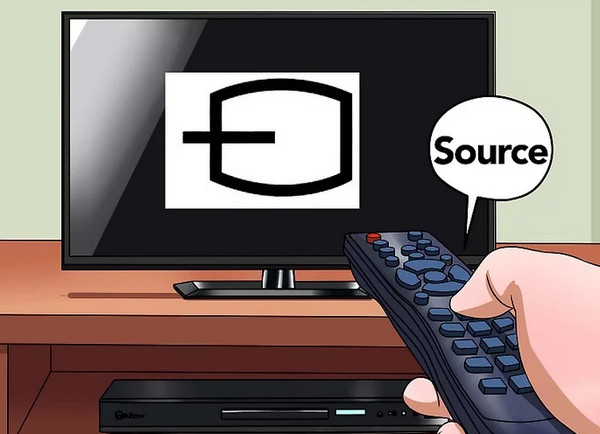
Note: The plugs on old cables may start to come loose due to fraying. An inadequate or nonfunctional connection may result from this. Try a new cable to see if that fixes the issue.
The steps are intuitive and overall similar to using an HDMI cable. What makes the process a little complex is that you need to pay attention to matching the different colored cables to the correct jacks.
Besides connecting DVD players to TVs with HDMI cable and A/V cables, you can also watch DVDs on TV without a DVD player. We want to introduce one powerful DVD ripper to help you watch DVDs on TV without a DVD player.
AnyMP4 DVD Ripper is an excellent DVD-ripping software. You can use it to load DVD discs, ISOs, and folders, and convert and save them to the USB drive. Then, you can connect the USB drive to the TV to play DVDs without a DVD player. As a multimedia device, the TV supports playing multiple video formats, such as MP4, AVI, WMV, etc., and this powerful ripping tool supports these output formats.
It provides easy and intuitive operation steps for you to master them easily. What's more, it allows you to manually customize parameters, such as codec, resolution, bitrate, and others, which can improve your TV viewing experience.
Now, here's how to get started.
1. Click the below button to download AnyMP4 DVD Ripper and install it on your computer.
Secure Download
Secure Download
Open this ripping tool and click Load DVD/ISO/Folder to add a DVD file.
Note: When we use this tool, we think the interface is clear so that we can easily know the function of every setting. Although there are some pure icons without explanation, move the cursor to them and we can know their functions.

2. Click Output Format, choose Video, and select the MP4 format that can be played on TV. You can choose HD 1080P to enjoy the wonderful video effects.
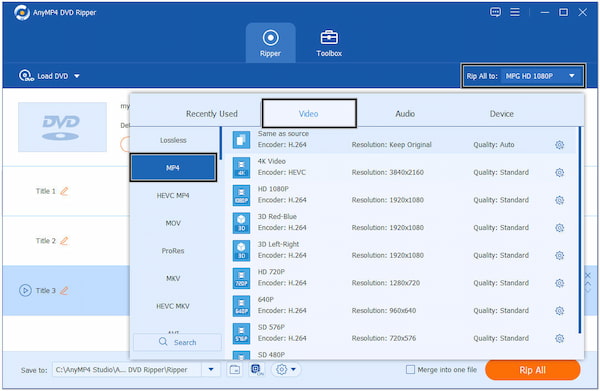
3. Plug your USB drive into the same computer and make sure it has enough space to store converted videos. Choose the destination folder as the USB drive by the Save to option, and click Rip All to start converting the DVD file to an MP4 video.
When we try its free trial version, it is a little pity that watermarks are added to the video.

With these three steps, the DVD is stored in the USB drive. And then, follow us to see how to play DVDs with a USB drive on TV. There are many types of TVs, and we choose LG TV as an example.
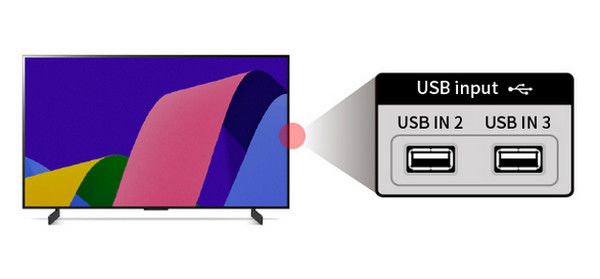
4. Attach the USB storage device to the TV's back USB input port.
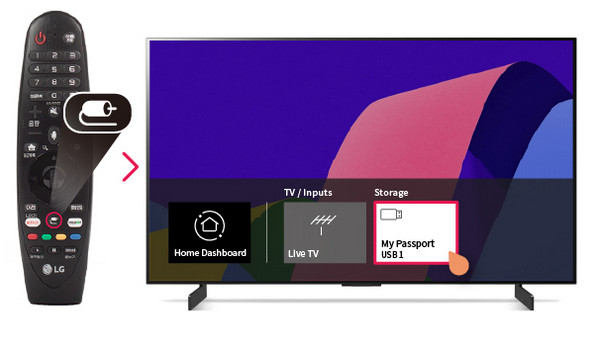
5. On the TV screen, choose USB Flash Drive after pressing the External Input button on the TV remote.
6. The last step is to choose a DVD video you want to watch, and you can see it on your TV.
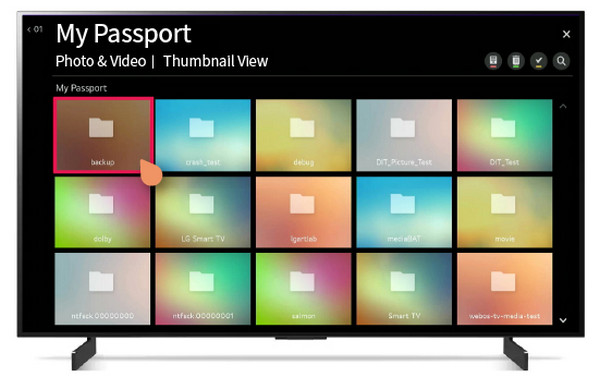
Follow the above steps and you can easily watch DVD files on TV to enjoy big screen experience. If you don’t have an HDMI cable, try this method, and you won't regret it.
Today, we introduce you to how to connect the DVD player to the TV with HDMI, which is the highest quality for video and audio connection. Moreover, we consider that some DVD players and TVs may not support HDMI connection, so we also introduce other ways to help you watch DVDs on TV.
If this article helps you, please give us a five-star rating!
Secure Download
Secure Download