Inkscape is a powerful tool that offers users various tools to create high-quality images completely for free. Whether you are a designer, illustrator, or just someone who needs to edit images, if you want to crop the images, Inkscape is a good choice. This article will show how to crop images in Inkscape, and if you would like to learn about other tools with similar functions, the article will also share another alternative cropping method.

Cropping an image in Inkscape means removing unwanted parts of an image to improve its visual effects. Inkscape not only offers a normal cropping function but also has the unique ability to crop images with the shapes tool. So, let’s follow the next steps to complete cropping the image with the shape tool.
1. Import images into Inkscape.
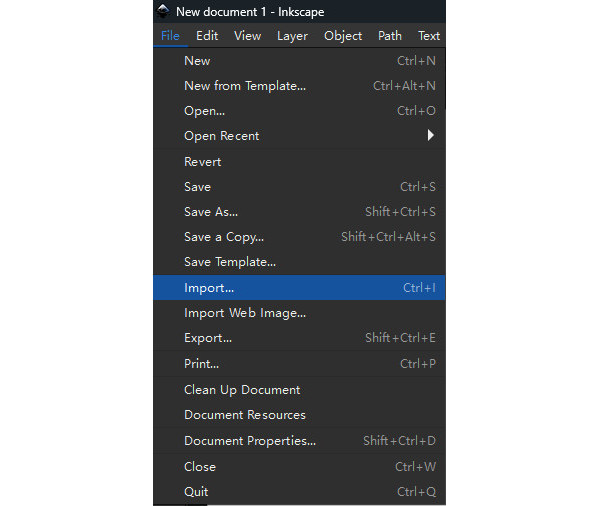
Firstly, open Inkscape, choose the image that will be cropped, and import it into Inkscape by clicking the Import button under the File option in the upper left corner of the page, or you can also press Ctrl + I on your keyboard to import the image.
2. Choose the shapes.
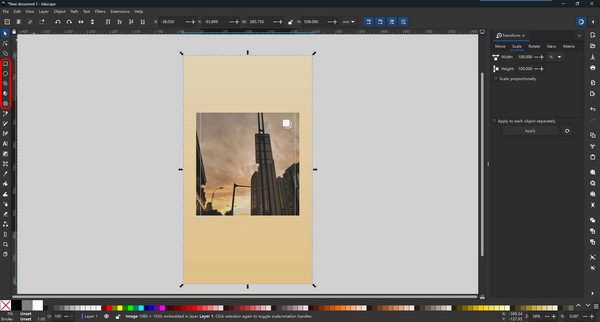
Secondly, choose the shapes you like cropping: squares, ellipses, stars, etc., and any other shapes provided by the toolbox on the left sidebar.
3. Place the shape tool on the image.
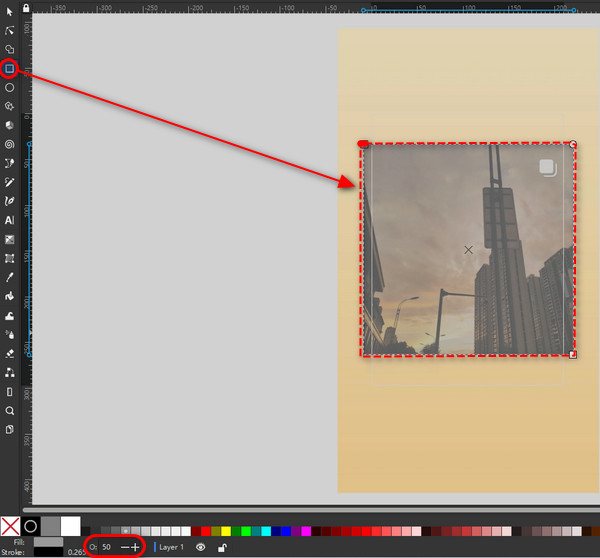
Thirdly, select the image parts you want to keep in the final image and make the shape tool cover the area of them in the original image. If your image is too big or small, you can click - and + in the lower right corner to resize the canvas in Inkscape for a better view.
In this step, you may feel uncertain whether the area drawn by the shape tool accurately covers the area you want, so you can reduce the opacity of the range until you can see clearly.
To see the shape area more clearly, you can change the color according to the specific image. The Opacity (O:) button is at the bottom of the page.
4. Set cropping area.
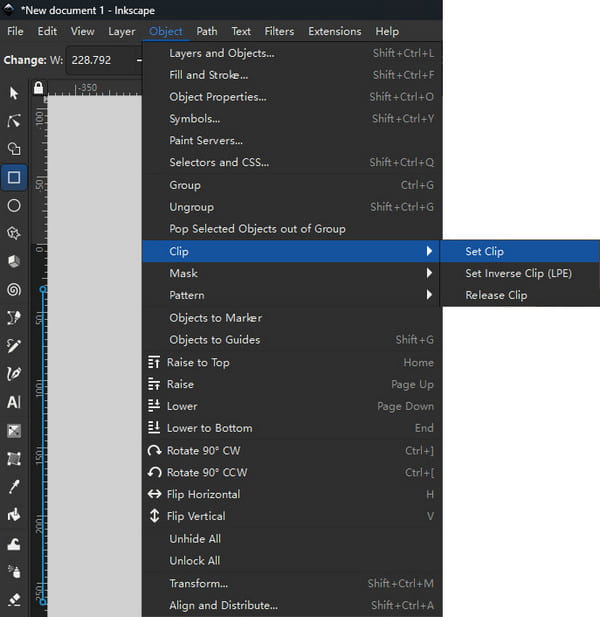
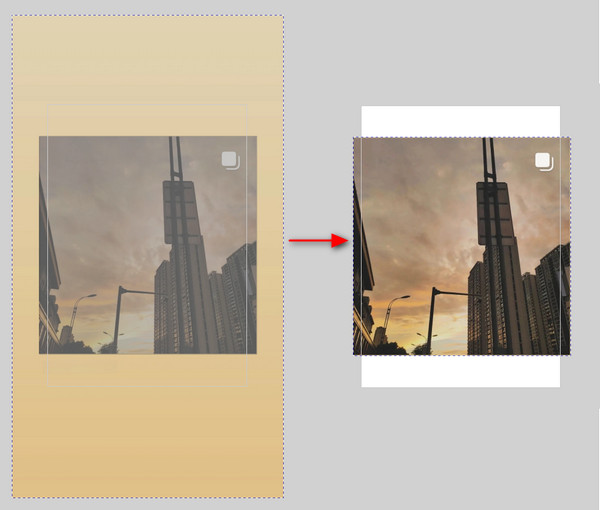
After you select the clipping range, press Shift and click the selected area and the original image, respectively. A dotted line appears on the edge of the image, indicating that they have been selected successfully. Then click the Object > Clip > Set Clip button to crop your image.
Now, you can see the cropped image!
5. Check the effect of the crop.
Finally, you should check whether the crop is correct. If you find something wrong and need to adjust again, don’t worry. Cropping an image in Inkscape is not destructive. You can easily remove the crop and revert to the original image with a partially transparent box by clicking Object > Clip > Release Clip.
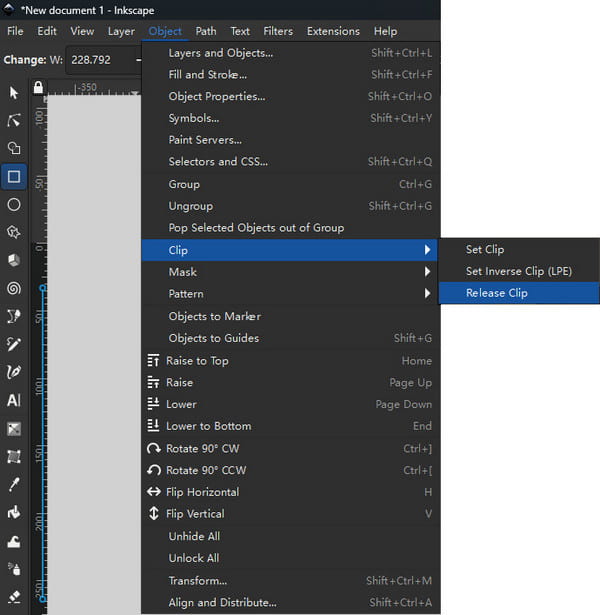
Or, more simply, you can also click the Undo button on the right side to return to the last action. Then, make any necessary adjustments and export by clicking the Export button from the File option in the upper left corner.
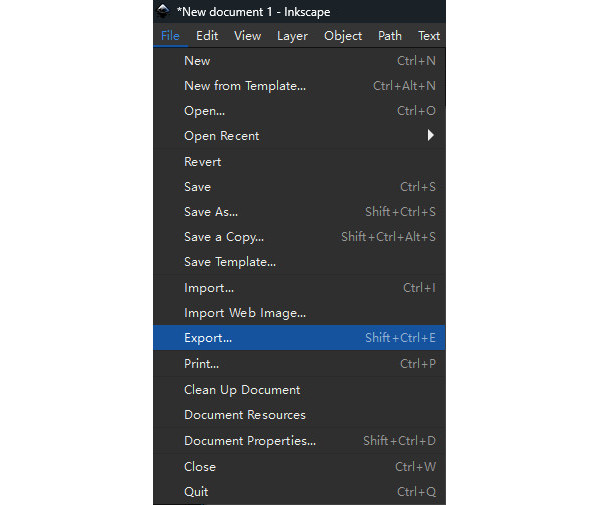
These are the steps for resizing an image in Inkscape. We believe that you have learned about cropping from start to finish, and this is bound to improve your image editing skills with the image crop editor.
However, Inkscape is a little professional for ordinary people who just want to crop a photo in daily life. There are too many specialized options that will make users puzzled. So, it may tend to be designed mainly for professionals rather than ordinary users.
If you think Inkscape is complicated to use for you, you can also try AnyMP4 Free Background Remover Online. It can be a great alternative to Inkscape. Even though it is a website whose main function is to remove an image’s background, it also includes other functions, such as Rotate & flip, Crop images, and so on. And cropping is just what you need. Let’s see how easy it is to crop an image by using it.
1. Visit the website.
Visit AnyMP4 Free Background Remover Online’s website in your browser.
2. Upload the image.
Click Upload Images button or drop your photo file into the box.
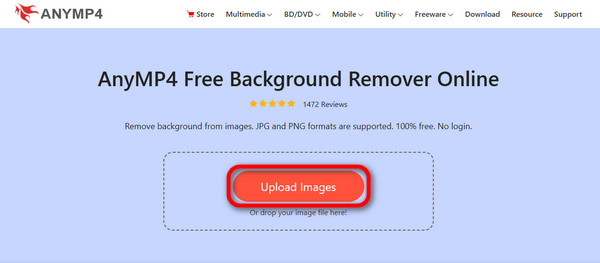
3. Crop the image.
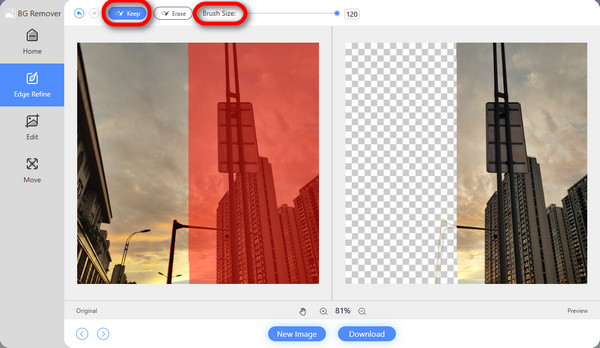
After uploading the image, due to the feature of this tool, which mainly removes the image background, you need to operate manually to ensure that the image background is retained. Click the Keep button, then adjust the size of the brush and choose the background area you want to retain.
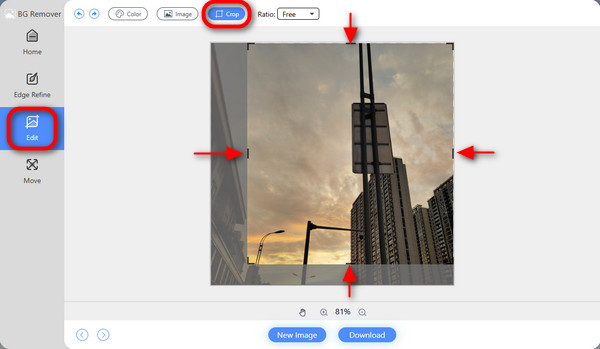
Click the Edit button on the left sidebar. Then click the Crop button above the center and drag the arrow to crop freely.
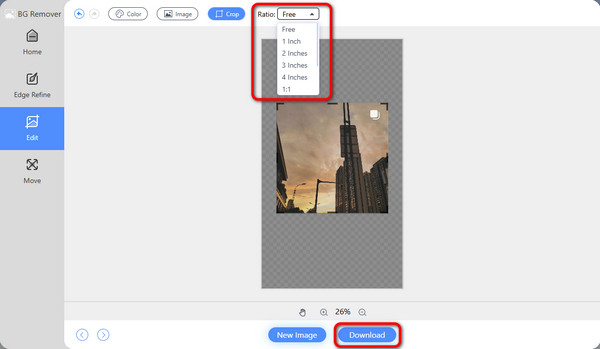
4. Adjust the ratio of cropping and download.
If you do Ratio option on the right side of the Crop button and choose the ratio you want to crop. In addition, you can use some other functions available on the website, such as Flip, Rotate, Edge Refine, and more.
Then, you can click the Download button to save the cropped image.
It is worth mentioning that site this image cropper is totally free to crop GIF, JPG, PNG, and more image formats. The web tool is compatible with Windows, Mac, iOS, Android, and more systems, and unlike software, e.g. Inkscape, it can be opened directly in your browser without downloading. So, it can be used anytime, even if you change devices.
Furthermore, one thing that this site does better than Inkscape is that it has a secure guarantee, which means the images you upload and edit will be automatically deleted after you finish using it. It doesn’t need to worry about information leakage. All these features make AnyMP4 Free Background Remover Online a great alternative. If you find the Inkscape a little hard to use, it is highly recommended to try AnyMP4’s cropping function, which is easy, safe, and convenient to use!
What image formats can Inkscape crop?
Inkscape can crop image formats containing JPEG, PNG, SVG, etc.
Can I crop a specific shape out of an image in Inkscape?
Yes, that’s what the feature of Inkscape is. Inkscape has four shape tools: Rectangle, Ellipse/ Arc, Star/ Polygon, 3D Box, and Spiral. Every tool can create its own unique shape, which you can use to crop your image.
Does cropping with shapes affect the image quality?
Yes, it is very likely to affect the image quality. Cropping means clipping a part of the original image, which will result in some pixels being lost and the resolution decreasing, so the image quality is also affected.
How can I remove the crop and revert to the original image in Inkscape?
Suppose you are not satisfied with the image after cropping. In that case, you can release the clip by clicking Object > Clip > Release Clip to remove the crop and revert the original image.
Is there a way to resize the image itself in Inkscape?
Yes, you can resize the image by dragging the corners and arrows, or you can click Object > Transform > Scale to adjust the detailed parameters.
The article details how to crop an image in Inkscape and explains that Inkscape has many other professional features besides image cropping. We also offer AnyMP4 Free Background Remover Online, an easy-to-use alternative that helps you resize an image effortlessly!
Overall, Inkscape is more suitable for professional people such as illustrators and designers because of its abundant and specialized options. At the same time, AnyMP4, is more suited for ordinary people who need to simply crop some images without more complicated operations.
If you think this article is helpful, please like it. If you have any questions about any part of the article, please let me know in the comment section. Thanks for visiting!