Adobe Premiere Pro is one of the top choices by editors at different skill levels. Users of varying proficiency, from amateur, experienced, and even professionals, consider Premiere Pro as their primary software of choice. The tool's popularity may be linked to its depth, which rewards experience and creativity. Due to its potential, Adobe Premiere Pro is far from being beginner-friendly. With that in mind, this article provides a detailed guide on how to resize a video in Premiere Pro using two different methods available in the software. We will also explore how to resize videos using the best Premiere Pro alternative today.

Before proceeding to our step-by-step guide on how to resize a video in Premiere Pro frame, let us first define the difference between video cropping and video resizing. These two video editing elements are essential when discussing how to resize videos since video cropping and resizing go hand-in-hand when changing the video aspect ratio.
First, video cropping in Premiere Pro involves removing a set section of the video you are editing. As a result, most videos cropped will fit bigger in the video’s frame since the remaining part that has not been cropped will fit slightly zoomed into the frame. For example, vertical videos using a landscape aspect ratio will be zoomed in once the black bars on its side have been cropped.
On the other hand, video resizing is the more direct option for changing the size of videos since it is its primary function. Most video resizing options involve changing its resolution or scaling the footage into the frame or aspect ratio you want. For more info regarding video resolution changes and scaling, a more detailed explanation may be found in the next section of the article.
Now that we have defined the main difference between video cropping and video resizing, we can move on to the tutorial on how to change the size of a video in Premiere Pro.
When it comes to Adobe Premiere Pro video resizing, learning the concept of frame sizes should be a priority since both video resizing options in Premiere Pro are based on the video frame size. With that in mind, frame size is the video resolution used during editing; this element will define your video’s aspect ratio, quality, and playback support.
Once the editing process is finished, the frame size will be the resolution of the video that has been produced. The most common examples of frame size and resolution are 1920x1080 (Full HD), 12080x720 (HD), 3840x2160 (4K), and more.
With the concept of frame size out of the way, we can now proceed to the two options of video resizing available in Premiere Pro: Scale to Frame Size and Set to Frame Size.
In the simplest terms, scale to frame size is the option that replaces the vector shapes in videos to become a pixel or dot while maintaining the original scale of the video. This process, known as rasterization, will make videos resized this way to have lower quality. This is more advisable for resizing modern-quality videos, such as 4K or 8K, into much smaller resolutions. Ultimately, scale to frame size reduces the quality of videos that it adjusts.
On the other hand, setting the frame size will change your video’s size to the exact resolution as the set frame size used in the Premiere Pro editor. Unlike the first method, the set to frame size option will adjust the scale of the video. This will result in a higher-quality resized video than the scale to frame size option.
Now that we have discussed their differences, we can proceed with the guide on how to use Scale to Frame Size and Set to Frame Size in Adobe Premiere Pro as a solution to how to resize video clips in Premiere Pro.
The first method that will be presented will be the more straightforward Scale to Frame Size option. As we have mentioned above, this method is the most automated option.
PROS
CONS
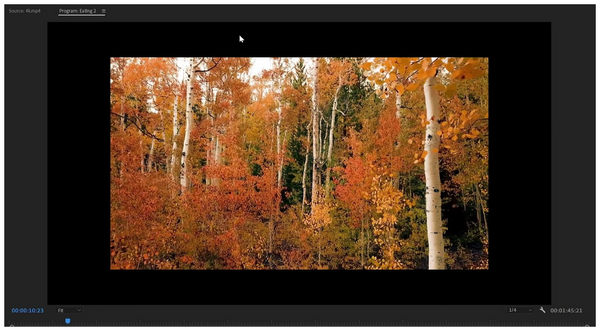
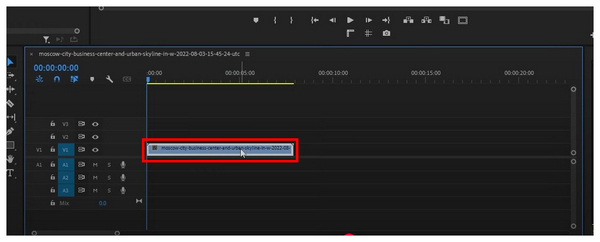
1. Open Adobe Premiere Pro and add the video you want to edit. If the video is smaller than your set frame size, black bars will appear around the video clip in the preview window.
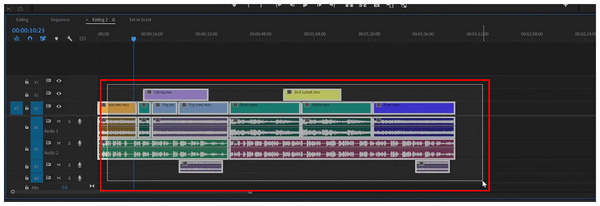
2. Select the Media files added to the editing timeline by clicking and dragging the selection box to scope the files you want to adjust. This option applies to all media files supported by Premiere Pro, such as videos, images, and audio files.
3. Once the media files have been selected, right-click on the active selection and choose the Scale to Frame Size option. Afterward, the video in the editing window will fit into the frame without black bars.
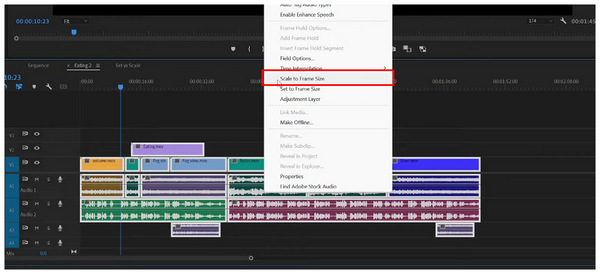
Remember that using this screen resizing mode will lower the quality of ultra HD videos, making it a suboptimal option if you want to keep your file’s quality.
The Set to Frame size is more advisable for more advanced video editors or those handling high-quality videos. To learn how to use this option, please continue reading below.
PROS
CONS
1. Import the video you want to edit in Adobe Premiere Pro and check if the file fits in the video editing frame. If the video does not fit, black bars surround it in the preview video window.
2. Next, click on the video file in the editing timeline. Then, right-click on it to open the editing options that can be applied to the video. This editing menu will be where the set to frame option is available.
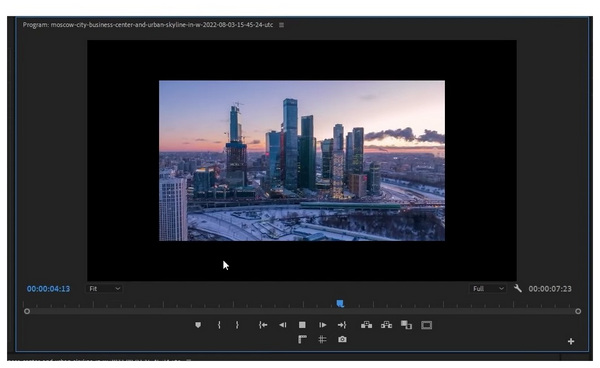
3. After right-clicking on the media file inside the editing timeline, find the Set to Frame option on the menus. Select it to instantly resize the video in the preview window above the timeline. Your video will now be resized while maintaining its quality.

If you are experienced with Adobe Premiere Pro, remember that using Set to Frame for video resizing may be adjusted on more advanced settings available in the software.
Compatibility: Windows 11/10/8.1/8/7, MacOS X 10.12 or above.
Although Adobe Premiere Pro is well-known for its more advanced editing capabilities, a significant downside of the tool is its complexity and technical skill requirement. As a result, video resizing alternatives such as AnyMP4 Video Converter Ultimate’s Video Compressor tool makes for an excellent option for users looking for more automated video resizing tools.
With the help of the Video Compressor tool of AnyMP4 Video Converter Ultimate, videos that are processed in it might be resized. This is because the software is optimized to become a video resizer tool by changing the resolution of the videos. Regarding the resolutions, the selection will be based on the current resolution of the file you are editing. If you are processing a standard 1920x1080 video, the Video Compressor tool can adjust it from as high as 3840x2160 to as low as 240x160.
Due to the automated video resizing options found within AnyMP4 Video Converter Ultimate, you can ensure that the videos you edit will retain a passable quality since the program itself will provide the minimum and maximum resolution size of the videos.
This feature makes the Video Compressor an easier video resizer software because the intricacies of scale or set to frame are absent. Moreover, resized videos can be previewed within the tool without being imported. This feature is a solid quality-of-life addition since it bypasses the impractical requirement to import editing files repeatedly.
Finally, resized videos using AnyMP4 Video Converter Ultimate’s Video Compressor tool may be saved into MP4, MOV, MKV, AVI, WMV, VOB, or FLV formats. This also makes the tool a functional program that can change the format of videos you want to resize.
To learn more about AnyMP4 Video Converter Ultimate, please read the Video Compressor tool’s main features below and a detailed guide on how to use it. You can also download AnyMP4 Video Converter Ultimate using the link below to learn more about the software.
Secure Download
Secure Download
Main Features:
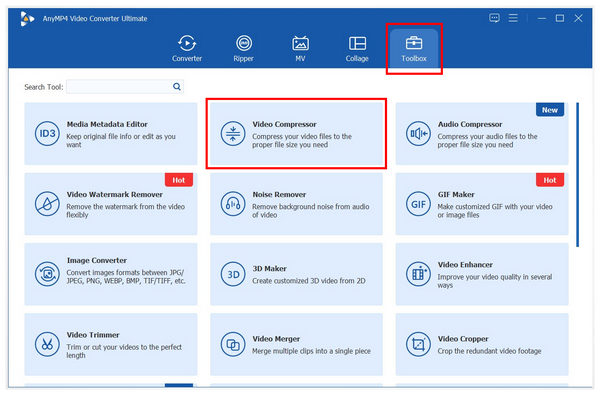
1. Open AnyMP4 Video Converter Ultimate and go to its Toolbox tab. Then, find the Video Compressor tool and click on it. Add the video file you want to resize in the Add File menu that will appear.
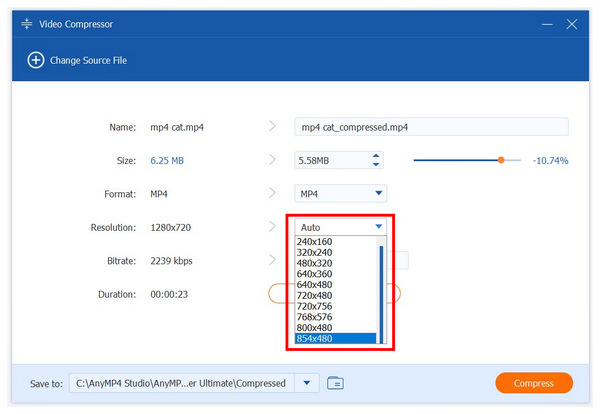
2. Inside the Video Compressor tool’s menu, click the Resolution adjustment option and choose the resolution you want to resize your video. Remember that this tool can be used on videos that are already produced and that automates the video resizing process.
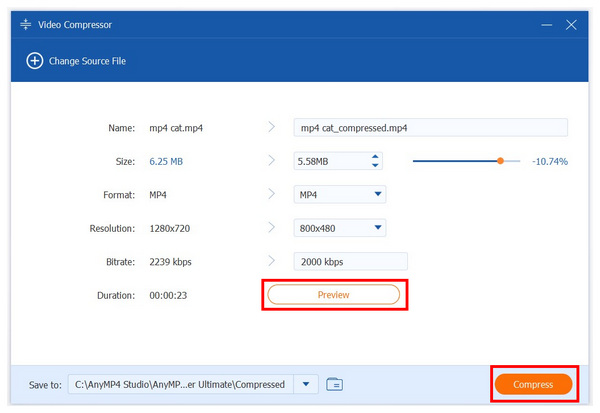
3. Once you have selected the resolution that you want to resize the video into, you can now adjust the different video elements that are available in it, such as the Size, File Format, Bitrate, and even the file name. You can also click on Preview to check the video before compressing. Otherwise, simply click Compress to import the resized video into your computer.
Following this three-step guide, you can resize your video in terms of resolution and file size or even change its file format. This makes AnyMP4 Video Converter Ultimate a good video resizing software since you can automate the resizing process while accessing more advanced file adjustment options.
This article has helped you learn how to handle your video resizing needs by featuring a complete guide on resizing videos in Adobe Premiere Pro. If you want a practical video resizing alternative, check out AnyMP4 Video Converter Ultimate.
Secure Download
Secure Download
 Updated by Angelica Liwanag to Edit Video
More readings
 The Ultimate Guide to Make Split-Screen Effects in Premiere Pro
When you want to make a split-screen effect in Adobe Premiere Pro, this is the ultimate guide to learn more about the detailed process and best tips.
 How to Flip/Rotate a Video in Adobe Premiere Pro [Easy Guide]
Whether you need to tweak to align the horizon of a video or adjust the video's orientation by 90 to 180 degrees, download Premiere to rotate video.
 How to Make Video Quality Better in Premiere Pro (2025)
Join us, discover what we need, and learn how to improve video quality in Premiere Pro. Check this to learn how to enhance video quality with this tool.
 Resize Video for Instagram - How to Crop/Resize Video for IG
How to resize a video for Instagram? How to crop video for Instagram free? Why does Instagram crop my videos? Get detailed guide to crop or resize video for IG.