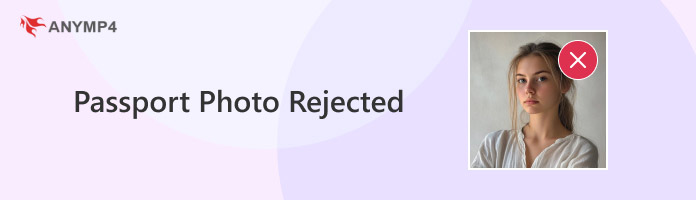
Having your passport photo rejected can be a frustrating experience. This occurrence can delay your travel plans and can potentially incur additional costs. Passport pictures must adhere to strict guidelines set by passport authorities to prevent any future problems. Even minor issues, such as hair on the face or an incorrect background, can lead to rejection. In this post, we will provide a detailed look into the common causes of passport photo rejection. Additionally, we will navigate to the practical solutions to ensure your next photo meets all the requirements. This way, you can avoid these issues next time and ensure a smooth application process.
Basically, it’s important to follow specific guidelines when preparing a passport photo. This way, you can ensure your image meets the requirements set by the government authorities. However, you should be aware that these standards can vary by country.
Here are the essential guidelines for acceptable passport photos.
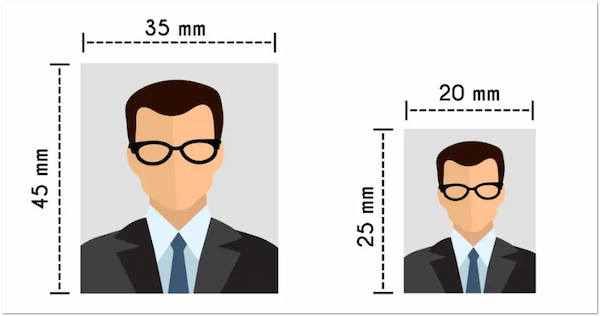
One of the most important aspects of passport photo compliance is the size. The dimensions must be precise, as not complying with these measurements may lead to rejections. Importantly, you should check the specific requirements for the country you’re applying to.
Here’s a reference table for the most commonly used passport photo formats:
| Passport Photo Size | Unit of Measurement | Unit of Measurement |
|---|---|---|
| 2×2 | Millimeters | Australia, Europe, Singapore, Philippines, UK, and more |
| 5×7 | Centimeters | Canada |
| 33×48 | Millimeters | China |
| 3×4, 4×4, 4×5, and 4×6 | Centimeters | Generic |
Note: In such cases your passport photo is too large, there’s a workaround you can try. You can use a dedicated crop photo editor to correct the dimensions to meet the standard size.
Head position is another crucial aspect of creating a compliant passport photo. Generally, the subject’s head should be centered and occupy a proportion of the image. The primary focus is to ensure the face is clearly visible and not covered by hair or accessories.
Here’s a reference table for the required head position for the passport photo:
| Country | Application | Description |
|---|---|---|
| USA | Passport, Citizenship, and Visa | The head should measure between 1 and 1.37 inches. The distance from eye level to the bottom of the photo must be at least 1.12 inches. |
| 5×7 | Centimeters | Canada |
| UK | Passport and Visa | The head and shoulders should occupy 65% to 75% of the frame. |
| Australia | Passport and Visa | The head and upper shoulders should be captured in close-up. This ensures that the measurement from the bottom of the chin to the crown falls between 32mm and 36mm. |
| Canada | Visa | The head size, measured from the chin to the crown, should range from 31 mm to 36 mm. |
| China | Passport | The head width should range from 21 mm to 24 mm. |
Typically, the facial expression for passport photos should be a neutral look. The applicant should have a natural, expressionless face, with their eyes open and mouth closed. Some countries state that expression should be neutral, while others allow for a slight smile. It is advisable to avoid any movements that could alter your facial appearance.
The background of a passport photo is crucial to ensure clarity and contrast. Most countries mandate a plain, light-colored background to ensure the subject stands out clearly against it. The background should be free of shadows, ensuring focus on the subject’s face.
Here’s a reference table for the required background color for the passport photo:
| Country | Application | Background Color |
|---|---|---|
| Canada | Immigration | Plain white background |
| China | Passport | White or light blue background |
| Czech | Visa | White to light blue background |
| Germany | Passport and Visa | Light-colored background (ideally a medium-gray) |
| Philippines | Passport | Royal blue background |
Clothing choices for passport photos should be simple and professional. It’s suggested to wear solid colors that contrast with the background, ensuring your face is the focal point. Avoid clothing with busy patterns, logos, or large accessories to maintain a neutral appearance.
Glasses can impact the acceptability of a passport photo, as reflections and glare can obscure the eyes. Most countries allow glasses in passport photos, but specific guidelines apply. Some countries have more strict requirements regarding glasses, so it’s essential to check guidelines.
“I received a notification that my passport photo was rejected. Can someone explain why this might have happened?”
There could be several reasons for your passport pictures to be rejected. In this section, we’ll detail the common issues that often lead to rejection. Additionally, we will provide a brief explanation for each to avoid future delays.
Each country has specific size requirements that must be adhered to. Submitting a photo that is too small or too large can lead to automatic rejection. Measure the photo size carefully and adjust to the correct dimension before submission.
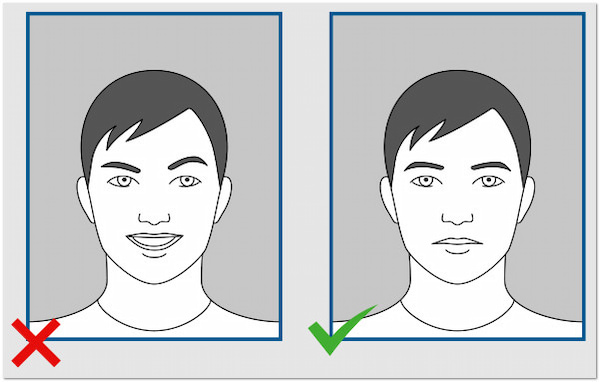
Smiling, frowning, or having an open mouth in a passport photo can lead to rejection. Authorities usually require a neutral facial expression with no exaggerated facial gestures. Maintain a relaxed, neutral expression with your mouth closed and your eyes looking directly at the camera.

Improper head positioning is one of the reasons passport photos are rejected. Most guidelines require that your head be directly in the middle of the frame with both eyes visible. Position yourself so that your face is directly in the center, and look straight at the camera.
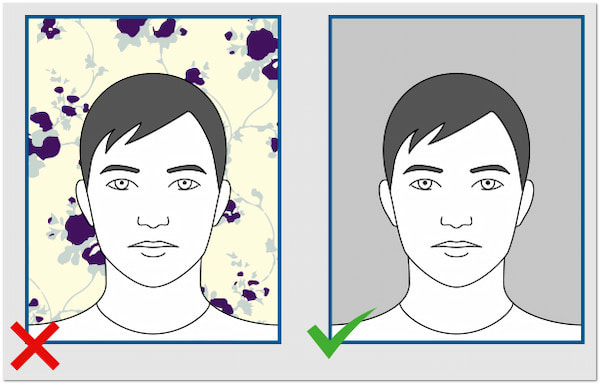
Background issues are among the reasons for photo rejection. Most countries require a plain, light-colored background to ensure that the subject stands out clearly. Ensure the background is a solid, light color. If you take a passport photo of yourself, and your background is cluttered, worry not. There’s a workaround you can try to make your background neat and clean.
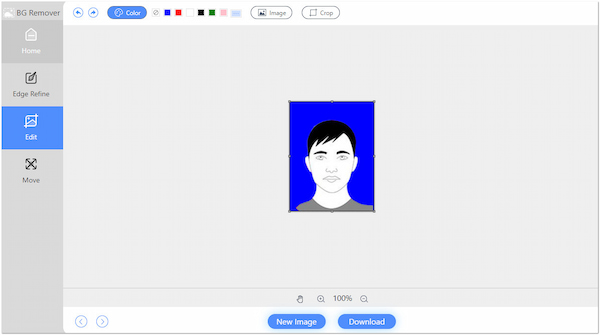
AnyMP4 Free Background Remover Online is a highly effective tool for removing undesirable photo backgrounds. Using the newest and constantly updated AI technology, it lets you erase the background with just a single click. Best of all, it gives you the option to replace the removed background with a solid color. Sounds great, right? This means you can change the passport photo’s background to the required color set by the country. Beyond that, it comes with essential tools for cropping, flipping, and rotating images.
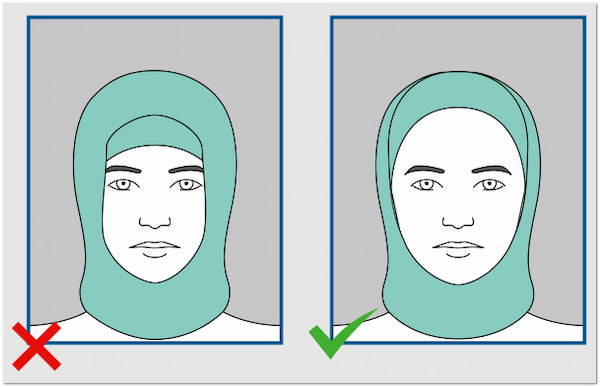
Clothing choices are one of the examples of rejected passport photos. It’s advisable to wear formal or smart-casual clothing that presents a professional appearance. Some countries discourage wearing bright colors, while others require casual attire. Also, avoid wearing anything that covers your face unless it’s for religious or medical reasons.

Reflections from glasses can pose problems in passport photos. The photo must capture the eyes clearly, as this is essential for identification purposes. If you’re wearing glasses, you should consider taking a photo without them.
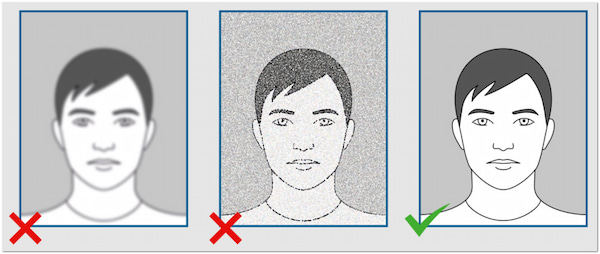
Poor image quality is another factor that causes passport photo rejection. Photos that are blurry, grainy, or pixelated can hinder clear recognition of the subject. If your camera captures low-quality images, you can use a dedicated online tool to enhance image quality. Aside from that, ensure you have proper lighting to avoid shadows in the background.
After receiving a passport photo rejection notice, carefully review the reason for the rejection. Surely, the notice includes specific details about why the photo was deemed unacceptable. Once you identify the problem, consult the official passport photo guidelines for your country to avoid making the same mistake again.
Once you understand the reasons for your photo’s rejection, take a new passport photo that complies with all the necessary guidelines. Ensure the new photo adheres to the requirements specified in the rejection notice. For instance, if your Walgreens passport photo is rejected, retake the photo on-site to ensure compliance with passport requirements.
If you’re unsure about the rejection reasons, you can contact passport authorities to assist. Most passport offices have customer service lines or online support where you can ask questions about your application. It’s helpful to have your rejection notice and application reference number on hand when you reach out.
Passport photo rejected: how long? If your passport photo is rejected, the time to obtain a new photo can vary based on how you choose to proceed. In some cases, there are also additional fees associated with submitting your application. This is applicable if you need to expedite the application to recover lost time.
How long does it take to get a new passport photo after rejection?
It depends on how you choose to obtain the new photo. If you decide to take the photo yourself, you can have a new image in just minutes.
Can I retake a passport photo at a drugstore?
Yes, you can retake a passport photo at a drugstore. Many drugstores, like Walgreens, offer passport photo services with an on-site photo session.
What if my passport photo is slightly off?
If your passport photo is slightly off, it may still be accepted. However, the risk of rejection is high if it does not meet the official guidelines.
Can I edit my passport photo to meet the requirements?
Yes, you can edit your passport photo to meet the requirements. For this purpose, you can use AnyMP4 Free Background Remover Online to change the background color. Aside from that, you can use the editing tools to crop the photo to meet the required size.
Can I use a selfie for my passport photo?
No, you cannot use a selfie for your passport photo. Passport photo requirements are strict, emphasizing the need for professional-looking images.
Dealing with a rejected passport photo can be inconvenient. Fortunately, it’s an issue that can be quickly resolved by understanding the specific guidelines. Should your photo be rejected, knowing the steps to address the issue can save time and reduce stress. If your passport photo background is different from the required color, AnyMP4 Free Background Remover Online can be your companion. This tool lets you change the background to the required color and even resize it. By following the provided measures above, you can prevent rejections. Additionally, you can ensure that your application process moves forward without further complications.
 Posted by Angelica Liwanag to Edit Photo
More readings
 5 Best Passport Size Photo Makers: Get Ready for Flight
Looking for a tool to make passport photos easily? Check this article out to learn the best software you can use to continue going to your favorite destination.
 [All iPhones Covered] How to Blur Photo Background on iPhone in 6 Ways
If you don’t know how to blur the background of a picture on iPhone, this article containing three free options (covering all models) can give you answers!
 How to Remove Glare from Photo: 3 Tools to Clean Light Glare
Learn how to remove light glare from a photo using three different software in this detailed guide about cleaning pictures with overpowering light flares.
 How to Get Rid of Grain in Photos in 3 Easy Tools
Want to learn how to remove grain from a photo? This article is perfect for you since we will explore multiple software that you can use for PC or mobile.