Life is made up of special moments, like photos. These moments hold all sorts of feelings and happy memories. Sometimes, we want to put these photos together to make a special picture, like a celebration of all the good times! This is called a photo collage. This post will show you how to make photo collage in Photoshop to create stunning compositions. We'll cover how to put your pictures in, arrange them, and use tools to make them look fancy.

Photoshop extends far beyond photo editing, allowing you to create captivating collages. Unlike rigid templates, which offer pre-designed layouts, freestyle collages offer complete creative control. You can arrange photos, blend elements, and experiment with different tools, transforming your creation into a unique story.
Here’s how to make a collage in Photoshop:
1. Initially, prepare the images you want to use in your collage. Launch Photoshop and press Ctrl + N/Command + N keys to create a new document. Set the document size according to your preferred collage dimension, then click OK.
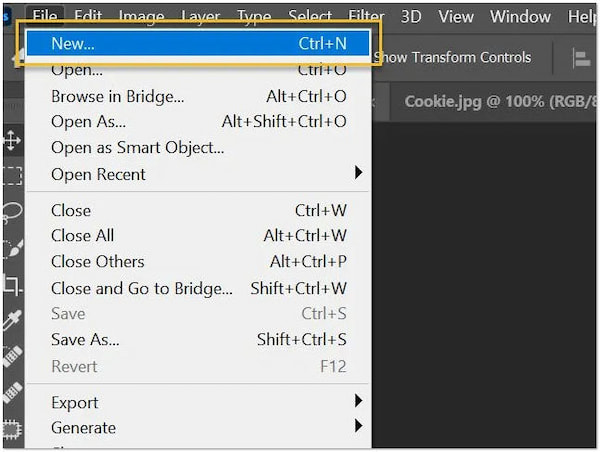
2. Go to File and select Load Files into Stacks to load multiple images. In the window that opens, select all your photos and click Open. Photoshop will load each image as a separate layer in your collage document.
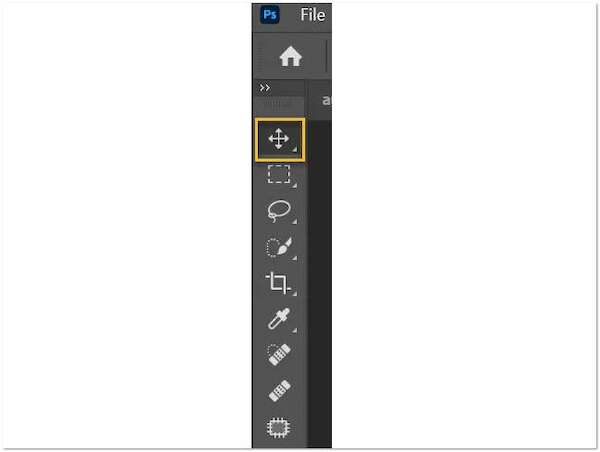
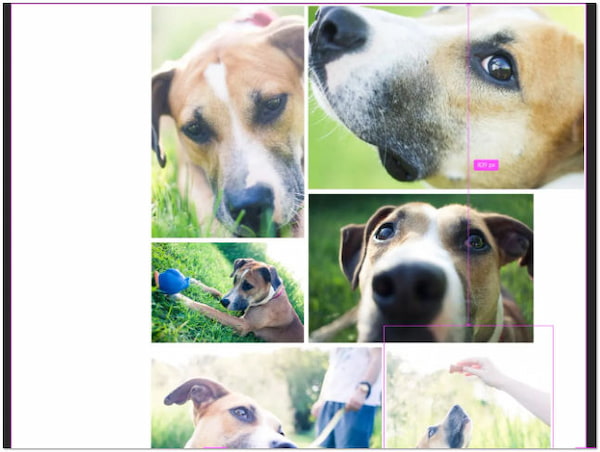
3. Use the Move Tool to drag and drop your photos around the collage document. Experiment with different layouts and overlapping elements to achieve your desired freestyle look. Optionally, you can rotate and resize images using the Free Transform Tool.
4. If you want a background for your collage, create a new layer below all your image layers. Fill it with a solid color using the Paint Bucket Tool. Alternatively, add a textured background image and adjust its opacity for a subtle effect.
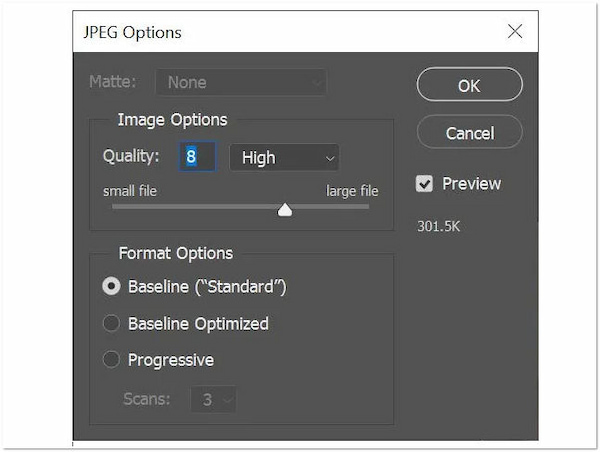
5. If you're done editing and don't plan on making further adjustments, flatten your image by going to Layer and selecting Flatten Image. Press Ctrl + S/Command + S, give your file a name and choose a file format for your collage.
Freestyle collages in Photoshop offer an open-ended journey of exploration and self-expression. It lets you express your artistic vision with complete freedom. However, for beginners, the lack of a structured layout can be daunting. Mastering Photoshop's tools and techniques takes time and practice.
Combining multiple images into a cohesive composition lets you express yourself in exciting ways. While starting from scratch can feel overwhelming, templates offer a helpful shortcut. These pre-designed layouts jumpstart your creative process. It lets you focus on the artistic aspects of arranging and customizing your photos to achieve the perfect aesthetic.
Here’s how do you make a collage in Photoshop:
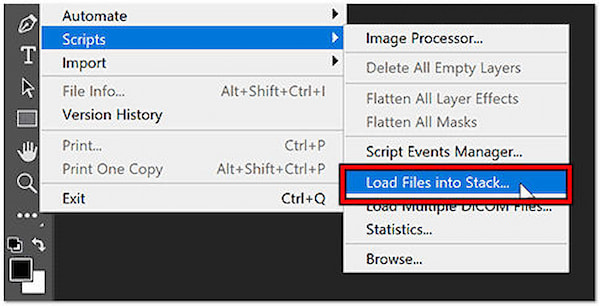
1. In your new Photoshop document, go to File, select Scripts, and click Load Files into Stack. Browse and choose all the images you want to use in your collage.
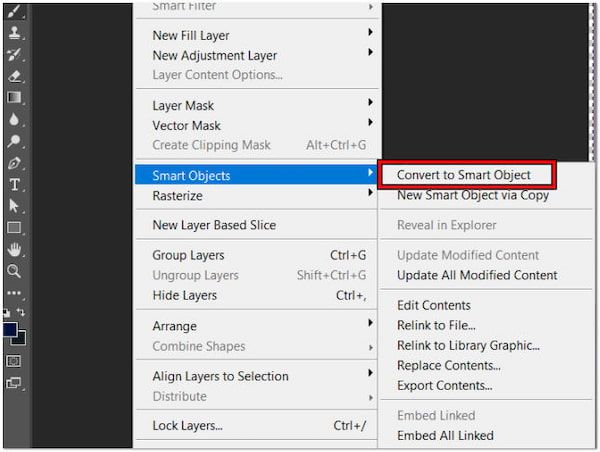
2. Select each image layer in the Layers panel. Go to Layer, select Smart Objects, and click Convert to Smart Object. This protects the original image quality for future edits.
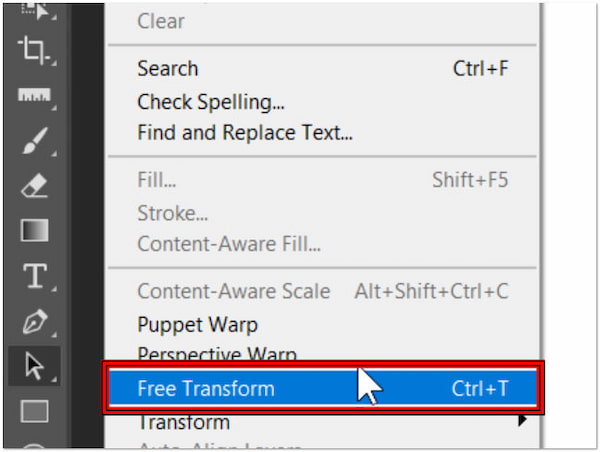
3. Use the Move Tool to position your photos. Go to Edit and select Free Transform to adjust their size as needed.
4. Right-click on a photo layer and choose Blending Options. The Stroke options allow you to create a border around the image.
5. Use the Crop Tool for final adjustments. Right-click the layer with the border and select Copy Layer Style. Then, right-click the layers for other images and select Paste Layer Style.
Automatic collage creation using templates is, unfortunately, impossible to achieve. However, this method offers a way to semi-automate the photo collage creation process. Consider using traditional tools like Move Tool to achieve your desired layout.
Creating collages in Photoshop goes beyond simply putting photos together. It lets you express ideas and emotions in a way that a single photo can't. Although Photoshop excels at photo editing, creating video collages isn’t its thing. If you're looking to combine photos and videos into a single project, then consider using AnyMP4 Video Converter Ultimate. This tool goes beyond simple media conversion and offers a user-oriented Collage Maker. This feature lets you create photo collages using various pre-designed templates. But what makes it truly remarkable is that you can create video collages. Also, you can craft a combination of both photos and videos.
For good measure, it offers over 40+ ready-made templates to choose from. You can customize the collage ratio, border thickness, and color and even select a decorative border background. But the customization doesn’t end there! You can edit individual photos and videos within the collage by cropping, rotating, and trimming. Additionally, you can add effects and filters, insert watermarks, and even set background music. On top of that, it lets you save your creation in various formats with customizable frame rates and resolutions. Compared to Photoshop, AnyMP4 Video Converter Ultimate offers a much simpler and more affordable solution for crafting video and photo collages.
1. Get a free download of AnyMP4 Video Converter Ultimate. Install the multimedia tool and allow the installation process to complete.
Secure Download
Secure Download
2. After installation, launch AnyMP4 Video Converter Ultimate on your computer. You will be presented with various tools. Select the Collage tab from the available selection.
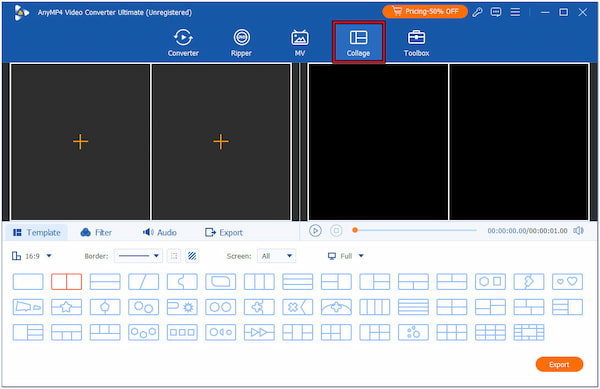
3. Choose your desired template, including 2, 3, 4, 5, 6, and even 13 layouts. Depending on your preference, you can also choose a template with a shape.
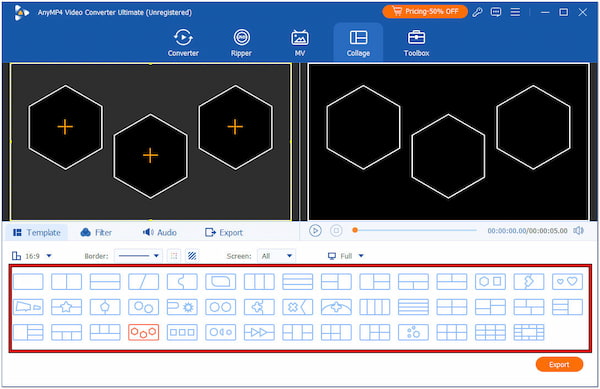
4. After selecting your template, click + to add a photo or video to each layout. Optionally, click each file to edit. You can rotate, crop, add filters, adjust the effects, and even overlay text.
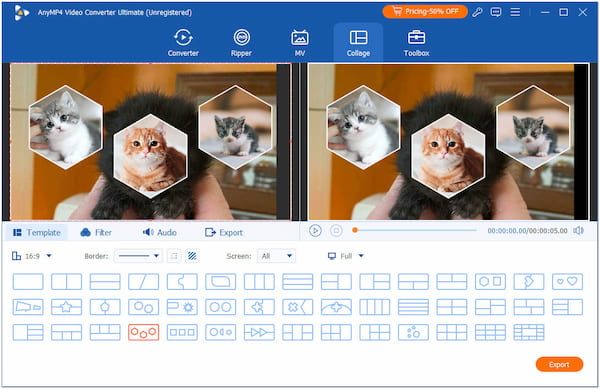
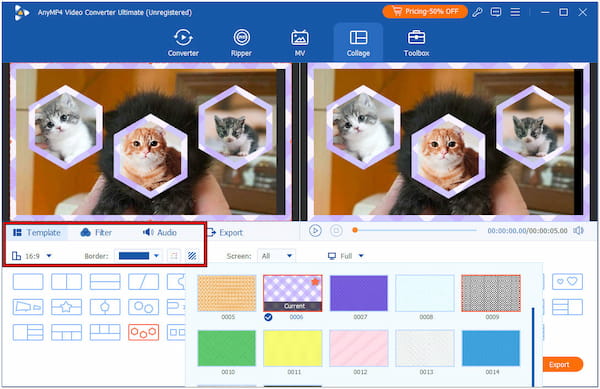
5. Once you have edited your files, customize your template. Configure the border’s thickness, color, and ratio. You can also add background music by going to the Audio tab.
6. After completing the configurations, it’s now time to save your collage. Click Export and configure the output settings. Choose your format, frame rate, and resolution.
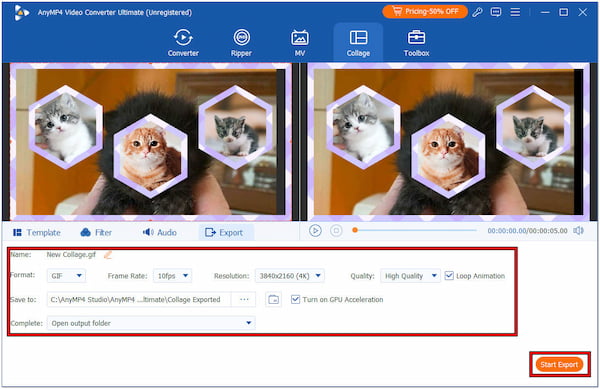
AnyMP4 Video Converter Ultimate allows you to create a more personalized collage. This tool does not limit its users to just simple photo collages. It lets you create a photo and video collage or a combination of both. Plus, you can configure the overall appearance of your creation.
In actuality, there are countless ideas for Photoshop collage layouts online. However, sifting through them all can be overwhelming. That’s why we’ve curated a selection of layouts to make a photo collage with different numbers of photos. Below are some exceptional ones to jumpstart your creativity and help you craft photo collages:
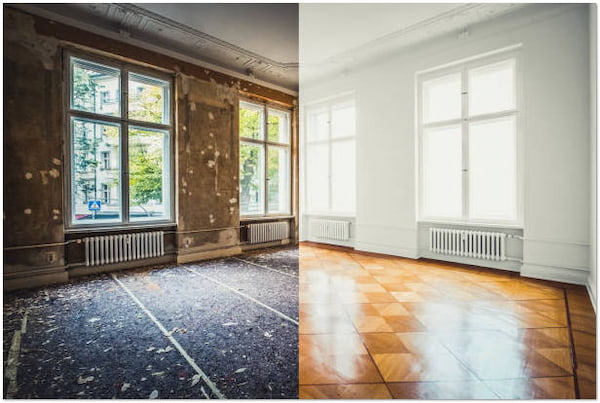
Split-screen comparison is a classic 2-photo collage template Photoshop layout. It is perfect for showcasing contrasting themes or highlighting a before and after scenario. Simply place your photos at equal halves of the document, ensuring they have the same dimensions. Use a subtle border or blending effect to create a seamless visual separation. This format is ideal for product comparisons or showcasing the impact of a change.
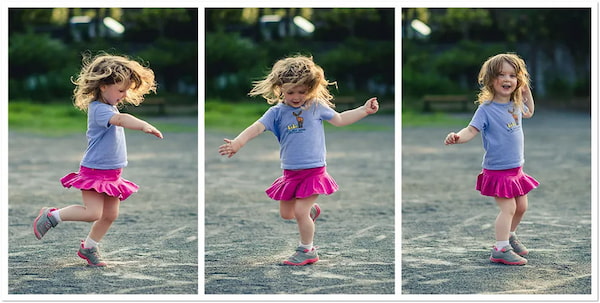
This 3 photo collage template Photoshop layout allows you to narrate a story. Divide the document into three equal sections and place each photo in its designated area. Ensure the photos flow chronologically for a cohesive narrative. This format is ideal for showcasing action sequences, travel experiences, or documenting creative projects.
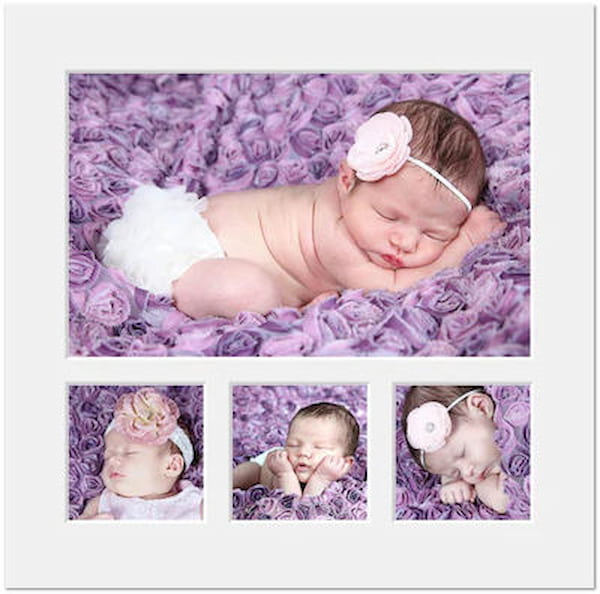
This 4-photo collage template Photoshop layout offers a classic approach. It's ideal for showcasing a series of related photos with equal emphasis. Consider using photos with similar color palettes or themes to create a cohesive look. Arrange four square photos in a 2×2 grid format. Maintain a consistent border around each photo for a clean look. It is similar to the Instagram picture collage layout.

This 5-photo collage template Photoshop layout is perfect for showcasing a narrative or journey. The overlapping circles creates a sense of connection and flow between the photos. You can use various photo sizes and orientations for added visual interest. Arrange five circular photo cutouts overlapping slightly. Add a textured background and subtle drop shadows for depth.
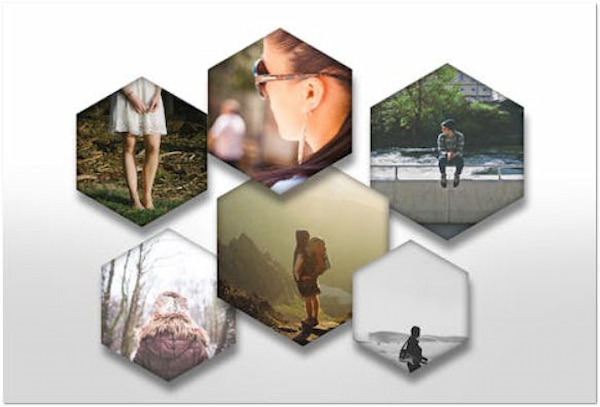
This is a unique 6 photo collage template Photoshop layout. It offers a modern and eye-catching way to showcase multiple photos. The honeycomb pattern creates a sense of unity and visual complexity. Consider using photos with similar color tones or a limited color palette for an organized look. Use hexagonal photo cutouts to create a honeycomb pattern. Experiment with photo sizes and orientations for a dynamic effect.
How do I arrange photos in Photoshop?
The most basic method of arranging photos in Photoshop is using the Move Tool. Select the Move Tool from the toolbar. Click your photo layer and drag it to the desired location on your collage document. You can also use the Free Transform Tool for precise placement and manipulation. This allows you to resize, rotate, and skew your photo while maintaining its aspect ratio.
How do you auto-align photos in Photoshop?
Use the Quick Selection Tool to highlight similar areas in multiple photos. Then go to Edit, select Auto-Align Layers, and choose a stacking method to attempt automatic alignment based on the selections. But here’s a thing. Auto-alignment might not always yield perfect results, especially with very different photos. Manual adjustments are necessary.
Where does Clipchamp save files?
By default, Clipchamp saves your project files in the Download. You can’t choose a specific location unless you finish the exporting process. You can export the finished video file to your desired location by clicking the Save to your Computer option. Also, you can choose to directly save it to cloud storage services or upload it on an integrated social media platform.
How do I group layers in Photoshop?
Grouping layers in Photoshop helps organize your photo collage. Select the photo layers you want to group. Hold Shift while clicking to select multiple layers. Right-click any of the selected layers and choose Group from Layers. Alternatively, use the shortcut Ctrl + G/Command + G to create a new group.
Knowing how to make a photo collage in Photoshop allows you to showcase a whole event in a single picture. Photoshop is indeed a powerful tool for creating photo collages. However, some users find it expensive and tricky to learn. If you’re looking for a more affordable and beginner-friendly alternative, try AnyMP4 Video Converter Ultimate. And the best part? You can not only use photos but also videos or even a combination of both!