User Guide
Get Started
Download & Install
Download iPhone Unlocker for Mac from the official website. Then install it to your Mac by following the on-screen instructions. After that, please launch the software on your Mac.
Register
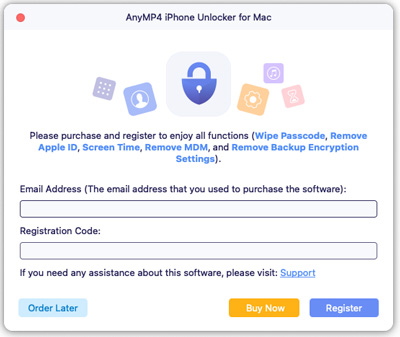
If you are using iPhone Unlocker for Mac for the first time, you can try the free trial version. However, in order to enjoy all of the benefits with no limit, you’d better purchase the license and register this software.
After purchasing, you will receive the registration code in your mailbox. To redeem this code, you need open the registration window. Usually, it will show up automatically once you launch iPhone Unlocker for Mac. If not, please click the Help button on the top left corner of your Mac.

Then enter the Email Address that you used to purchase this software and the Registration Code. Now confirm the registration.
Remove the Lock Screen Passcode
Forget the lock screen passcode of your iPhone? To remove it, you need to use the Wipe Passcode Mode on iPhone Unlocker for Mac, which can also be used to wipe the screen passcode of other iOS devices.
1. All your data will be deleted if you remove the lock screen password.
2. The iOS version of your iOS device will be updated to latest.
3. Keep the connection between your device and Mac during the whole process.
Step 1 Open iPhone Unlocker for Mac
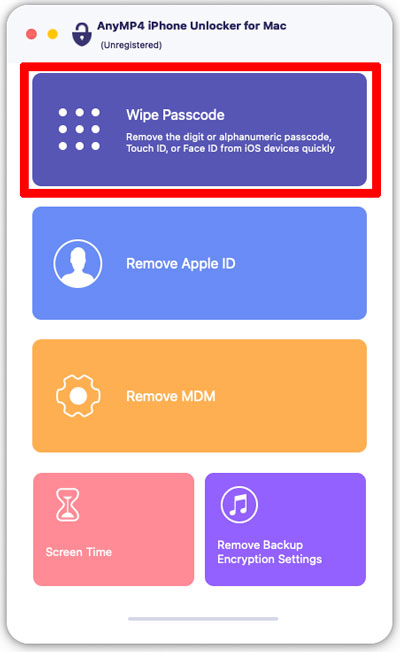
After opening iPhone Unlocker for Mac on your Mac, please click Wipe Passcode.
Step 2 Use a USB cable to connect your device
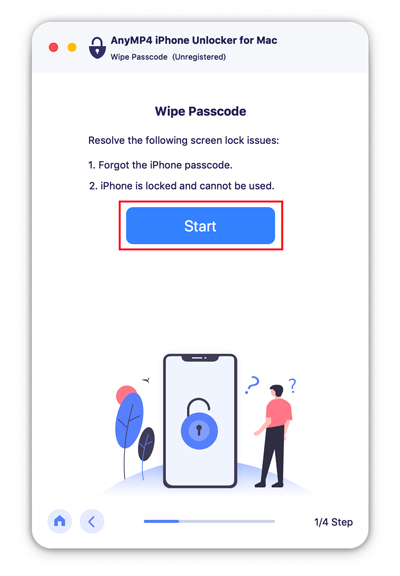
Click Start to confirm your issue. Then connect your device and unlock it. Make sure it is recognized by your Mac.
Step 3 Check the information of your iPhone
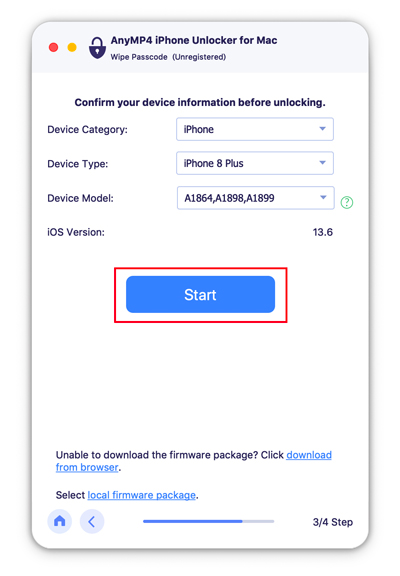
Confirm your device’s information before you click Start to unlock it.
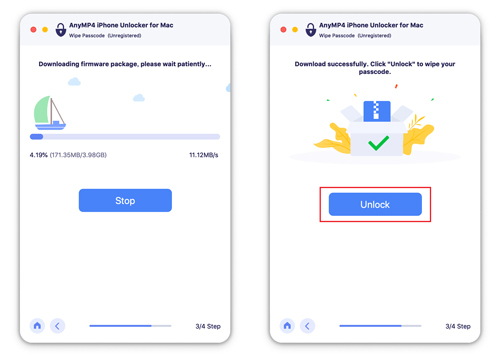
Step 4 Get firmware package
The unlocker will start the download of firmware package. You need to click the Unlock button after downloading the package successfully.
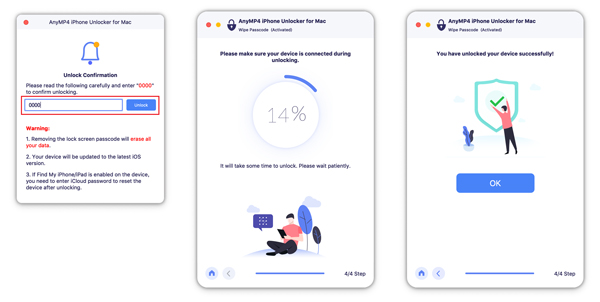
Step 5 Input the confirmation code
Please input “0000”. Then the lock screen passcode of your device will be erased.
Delete Your Apple ID
Want to remove the Apple ID or iCloud account on your iPhone? Then you need to try the Remove Apple ID mode, which can easily delete your ID account within a few steps.
1. All your data will be erased while using this mode.
2. If the removing process is not done, please don’t disconnect your device.
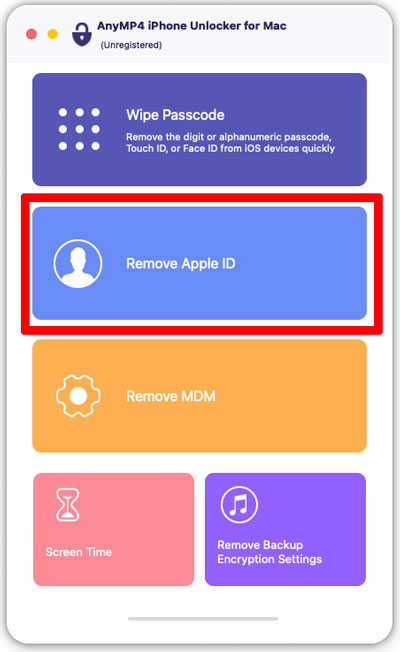
Step 1 Launch iPhone Unlocker for Mac
Open iPhone Unlocker for Mac and click the Remove Apple ID button. Then connect your iPhone, iPad or iPod Touch to your MAC through USB cable.
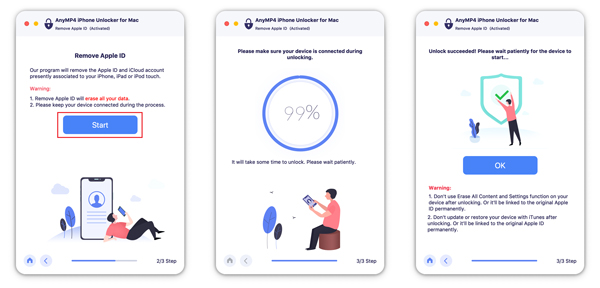
Step 2 Delete your Apple ID
Click Start and then your Apple ID and iCloud account will be deleted. Now you can log in another Apple ID or create a new one on your device.
Note :
1. If Find My iPhone is disabled on your iOS device, iPhone Unlocker will delete your Apple ID directly.
2. If Find My iPhone is enabled on your iOS device running in before iOS 11.4, you need to reset all settings on your device by going to Settings, then General, tap Reset, and hit Reset All Settings on your iOS device. if needed, enter your passcode to confirm the resetting. After that, your iOS device will restart, and this software will remove your Apple ID automatically.
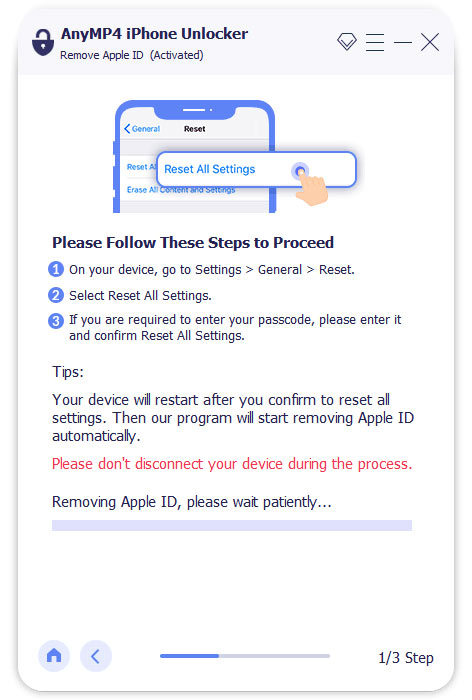
3. If Find My iPhone is enabled on your iOS device running in iOS 11.4 or later, you should follow the steps below to remove your Apple ID.
Choose the Start button to continue in step 2.
Follow the on-screen instructions to enable Two-factor Authentication on your device.
Then input 0000 to confirm that.
Step 3 Remove Apple ID now
In the pop-up interface, select the corresponding information to match your iPhone category, type, and model.
Finally, click Start to remove Apple ID now.
Unlock Screen Time
There is a helpful mode for you to unlock Screen Time on iPhone Unlocker for Mac. You can also use it to retrieve restriction passcode of your iOS device.
1. Please disable Find My iPhone on your device.
2. iTunes is needed during the process of scanning your iPhone. Please install and update it to the latest version.
3. Connect your device to Mac until the work is done.
4. Please reset your device after unlocking screen time to clean it thoroughly.
Step 1 Initiate iPhone Unlocker for Mac
Find the Screen Time mode on the interface of iPhone Unlocker for Mac.
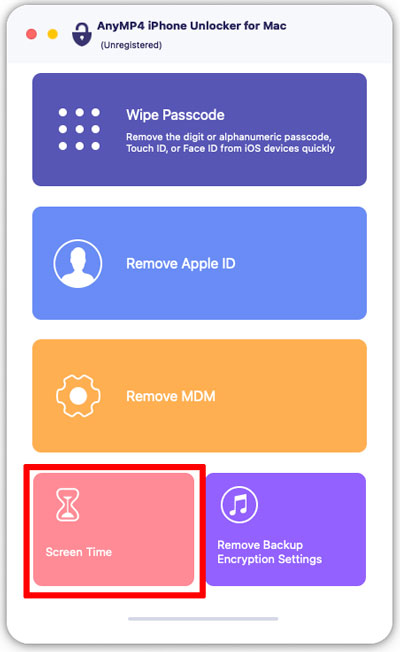
Step 2 Unlock Screen Time
After connecting your device to Mac, click Start to delete the Screen Time passcode or restrictions passcode.
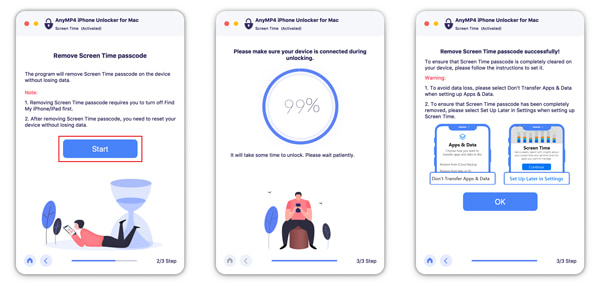
If you are using iOS 11 or earlier version, please make sure that your iTunes backup is not encrypted, otherwise, you need to decrypt the backup first.
Disable MDM
If you want to personalize your iPhone without any monitor or restriction, you may want to remove the Mobile Device Management with AnyMP4 iPhone Unlocker for Mac.
Step 1 Run iPhone Unlocker for Mac
Turn on iPhone Unlocker for Mac and click Remove MDM on its interface. Then, connect your iOS devices to your Mac with a USB cable.
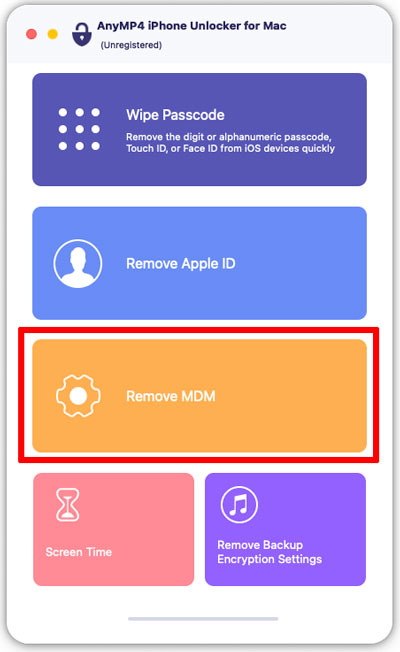
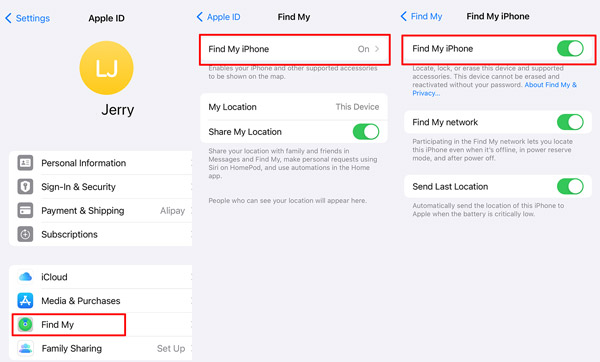
Step 2 Turn off Find My
Before removing MDM, you need to turn off iPhone Find My first. Tap your name in iPhone Settings and Click Find My iPhone, then enter your Apple ID password and switch it off.
Step 3 Remove MDM
Then, click Start to remove the MDM restriction on your iPhone, iPad or iPod.
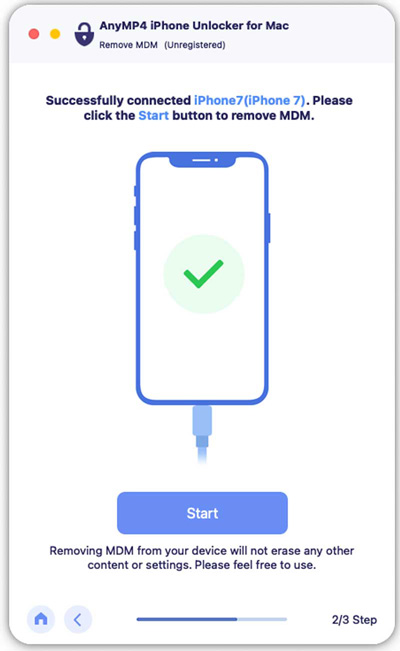
If you restore your iPhone from an older backup, MDM may come back. But you can use iPhone Unlocker for Mac to remove it again.
Bypass iTunes Backup Encryption
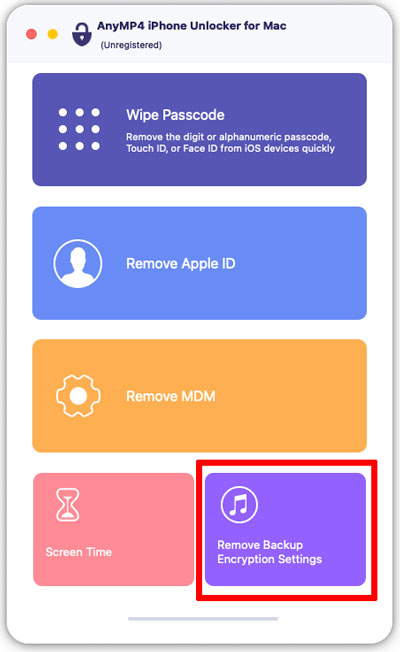
Encrypted iTunes Backup can save your iPhone system data and private information. You may easily forget its password because you don’t use it frequently and that’s when Remove Backup Encryption Settings can help.
Step 1 Start iPhone Unlocker for Mac
Click on the Remove Backup Encryption Settings after starting iPhone Unlocker for Mac.
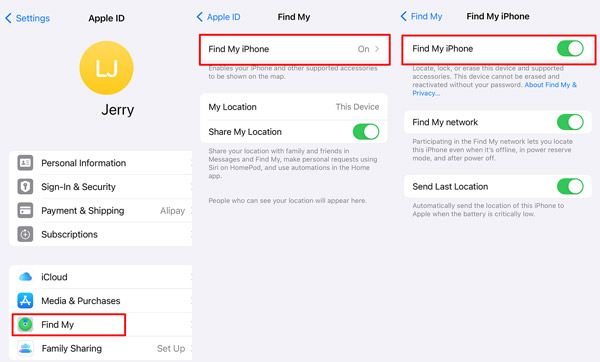
Step 2 Disable Find My on iPhone
Go to your iPhone Settings, then hit your Apple ID name. On the new page, tap Find My > Find My iPhone and turn it off.
Step 3 Connect iPhone
Use a USB cable to match your iPhone and computer, then click Start to remove the iTunes backup password. Please remember to keep your iPhone unlocked during the removal.
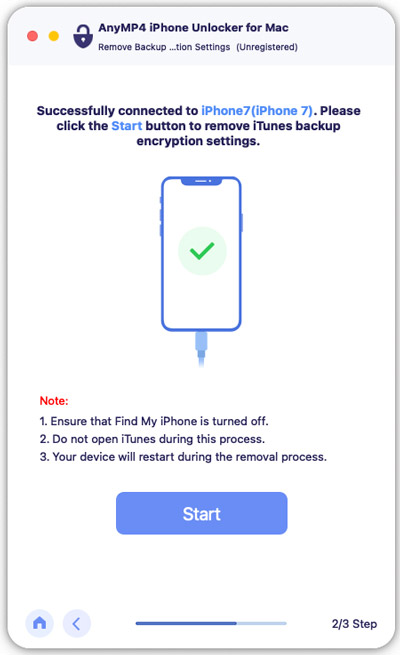
1. Removing Backup Encryption settings won’t damage your encrypted backups before the removal.
2. Try not to use iTunes and iPhone during the processing in case of system errors.

